DIY Smart Blinds: Automate Your Home for Under $100

Transform your home into a smart home by automating your blinds with these DIY projects, typically costing under $100, that enhance convenience and energy efficiency through simple hardware setups and user-friendly smart home integrations.
Ready to upgrade your home without breaking the bank? Discover how you can easily automate your blinds with these exciting DIY Smart Home Projects: Automate Your Blinds for Under $100.
Getting Started with DIY Smart Blinds
Embarking on a DIY smart home project to automate your blinds is a fantastic way to enhance your living space. These projects combine affordability with practicality, bringing a touch of modern technology into your daily routine.
By automating your blinds, you can enjoy benefits such as improved energy efficiency, enhanced privacy, and added convenience. Plus, it’s all achievable without needing a hefty budget.
Why Automate Your Blinds?
Automating your blinds offers numerous advantages that contribute to a more comfortable and efficient home. Not only does it add a layer of sophistication, but it also provides practical solutions for everyday living.
Consider the convenience of scheduling your blinds to open and close automatically. This can help regulate indoor temperatures, protect furniture from sun damage, and even deter potential intruders by simulating occupancy.
- Energy Efficiency: Automatically adjust blinds to minimize heat gain during summer and retain heat during winter.
- Enhanced Privacy: Set schedules to close blinds at night, ensuring complete privacy.
- Convenience: Control your blinds remotely or through voice commands.
In conclusion, automating your blinds is a simple yet effective way to improve your home’s comfort, security, and energy efficiency. It’s a project that offers both immediate and long-term benefits.
Understanding the Basics: Components and Tools
Before diving into automating your blinds, it’s crucial to understand the essential components and tools required for a successful DIY project. Knowing what you need will help streamline the process and prevent unnecessary complications.
Gathering the right materials not only ensures a smoother installation but also contributes to the longevity and reliability of your automated blinds. Take the time to research and select high-quality components that fit your specific needs.
Key Components for Smart Blinds
The heart of any DIY smart blind system lies in selecting the right components. These include the motor, control board, power supply, and any necessary mounting hardware.
Each component plays a vital role in the overall functionality of your automated blinds. Choosing compatible parts is essential to avoid performance issues and ensure seamless integration with your existing smart home setup.
- Motor: Select a motor with adequate torque for your blind’s size and weight.
- Control Board: Choose a board compatible with your smart home system (e.g., Arduino, Raspberry Pi).
- Power Supply: Ensure the power supply meets the motor’s voltage and current requirements.
In summary, having a clear understanding of the required components and selecting the appropriate tools will significantly increase your chances of a successful and satisfying DIY smart blind project. It’s all about preparation and attention to detail.
Planning Your Project: Design and Compatibility
Effective planning is essential for a successful DIY smart blind project. Before you start, take the time to carefully design your setup and ensure compatibility with your existing smart home ecosystem.
A well-thought-out plan will not only save you time and money but also ensure that your automated blinds seamlessly integrate into your daily life. Consider factors such as blind type, window size, and your preferred method of control.
Assessing Your Blinds and Windows
Begin by assessing the type of blinds you have and the dimensions of your windows. This will help you determine the appropriate motor size and the amount of hardware required.
Different types of blinds, such as roller blinds, Venetian blinds, or cellular shades, may require slightly different approaches. Understanding these nuances is crucial for a smooth installation process.
- Roller Blinds: Simple and straightforward, ideal for automated rolling mechanisms.
- Venetian Blinds: Requires a more complex mechanism for tilting the slats.
- Cellular Shades: Similar to roller blinds but with a unique honeycomb structure.
In short, careful planning and a thorough assessment of your blinds and windows are crucial steps in ensuring the success of your DIY smart blind project. Take the time to gather all the necessary information before you begin.
Step-by-Step Guide: Building Your Smart Blinds
With careful planning complete, it’s time to begin the hands-on process of building your smart blinds. Follow this step-by-step guide to ensure a smooth and successful installation.
Remember to prioritize safety and take your time. Rushing through the process can lead to mistakes or even damage to your equipment. A methodical approach will yield the best results.
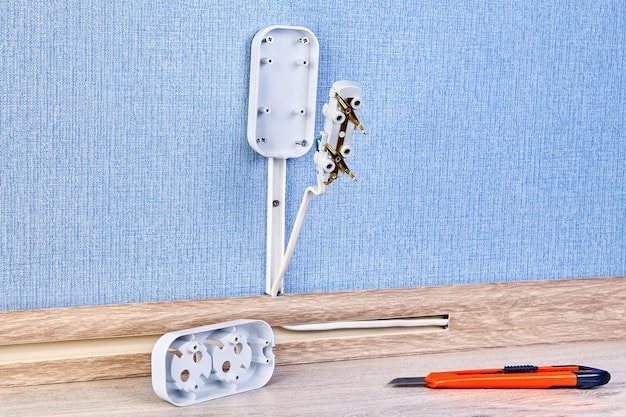
Installing the Motor and Control System
The first step is to install the motor and control system. This typically involves attaching the motor to the blind’s roller mechanism and connecting it to the control board.
Ensure that all connections are secure and properly insulated. A loose connection can cause malfunctions or even damage to your equipment.
- Mounting the Motor: Securely attach the motor to the blind’s headrail.
- Wiring the Control Board: Connect the motor to the control board, following the manufacturer’s instructions.
- Testing the System: Perform a test run to ensure the motor and control board are functioning correctly.
In conclusion, installing the motor and control system requires careful attention to detail. Follow the instructions closely and double-check all connections to ensure a reliable and efficient setup.
Integrating with Smart Home Platforms
One of the key benefits of automating your blinds is the ability to integrate them with your existing smart home platform. This allows you to control your blinds remotely and create automated routines.
Integrating with platforms like Alexa, Google Home, or Apple HomeKit can significantly enhance the convenience and functionality of your smart blinds. Consider which platform best suits your needs and preferences.
Setting Up Voice Control
Voice control is a powerful feature that allows you to operate your blinds with simple voice commands. This can be especially useful when your hands are full or when you want to adjust your blinds from across the room.
Setting up voice control typically involves connecting your smart blind control board to your chosen smart home platform and configuring the necessary voice commands.
- Connecting to Alexa: Use the Alexa app to add your smart blinds as a new device.
- Setting Up Google Home: Link your smart blinds to Google Home through the Google Home app.
- Configuring Apple HomeKit: Add your smart blinds to HomeKit using the Home app on your iOS device.

Troubleshooting Common Issues
Even with careful planning and execution, you may encounter some common issues during your DIY smart blind project. Knowing how to troubleshoot these problems can save you time and frustration.
From motor malfunctions to connectivity problems, having a basic understanding of troubleshooting techniques can help you quickly resolve any issues and get your smart blinds up and running smoothly.
Dealing with Motor Problems
Motor problems are among the most common issues encountered in DIY smart blind projects. These can range from the motor not working at all to the motor struggling to move the blinds.
Before replacing the motor, check the power supply and all wiring connections. A loose connection or insufficient power can often be the culprit.
- Check Power Supply: Ensure the motor is receiving the correct voltage and current.
- Inspect Wiring: Look for any loose or damaged wires.
- Test the Motor: Use a multimeter to test the motor’s functionality.
In short, troubleshooting common issues requires a systematic approach. By carefully diagnosing the problem and following these tips, you can often resolve issues quickly and efficiently.
| Key Point | Brief Description |
|---|---|
| 💡 Budget Automation | Transform your home with smart blinds for under $100. |
| 🛠️ Essential Components | Motors, control boards, and power supplies are key for success. |
| 📱 Smart Home Integration | Connect your blinds to Alexa, Google Home, or HomeKit. |
| ⚙️ Troubleshooting | Address motor and connectivity issues with simple checks. |
FAQ
▼
A 12V DC motor with sufficient torque to lift your blinds is generally recommended. Consider the weight and size of your blinds when selecting the motor.
▼
Yes, by integrating a microcontroller like an Arduino or ESP32, you can control the blinds remotely via a smartphone app through Wi-Fi or Bluetooth.
▼
Automating blinds offers energy savings, enhanced privacy, convenience through remote control, and can be set on schedules for simulating occupancy during vacations.
▼
Basic tools like a screwdriver, pliers, wire strippers, and a soldering iron may be necessary. A multimeter can also be helpful for troubleshooting electrical connections.
▼
With clear instructions and patience, this project is manageable for beginners. Start with simpler setups and gradually add more complex features as you gain experience.
Conclusion
Automating your blinds with DIY projects offers an affordable and rewarding way to enhance your home. By using the right components, careful planning, and some hands-on work, you can enjoy the convenience and energy-saving benefits of smart blinds for under $100.


