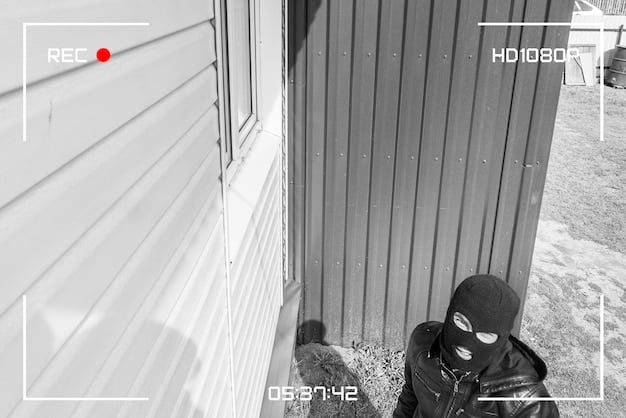
DIY Smart Home Security: 8-Zone System Under $500 in 2025
In 2025, creating a DIY smart home security system with 8 zones for under $500 is achievable by leveraging affordable components like Raspberry Pi, motion sensors, door/window sensors, and open-source software, offering a cost-effective and customizable security solution.
Securing your home doesn’t have to break the bank. Imagine having an 8-zone smart home security system that you built yourself for under $500 in 2025. With the advancements in technology and the availability of affordable components, a DIY smart home security: install your own 8-zone system for under $500 in 2025 project is not only feasible but also highly customizable to fit your specific needs.
Planning Your DIY Smart Home Security System
Before diving into the installation, careful planning is essential to ensure your DIY smart home security system meets your specific requirements and operates effectively. This involves assessing your home’s vulnerabilities, selecting the appropriate components, and designing a system layout that provides comprehensive coverage.
Assessing Your Home’s Security Needs
Start by identifying potential entry points and areas that require monitoring. Consider doors, windows, garages, and any other accessible openings. Evaluate the level of security needed for each area based on factors such as location, visibility, and vulnerability.
Choosing the Right Components
Selecting the right components is crucial for building a reliable and effective DIY smart home security system. Key components include a central control unit, sensors, cameras, and alarm systems.
- Central Control Unit: A Raspberry Pi or similar microcontroller can serve as the brain of your system, processing data from sensors and managing alerts.
- Sensors: Choose from motion sensors, door/window sensors, and environmental sensors to detect unauthorized access and environmental hazards.
- Cameras: IP cameras provide visual monitoring and can be integrated into your system for remote viewing and recording.
- Alarm Systems: Sirens and notification systems alert you and your neighbors in the event of a security breach.
A well-planned DIY smart home security system provides peace of mind and enhances your home’s protection. By carefully assessing your needs and selecting the right components, you can create a customized security solution that fits your budget and offers comprehensive coverage.
Setting Up the Raspberry Pi as Your Central Hub
The Raspberry Pi is a versatile and affordable single-board computer that can serve as the central hub for your DIY smart home security system. Setting it up involves installing the operating system, configuring network settings, and installing the necessary software to manage your security components.
Installing the Operating System
Begin by installing a suitable operating system on your Raspberry Pi. Raspberry Pi OS (formerly Raspbian) is a popular choice due to its ease of use and extensive community support.
Configuring Network Settings
To ensure your Raspberry Pi can communicate with other devices and the internet, configure its network settings. This involves setting up a static IP address, configuring Wi-Fi or Ethernet connectivity, and ensuring proper network security.
With the Raspberry Pi set up as your central hub, you’re ready to connect and configure the various sensors and devices that make up your DIY smart home security system. The Raspberry Pi’s processing power and connectivity options make it an ideal choice for managing your home’s security.
Connecting and Configuring Sensors
Sensors are the eyes and ears of your smart home security system, detecting motion, door/window openings, and other potential security breaches. Connecting and configuring these sensors to your Raspberry Pi is a critical step in building a comprehensive security solution.
Wiring the Sensors to the Raspberry Pi
Connect your sensors to the Raspberry Pi using GPIO (General Purpose Input/Output) pins. Each sensor will have specific wiring requirements, so consult the sensor’s datasheet for detailed instructions.
Configuring Sensor Inputs in Software
Once the sensors are physically connected, configure them in your software. This involves writing code to monitor the GPIO pins connected to the sensors and trigger actions when a change is detected.
- Motion Sensors: Detect movement within a specified range. Configure them to trigger an alarm or send a notification when motion is detected in a monitored area.
- Door/Window Sensors: Detect when a door or window is opened. Use magnetic reed switches to create a simple and reliable sensor system.
- Environmental Sensors: Monitor temperature, humidity, and other environmental factors. Use these sensors to detect potential hazards such as water leaks or extreme temperatures.
Proper sensor configuration ensures accurate detection and timely alerts, enhancing the overall effectiveness of your DIY smart home security system. By carefully wiring and configuring your sensors, you can create a reliable and responsive security solution.
Integrating Cameras for Visual Monitoring
Integrating cameras into your DIY smart home security system provides visual monitoring capabilities, allowing you to remotely view live footage and record events. This adds an extra layer of security and provides valuable evidence in the event of a security breach.
Selecting IP Cameras
Choose IP cameras that are compatible with your Raspberry Pi and support standard protocols such as RTSP (Real Time Streaming Protocol). Consider factors such as resolution, night vision, and viewing angle when selecting your cameras.
Setting Up Camera Streams
Configure the cameras to stream video to your Raspberry Pi. This typically involves setting up a static IP address for each camera and configuring port forwarding on your router.
With cameras integrated into your DIY smart home security system, you can monitor your property remotely and record events for later review. This visual monitoring capability enhances your security and provides valuable peace of mind.
Setting Up Alerts and Notifications
Real-time alerts and notifications are crucial for a smart home security system. Configuring these ensures you are immediately informed of any security breaches or unusual activity, allowing you to take swift action.
Configuring Email Alerts
Set up your system to send email alerts when a sensor is triggered or a camera detects motion. Use a service like Gmail or SendGrid to send these alerts.
Implementing Push Notifications
Implement push notifications to send alerts directly to your smartphone. Use a service like Pushover or IFTTT to integrate push notifications into your system.
- Customizing Alert Messages: Tailor your alert messages to provide specific information about the event, such as the sensor that was triggered or the location of the camera that detected motion.
- Setting Notification Schedules: Configure notification schedules to ensure you only receive alerts during specific times, such as when you are away from home.
Effective alerts and notifications ensure you are always aware of your home’s security status. By configuring email alerts and push notifications, you can take immediate action in the event of a security breach or emergency.
Testing and Optimizing Your System
Once your DIY smart home security system is set up, thorough testing and optimization are essential to ensure it operates reliably and effectively. This involves testing all sensors, cameras, and alerts, as well as optimizing the system for performance and security.
Testing Sensors and Cameras
Test each sensor and camera to ensure they are functioning correctly. Trigger each sensor and verify that an alert is sent and the camera records the event.
Optimizing Performance and Security
Optimize your system for performance by reducing latency and ensuring smooth operation. Secure your system by implementing strong passwords and keeping your software up to date.
Regular testing and optimization ensure your DIY smart home security system remains effective and reliable. By continuously monitoring and improving your system, you can maintain a high level of security and protect your home and family.
| Key Point | Brief Description |
|---|---|
| 🏠 Home Assessment | Evaluate entry points and security needs for each area. |
| ⚙️ Raspberry Pi Setup | Use as a central hub with OS installation and network configuration. |
| 🚨 Sensor Integration | Connect and configure motion, door/window, and environmental sensors. |
| 📹 Camera Integration | Setup IP cameras for visual monitoring and event recording. |
FAQ
▼
A “zone” in a home security system is a specific area or section of your property that is monitored by one or more sensors. Each zone can be armed or disarmed independently, allowing you to customize your security coverage.
▼
Yes, with careful planning and component selection, it’s entirely possible. Using a Raspberry Pi and affordable sensors can significantly reduce costs compared to professional systems.
▼
Basic coding knowledge is helpful, but many open-source software solutions provide user-friendly interfaces and pre-built code snippets to assist with the setup and configuration.
▼
DIY systems offer greater customization, lower costs, and no monthly fees. You have complete control over the system and can tailor it to your specific needs and preferences.
▼
Regular testing, using high-quality components, and implementing redundant systems (like battery backups) are essential. Also, keep your software updated to address security vulnerabilities.
Conclusion
Building your own DIY smart home security system with 8 zones for under $500 in 2025 is an attainable and rewarding project. By leveraging affordable components, open-source software, and careful planning, you can create a customized security solution that provides peace of mind and protects your home and family.


")