Build a DIY Smart Mirror with Voice Control for Under $300
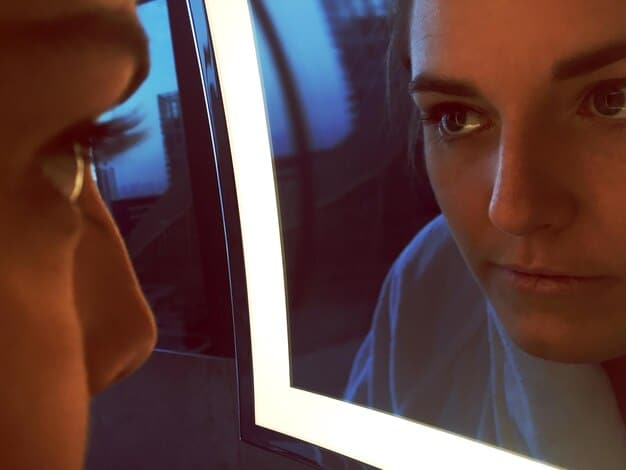
Building a DIY smart mirror with voice control for under $300 involves repurposing a monitor, applying a two-way mirror film, integrating a Raspberry Pi for processing, and utilizing voice assistant APIs for seamless interaction.
Want to upgrade your bathroom or bedroom with a futuristic gadget? You can build a DIY smart mirror with voice control for under $300. This guide walks you through the process, making it accessible even if you’re not a tech expert.
What is a Smart Mirror and Why Build One?
A smart mirror, at its core, is a reflective surface that also displays information. Think of it as a regular mirror combined with a computer screen showing you the weather, news, calendar events, and much more.
Why go through the trouble of building one yourself? Besides the sheer fun of it, a DIY smart mirror offers several advantages:
- Customization: You decide what information to display and how it’s presented.
- Cost-Effectiveness: Pre-built smart mirrors can be expensive. DIYing saves you a significant amount of money.
- Learning Experience: You’ll gain valuable skills in electronics, programming, and DIY projects.
Building your own smart mirror allows you to learn about the technology firsthand and create a device perfectly tailored to your needs and budget.
Gathering Your Materials: The Shopping List
Before diving into the build, you’ll need to gather all the necessary components. Here’s a breakdown of what you’ll need and estimated costs:
Essential Components:
- Two-Way Mirror: The reflective surface that allows the display to shine through.
- Monitor: A used monitor with preferably a thin bezel to display the information.
- Raspberry Pi: A microcomputer that powers the smart mirror and runs the software.
- HDMI Cable: To connect the Raspberry Pi to the monitor.
- Power Supply: For both the monitor and the Raspberry Pi.
- Frame: To house the mirror and monitor.
Voice Control Add-ons:
- Microphone: To capture your voice commands. A USB microphone works well.
- Speaker: To provide feedback and respond to your voice commands.
Tools and Consumables:
- Wood for Frame
- Screws and Fasteners
- Adhesive or Mounting Tape
- Basic Tools: Screwdriver, drill, saw (if building a custom frame).
Careful planning and procurement ensure smooth execution of the project.
Preparing the Monitor and Mirror
The first step is modifying the monitor and preparing the two-way mirror. This involves disassembling the monitor and carefully applying the mirror film.
Disassembling the Monitor:
Carefully take apart the monitor to remove the outer casing, ensuring that you do not damage the LCD panel. It’s helpful to watch a video of the disassembling process.
Cleaning and Applying the Two-Way Mirror Film:
- Clean the Mirror: Thoroughly clean the glass to remove any dust or fingerprints.
- Prepare the Film: Cut the film slightly larger than the glass surface.
- Apply the Film: Carefully apply the film, working from one edge to the other to avoid trapping air bubbles.
Applying the two-way mirror film might seem daunting, but with patience it can be a straightforward and satisfying experience.
Setting Up the Raspberry Pi
The Raspberry Pi is the brain of your smart mirror. Setting it up involves installing the operating system and configuring the necessary software.
Installing the Operating System:
Download the Raspberry Pi OS (formerly Raspbian) and the Raspberry Pi Imager software. Use the imager to flash the OS onto a micro SD card.
Configuring the Software:
- Update the System: After booting up, update the system using the terminal `sudo apt update` and `sudo apt upgrade`.
- Install MagicMirror²: This open-source modular smart mirror platform is the most used for this project.
- Configure Modules: Customize the modules to display the information you want such as weather, news, and calendar events.
Configuring the Raspberry Pi might seem complicated at first, but following the official Raspberry Pi documentation helps.
Integrating Voice Control
Adding voice control elevates your smart mirror from a simple display to an interactive assistant. This involves setting up a voice assistant like Google Assistant or Amazon Alexa on your Raspberry Pi.
Setting Up Google Assistant:
Follow Google’s official documentation to install the Google Assistant SDK on your Raspberry Pi. Once installed, you’ll need to authenticate your device with your Google account.
Writing Voice Control Scripts:
Create scripts to respond to voice commands. For example, you can write a script to display the current weather or add an event to your calendar using voice commands.

Integrating voice control transforms your smart mirror from a passive display into an active, responsive component of your smart home.
Building the Frame and Assembling the Mirror
The final step is constructing a frame to house the monitor and mirror, and then assembling all the components into a single unit.
Designing the Frame:
Measure the dimensions of the mirror and plan the frame accordingly. Choose a design that complements your home decor. Consider using wood or aluminum for the frame.
Assembling the Components:
Mount the monitor and mirror into the frame. Secure them with screws or adhesive. Connect the Raspberry Pi to the monitor via HDMI. Connect the power supplies, microphone, and speaker.
- Power Management: Hide cables and power supplies.
- Testing: Power on the mirror and verify that everything functions correctly.
Assembling the frame and components finalizes your DIY smart mirror, bringing together all the hard work into a functional decor piece.
The meticulous assembly ensures that your smart mirror will function seamlessly and look good for years to come.
| Key Point | Brief Description |
|---|---|
| 🛠️ Monitor Disassembly | Remove the monitor’s casing carefully to access the LCD panel. |
| 💿 Raspberry Pi Setup | Install the OS, download and configure MagicMirror² for display customization. |
| 🎤 Voice Control Integration | Set up Google Assistant on Raspberry Pi and create voice command scripts. |
| 🖼️ Frame Assembly | Design and build a frame to house the mirror and monitor. |
FAQ
▼
The two-way mirror film is arguably the most critical; it enables the display to be visible while maintaining a reflective surface. Choose a high-quality film for best results.
▼
While most monitors will work, a slim bezel monitor is preferred. This helps to hide the edges of the display for a more seamless, mirror-like appearance once assembled.
▼
Basic knowledge of Python or similar scripting languages is helpful, especially for customizing voice control scripts. However, many guides and tutorials are available to simplify the process.
▼
It’s a good practice to update the system and MagicMirror² modules regularly – at least monthly. This ensures security and access to the latest features and improvements.
▼
Security risks include potential access to your personal data through interconnected accounts or unsecured network connections. Use strong passwords and keep your software updated to mitigate these risks.
Conclusion
Building your own DIY smart mirror with voice control for under $300 offers a great way to personalize your home and learn about technology. From preparing the components to assembling the final product, each step provides a unique learning experience and a fantastic smart home addition.
