Build a DIY Smart Pet Feeder with Scheduled Dispensing for $100
Building a DIY smart pet feeder with scheduled dispensing for $100 is achievable by repurposing affordable components like an Arduino, a servo motor, and a readily available food container to create a system that automates pet feeding, ensuring consistent portions and timing.
Looking to simplify your pet’s feeding schedule? Discover how to build a DIY smart pet feeder with scheduled dispensing for $100, combining technology and affordability for a healthier, happier pet.
Why Build Your Own Smart Pet Feeder?
Building a smart pet feeder yourself might seem daunting, but the benefits are numerous. From cost savings to customization, understanding why this DIY project is worthwhile helps in appreciating the process and the end result.
A DIY approach to a smart pet feeder allows for complete control over the design and functionality, ensuring that it perfectly fits your pet’s needs and your home setup.
Cost-Effectiveness Compared to Commercial Feeders
Commercial smart pet feeders often come with a hefty price tag. By opting for a DIY solution, you can significantly reduce costs by using readily available and affordable components.
Customization for Specific Pet Needs
Every pet is unique, with specific dietary needs and feeding habits. A DIY feeder can be tailored to dispense the exact portion sizes required, accommodating different types of food and feeding schedules.
- Precise portion control to manage weight.
- Adjustable dispensing times to suit busy schedules.
- Compatibility with various food types (kibble, wet food).
By creating your own smart pet feeder, you’re not just saving money; you’re also creating a tailored solution that benefits your pet’s health and happiness.
Gathering the Necessary Components
Before diving into the construction of your smart pet feeder, gathering all the necessary components is crucial. This ensures a smooth building process and avoids any unexpected delays.
The components can be sourced from online retailers, electronics stores, or even repurposed from old devices. Here’s a list to get you started:
Essential Electronic Components
The heart of the smart pet feeder lies in its electronic components, which control the dispensing mechanism and scheduling.
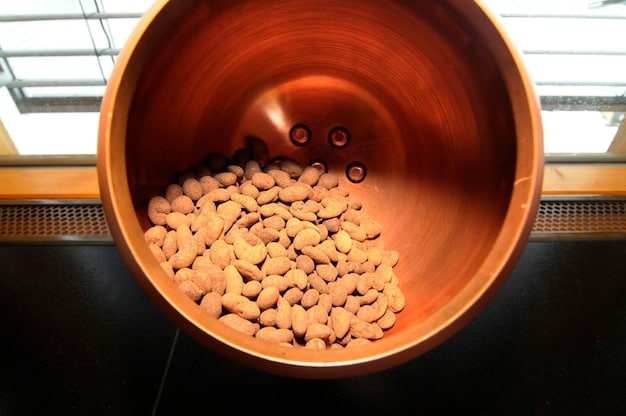
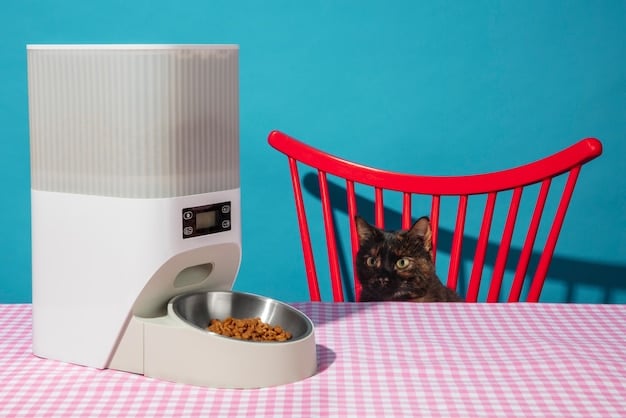
Food Container and Dispensing Mechanism
The container and dispensing mechanism are responsible for safely storing the food and accurately dispensing it at the scheduled times.
- Arduino or similar microcontroller
- Servo motor for precise dispensing
- Real-time clock (RTC) module
With all the necessary components in hand, you’ll be well-prepared to assemble your smart pet feeder and bring your automated feeding solution to life.
Assembling the Feeder Structure
With the components gathered, the next step is assembling the structure of the smart pet feeder. This involves constructing the physical framework that will house the electronic components and store the pet food.
The structure should be sturdy, pet-proof, and easy to clean. Here’s how you can go about it:
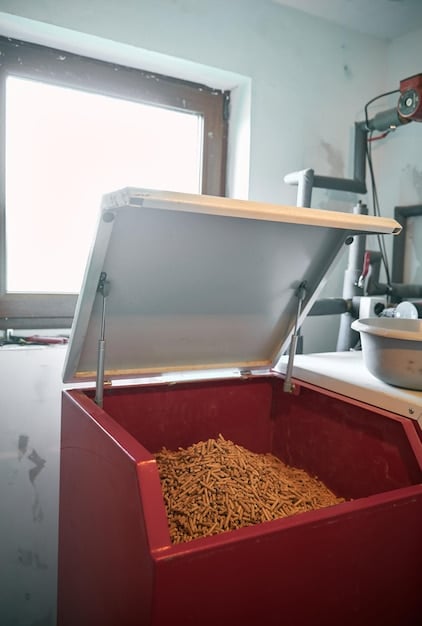
Creating the Food Storage Compartment
The food storage compartment needs to be designed to keep the food fresh and protected from pests. A good seal is essential to prevent spoilage.
Integrating the Dispensing Mechanism
The dispensing mechanism should be seamlessly integrated into the structure, ensuring accurate and reliable food delivery.
- Cut and shape the container to fit the servo motor.
- Ensure the mechanism doesn’t crush the food pellets.
- Make sure all parts fit together and are secure.
By carefully assembling the feeder structure, you’ll create a solid foundation for your smart pet feeder and ensure its long-term functionality.
Programming the Smart Feeder
Once the physical structure is assembled, the next step is programming the smart feeder. This involves writing the code that will control the dispensing mechanism and scheduling.
The programming can be done using the Arduino IDE, which is a free and open-source software platform. Here’s what you’ll need:
Setting Up the Arduino IDE
First, download and install the Arduino IDE on your computer. This software allows you to write, compile, and upload code to the Arduino.
Remember to install the necessary libraries for the RTC module and servo motor.
Writing the Code for Scheduled Dispensing
The code should include functions for setting the feeding schedule, controlling the servo motor, and reading the time from the RTC module.
- Programming the feeding schedule
- Setting up the dispense amounts.
- Incorporating timers and alerts
With the programming complete, your smart pet feeder will be ready to automatically dispense food according to the schedule you set.
Testing, Calibration, and Refinement
After assembling and programming your DIY smart pet feeder, it’s time for thorough testing, calibration, and refinement. This ensures that the feeder operates reliably and accurately according to your specifications.
Testing involves operating the feeder through several feeding cycles, monitoring the dispensing accuracy, and making any necessary adjustments. Here’s how:
Conducting Initial Tests
Begin by running the feeder through several test cycles without your pet present. This allows you to observe the mechanism and ensure everything is working correctly.
Calibrating Dispensing Amounts
Use different measurements to ensure that the correct amount of kibble food is being dispensed for your pet.
- Adjust if food is not dispensing consistently.
- Clean any stuck or jammed food.
- Address any electrical issues.
By diligently testing, calibrating, and refining your smart pet feeder, you can ensure it operates reliably and meets the specific needs of your pet.
Integrating the Feeder into Your Smart Home Ecosystem
Once your DIY smart pet feeder is fully functional, the next step is integrating it into your broader smart home ecosystem. This can enhance its functionality and provide a more seamless user experience.
Connecting your pet feeder to other smart devices and systems can provide additional benefits, such as remote monitoring and integration with other pet care routines.
Connecting to Wi-Fi for Remote Monitoring
An Espressif microcontroller with built-in Wi-Fi capabilities can be implemented within the electrical components.
Integrating with Smart Assistants
Integration with smart assistants like Amazon Alexa or Google Assistant allows for voice control and seamless integration with other smart home devices.
- Integrate with external services to restock food
- Program for automatic alerts when feeder is low
- Connect with automatic doors to let pet in and out
By integrating your DIY smart pet feeder into your smart home ecosystem, you can create a more convenient, efficient, and connected pet care routine.
| Key Point | Brief Description |
|---|---|
| 💰 Cost Savings | DIY feeders are cheaper than commercial ones. |
| ⚙️ Customization | Adjustable portions and schedules for pet needs. |
| 🛠️ Component Sourcing | Use affordable electronics and repurposed items. |
| 📱 Integration | Connect to Wi-Fi and smart assistants for added features. |
Frequently Asked Questions (FAQ)
▼
You’ll need basic tools like a screwdriver, wire cutters, soldering iron, and possibly a drill, depending on your design. Safety glasses are also recommended.
▼
Start by dispensing a small amount and weighing it. Adjust the servo motor’s rotation time until the desired portion size is consistently dispensed.
▼
A food-grade plastic container with a tight-fitting lid is ideal. Make sure it’s easy to clean and large enough to hold several days’ worth of food.
▼
Use sturdy materials and secure all components tightly. Consider adding a weighted base to prevent tipping and shielding the wiring to prevent chewing.
▼
Yes, by adding a Wi-Fi module and programming the Arduino to connect to a custom app. This enables remote monitoring and adjustments to the feeding schedule.
Conclusion
Building a DIY smart pet feeder with scheduled dispensing for $100 offers a rewarding blend of cost savings, customization, and technological innovation. By carefully gathering components, assembling the structure, and programming the system, you can create a tailored solution that enhances your pet’s well-being and seamlessly integrates into your smart home ecosystem.


