Automate Your Home Entertainment: DIY Smart Remote Control Guide
Automating your home entertainment system with a DIY smart remote control enhances convenience by integrating multiple devices into a single, customizable interface, offering seamless control and a personalized user experience.
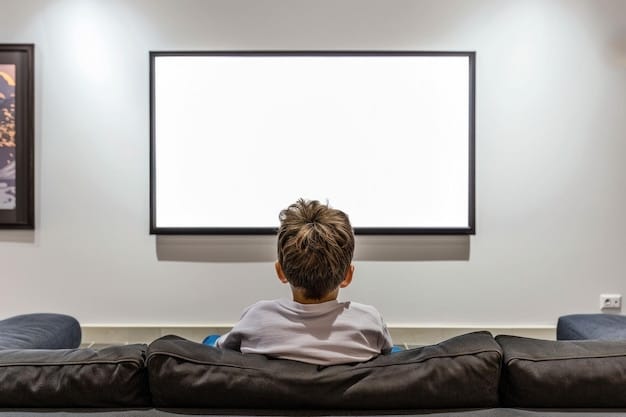
Ready to streamline your binge-watching sessions and simplify your connected home? Learn how to **automate your home entertainment system with a DIY smart remote control**, turning chaos into seamless control.
Why Automate Your Home Entertainment System?
Imagine controlling your TV, sound system, streaming devices, and even smart lighting with a single, personalized remote. Automating your home entertainment system offers unparalleled convenience and a streamlined user experience. But why should you consider a DIY approach?
Convenience and Control
DIY smart remote controls offer a level of customization that store-bought universal remotes simply can’t match. You can tailor the device to perfectly suit your needs and preferences.
Cost-Effectiveness
Commercial smart remote controls can be quite expensive. Building your own can be a significantly cheaper option, especially if you already have some of the required components.
Here are the key benefits of automating your entertainment setup:
- Simplified control: Operate multiple devices with a single interface.
- Customization: Tailor the remote to your specific devices and preferences.
- Cost savings: Build a smart remote for a fraction of the cost of commercial options.
In essence, automating your home entertainment system offers a smarter, simpler, and more affordable way to enjoy your favorite content.
What You’ll Need to Build Your DIY Smart Remote
Before diving into the construction phase, it’s important to gather all the necessary materials and equipment. The specific components you’ll need may vary depending on the complexity of your project and the features you want to include.
Hardware Components
At the heart of your DIY smart remote will be a microcontroller board, like a Raspberry Pi or an Arduino. You’ll also need an IR transmitter to send signals to your devices, and potentially a touchscreen or buttons for user input. Consider a case to house the electronics and give your remote a professional look.
Software and Code
You’ll need some basic programming knowledge to write the code that controls your remote. The exact language will depend on the microcontroller you choose (e.g., Python for Raspberry Pi, C++ for Arduino). Libraries and APIs specific to your chosen hardware and software can greatly simplify the development process.
Essential components for the project include:
- A microcontroller (Raspberry Pi, Arduino, etc.)
- An IR transmitter
- A power source
- A user interface (touchscreen, buttons)
Gathering the correct tools and components ensures that creating the DIY remote will progress smoothly and lead to the results expected.
Choosing the Right Microcontroller: Raspberry Pi vs. Arduino
Selecting the right microcontroller is a crucial step in building your DIY smart remote. Both Raspberry Pi and Arduino are popular choices, but they have different strengths and weaknesses.
Raspberry Pi
The Raspberry Pi is a full-fledged computer on a single board. It can run a complete operating system and is well-suited for complex tasks like image recognition or running a web server.
Arduino
Arduino is a simpler microcontroller that’s easier to learn and use. It’s ideal for basic tasks like reading sensor data or controlling LEDs. Arduinos are generally more power-efficient than Raspberry Pis.
Consider these aspects when deciding on the most appropriate microcontroller:
- Processing power: Raspberry Pi offers more processing power.
- Ease of use: Arduino is simpler for beginners.
- Power consumption: Arduino is more energy-efficient.
- Community support: Both have extensive online communities and resources.
Whether you opt for the Raspberry Pi or the Arduino, each microcontroller will enable a successful path forward for your project.
Programming Your Smart Remote: Software Setup
Once you’ve selected your hardware, it’s time to focus on the software side of things. This involves installing the necessary software tools, configuring your microcontroller, and writing the code that will control your remote.
Setting Up the Development Environment
You’ll need to install an Integrated Development Environment (IDE) on your computer. This is where you’ll write and compile your code. Popular IDEs include the Arduino IDE for Arduino projects and Thonny or VS Code for Raspberry Pi projects.
Writing the Control Code
The heart of your smart remote is the code that translates user input into IR signals. This code will typically use libraries specific to your microcontroller and IR transmitter.
Key steps in setting up the software:
- Choose and install a suitable IDE
- Install necessary libraries and APIs
- Write code to handle user input and IR signal transmission
With your software environment configured, coding your DIY remote will allow you to complete this project.
Designing the User Interface: Touchscreen or Physical Buttons?
The user interface is how you’ll interact with your smart remote. You have two main options: a touchscreen or physical buttons. Each has pros and cons.
Touchscreen Interface
Touchscreens offer a flexible and customizable interface. You can display different buttons and controls depending on the device you’re controlling. However, touchscreens can be more expensive and require more complex programming.
Physical Buttons
Physical buttons are cheaper and easier to implement. They provide tactile feedback and can be easier to use without looking. However, they offer less flexibility and require more wiring.
When making a decision, consider these points:
- Cost: Physical buttons are generally cheaper.
- Complexity: Touchscreens require more programming.
- Usability: Physical buttons offer tactile feedback.
- Customization: Touchscreens are more customizable.
Creating an interface will add a component that will elevate this project from a basic controller to a refined product.
Testing and Troubleshooting Your DIY Smart Remote
Once you’ve built and programmed your smart remote, it’s time to test it out and troubleshoot any issues that arise. This is a crucial step to ensure that your remote works reliably and effectively.
Testing the IR Signal
Use an IR detector or your smartphone’s camera to verify that the IR transmitter is sending signals when you press a button. If not, check your wiring and code.
Troubleshooting Common Issues
Common issues include incorrect IR codes, range problems, and software glitches. Consult online forums and documentation for solutions.
Following this, you can make improvements through:
- Verifying IR signal transmission.
- Debugging software.
- Testing for range issues.
By testing, your completed smart remote will work as planned.
| Key Aspect | Brief Description |
|---|---|
| ⚙️ Microcontroller Choice | Selecting between Raspberry Pi (powerful) and Arduino (simple). |
| 💻 Software Setup | Configuring IDEs and writing code to transmit IR signals. |
| 💡 User Interface | Deciding between touchscreen or physical buttons for interaction. |
| 🛠️ Troubleshooting | Testing the remote and fixing IR signal and software issues. |
Frequently Asked Questions
▼
DIY smart remotes offer customization, allowing you to tailor them to your specific devices and preferences. They can also be more cost-effective compared to commercial smart remotes, especially if you already have some components.
▼
Raspberry Pi is better for complex tasks requiring more processing power, while Arduino is simpler and more power-efficient, making it great for basic control functions. The choice depends on your project’s complexity.
▼
Basic programming knowledge is essential. Python is commonly used for Raspberry Pi, while C++ is used for Arduino. Familiarity with these languages and relevant libraries will simplify the development process.
▼
Touchscreens offer flexibility and customization, while physical buttons provide tactile feedback and are easier to implement. Consider cost, complexity, and usability when making your decision, based on your preference.
▼
Common issues include incorrect IR codes, range problems, and software glitches. Thorough testing and troubleshooting, along with consulting online forums, can help resolve these issues and ensure your remote works effectively.
Conclusion
By following these insights, you can **automate your home entertainment system with a DIY smart remote control**, and create a customized device that centralizes control of all your devices into one easy-to-use interface.


