DIY Smart Home Hub: Build Your Own Centralized Control System

A DIY smart home hub empowers users to create a personalized, centralized control system using affordable hardware and open-source software, offering greater privacy, customization, and integration with various smart devices compared to commercial alternatives.
Ready to take control of your smart home? Building your own DIY smart home hub offers a personalized and private alternative to commercial systems, giving you the power to integrate devices exactly as you want and keeping your data secure.
Why Build a DIY Smart Home Hub?
The allure of a connected home is undeniable, but with it comes concerns about data privacy, vendor lock-in, and limited customization. That’s where the DIY smart home hub comes in. It’s about taking control, tailoring your setup to your specific needs, and avoiding the pitfalls of proprietary systems.
Building your own hub allows you to choose the hardware, the software, and the level of integration, creating a truly personalized smart home experience. Plus, it can be a rewarding project for tech enthusiasts looking to dive deeper into the world of IoT.
Privacy and Security Advantages
One of the most significant benefits of a DIY hub is enhanced privacy. By self-hosting, you minimize your reliance on cloud services and reduce the risk of your data being shared or compromised. You have direct control over what information is collected and how it’s stored.
Furthermore, you can implement robust security measures, such as local encryption and firewall configurations, to protect your smart home network from unauthorized access. This is especially crucial as smart devices become increasingly vulnerable to cyberattacks.
Cost Savings and Customization
While there’s an initial investment in hardware, a DIY hub can save you money in the long run by avoiding subscription fees and vendor-specific hardware. You are free to choose the components that best fit your budget and needs, without being forced into a specific ecosystem.
- Reduced Subscription Costs: Avoid monthly fees associated with cloud-based services.
- Hardware Flexibility: Choose devices that meet your requirements and budget.
- Open-Source Advantage: Leverage free, community-supported software for enhanced functionality.
The level of customization is unmatched. You can integrate devices from different manufacturers, create complex automations, and develop custom interfaces that suit your lifestyle. The possibilities are limited only by your imagination and technical skills.
Ultimately, a DIY smart home hub is a powerful way to regain control over your smart home, offering enhanced privacy, cost savings, and unparalleled customization.
Essential Hardware Components
Before you begin building your DIY smart home hub, let’s take a look at main ingredients. Selecting the right hardware is crucial for ensuring compatibility, performance, and scalability. These are the core components you’ll need to consider:
From the brains of the operation to the communication channels, each piece plays a vital role in bringing your smart home hub to life.
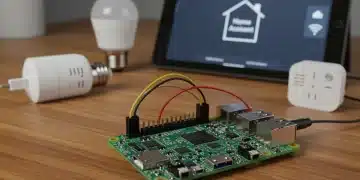
The Brain: Raspberry Pi or Similar
The heart of your DIY hub will likely be a single-board computer like the Raspberry Pi. These compact, low-power devices are affordable, versatile, and have a large community providing ample support and resources.
Consider a Raspberry Pi 4 or a Raspberry Pi 5 for optimal performance. However, older models like the Raspberry Pi 3 can also work, especially for simpler setups. Alternatives include other single-board computers like the ODROID or Intel NUC, but the Raspberry Pi remains the most popular choice due to its ease of use and extensive software support.
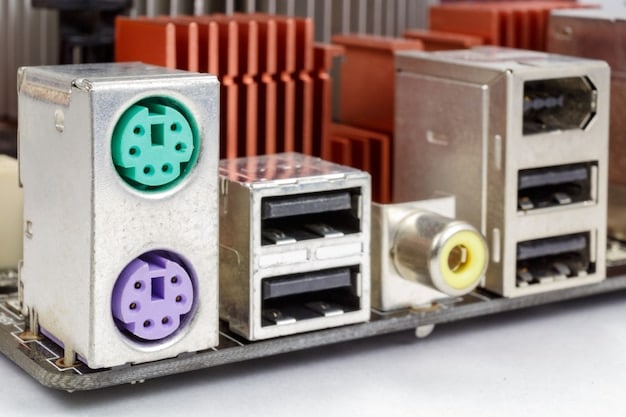
Connectivity: Zigbee, Z-Wave, and Wi-Fi
To communicate with your smart devices, you’ll need the appropriate connectivity options. Wi-Fi is often built-in, but for devices that use Zigbee or Z-Wave, you’ll need additional hardware. Zigbee and Z-Wave are mesh networking protocols designed specifically for smart home devices, offering low power consumption and reliable communication.
You can add Zigbee and Z-Wave support to your Raspberry Pi using USB dongles. These dongles act as bridges between your hub and the devices, allowing you to control them from your hub’s software. Examples include the Sonoff Zigbee 3.0 USB Dongle Plus or the Zooz Z-Wave Plus S2 Stick.
- Zigbee USB Dongle: Enables communication with Zigbee-based devices.
- Z-Wave USB Dongle: Enables communication with Z-Wave-based devices.
- Stable Wi-Fi Connection: Ensure reliable connectivity for Wi-Fi-enabled devices.
Choosing the right hardware components is fundamental for building a robust and efficient DIY smart home hub. With the right foundation, you can create a system that seamlessly integrates with your smart devices and meets your specific needs.
Choosing the Right Software Platform
With the hardware in place, it’s time to select the software that will power your DIY smart home hub. The software platform provides the interface, automation engine, and integration capabilities that bring your smart home to life. There are several open-source options available, each with its own strengths and weaknesses.
Selecting the right platform depends on your technical expertise, desired level of customization, and compatibility requirements.
Home Assistant: User-Friendly Automation
Home Assistant is a popular open-source platform known for its user-friendly interface and extensive device integrations. It offers a web-based interface that allows you to easily configure devices, create automations, and monitor your smart home’s status.
Home Assistant supports a wide range of devices and protocols, including Zigbee, Z-Wave, Wi-Fi, and Bluetooth. It also has a large and active community, providing ample support and custom integrations.
- Extensive Device Support: Integrates with almost every smart device.
- User-Friendly Interface: Easy to set up and manage your smart home.
- Automation Engine: Create complex automations with ease.
OpenHAB: Highly Customizable Solution
OpenHAB is another powerful open-source platform that offers a high degree of customization. It uses a rules-based engine that allows you to define complex automations using a scripting language. While OpenHAB can be more complex to set up than Home Assistant, it offers greater flexibility and control.
OpenHAB supports a variety of protocols and devices, and its modular architecture allows you to add new integrations and features as needed. It’s a great choice for advanced users who want to fine-tune every aspect of their smart home.
Ultimately, the best software platform for your DIY smart home hub depends on your specific needs and technical expertise. Home Assistant is a great choice for beginners, while OpenHAB offers more customization options for advanced users.
Setting Up Your DIY Hub: A Step-by-Step Guide
Now for the exciting part – setting up your DIY smart home hub. This involves installing the operating system, configuring the software platform, and connecting your smart devices. Here’s a step-by-step guide to get you started:
The process might seem daunting at first, but with patience and attention to detail, you can have your own customized smart home hub up and running in no time.
Step 1: Install the Operating System
Start by installing a lightweight operating system on your Raspberry Pi. Raspberry Pi OS (formerly Raspbian) is a popular choice, but other Linux distributions like Ubuntu Server or DietPi can also work well.
You’ll need to download the operating system image and flash it to an SD card using a tool like Raspberry Pi Imager. Insert the SD card into your Raspberry Pi, connect a monitor, keyboard, and mouse, and boot it up. Follow the on-screen instructions to complete the installation.
Step 2: Install Your Chosen Software Platform
Once the operating system is installed, it’s time to install your chosen software platform (e.g., Home Assistant or OpenHAB). Follow the official documentation for your platform to install it on your Raspberry Pi.
- For Home Assistant: Use the official installation script for Raspberry Pi.
- For OpenHAB: Follow the instructions for Debian-based systems.
- Configure Network Settings: Ensure your hub has a static IP address for reliable access.
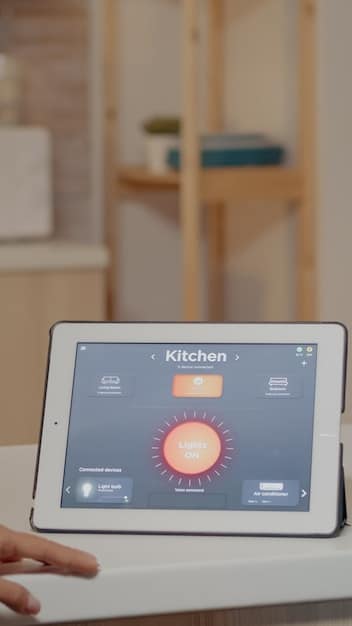
The installation process typically involves downloading and running a script that installs the necessary dependencies and configures the software. Once the installation is complete, you can access the software’s web interface through your web browser.
Step 3: Connect Your Smart Devices
With the software platform installed, you can start connecting your smart devices. Each platform has its own method for adding devices, typically involving discovering them on your network or manually entering their details.
Follow the instructions for your chosen platform and devices to connect them to your hub. You may need to install additional integrations or add-ons to support specific devices or protocols.
By following these steps, you can successfully set up your DIY smart home hub and begin enjoying the benefits of personalized and private smart home control.
Advanced Customization and Automation
Once your DIY smart home hub is up and running, the real fun begins: advanced customization and automation. This is where you can tailor your smart home to your specific needs and create truly intelligent behaviors.
From creating complex automation routines to integrating custom sensors and devices, the possibilities are endless.
Creating Automation Rules
Automation rules are the heart of a smart home. They allow you to define how your devices interact with each other and respond to various triggers. For example, you can create a rule that automatically turns on the lights when you enter a room or adjusts the thermostat based on the time of day.
Integrating Custom Sensors
One of the advantages of a DIY hub is the ability to integrate custom sensors and devices. You can build your own sensors using Arduino or ESP32 boards and connect them to your hub using MQTT or other protocols.
This allows you to monitor things like temperature, humidity, air quality, and motion in ways that aren’t possible with off-the-shelf smart devices.
- Motion Detection: Trigger actions based on movement in specific areas.
- Environmental Monitoring:Track temperature, humidity, and air quality.
- Custom Notifications: Receive alerts based on sensor readings.
By harnessing the power of advanced customization and automation, you can create a truly intelligent and responsive smart home that adapts to your lifestyle.
Troubleshooting Common Issues
Like any complex system, your DIY smart home hub may encounter issues from time to time. Troubleshooting is a crucial skill for ensuring smooth operation and resolving any problems that arise.
Here are some common issues and how to troubleshoot them, ensuring your smart home runs smoothly.
Device Connectivity Problems
One of the most common issues is devices disconnecting from the hub. This can be caused by a variety of factors, including network problems, interference, or device compatibility issues.
Start by checking your network connection and ensuring that all devices are within range of your hub. You may also need to update the firmware on your devices or hub to resolve compatibility issues.
Software Glitches
Software glitches can also cause problems with your hub. These can range from minor errors to system crashes. Restarting your hub is often the first step in resolving software glitches.
If the problem persists, you may need to check the logs for error messages or consult the documentation for your chosen software platform. Reinstalling the software may be necessary in some cases.
By proactively troubleshooting common issues, you can keep your DIY smart home hub running smoothly and avoid any major disruptions.
| Key Point | Brief Description |
|---|---|
| 🔑 Privacy Control | Self-hosting minimizes reliance on cloud services, giving you data control. |
| 🛠️ Hardware Flexibility | Choose components fitting your budget and needs, avoiding vendor lock-in. |
| ⚙️ Software Choice | Select platforms like Home Assistant or OpenHAB based on technical expertise. |
| 💡 Automation Power | Create custom automation rules to tailor device interactions and responses. |
Frequently Asked Questions
▼
The primary benefits include enhanced privacy, greater control over your data, reduced costs by avoiding subscription fees, and extensive customization options to tailor your smart home to your specific needs.
▼
You’ll need a single-board computer like a Raspberry Pi, along with connectivity options like Wi-Fi, Zigbee, or Z-Wave USB dongles to communicate with your smart devices.
▼
Popular options include Home Assistant, known for its user-friendly interface and wide device support, and OpenHAB, which offers more customization options for advanced users.
▼
Implement robust security measures such as local encryption, firewall configurations, and regular software updates to protect your smart home network from unauthorized access and cyber threats.
▼
Start by checking device connectivity, ensuring all devices are within range and properly connected. Restarting the hub and checking logs for error messages can also help resolve software glitches.
Conclusion
Building a DIY smart home hub is an enriching project that hands you full control of your smart residence. This setup ensures enhanced privacy, extensive personalization, and noteworthy cost savings. Whether you’re a tech enthusiast or someone keen to manage their smart home devices better, a do-it-yourself hub offers a compelling alternative to traditional systems.
