Upgrade Sprinkler System to Smart, Weather-Aware in 3 Hours
Upgrade your existing sprinkler system to a smart, weather-aware setup in 3 hours by installing a smart sprinkler controller, weather sensors, and smart valves for efficient water management and cost savings.
Ready to ditch the guesswork and optimize your lawn watering? This guide shows you how to upgrade your existing sprinkler system to a smart, weather-aware setup in 3 hours, saving water and money.
Why Upgrade to a Smart Sprinkler System?
Upgrading to a smart sprinkler system offers numerous benefits, transforming the way you care for your lawn and garden. Beyond the convenience of automated watering, these systems provide significant water conservation and cost savings. By leveraging real-time weather data and intelligent programming, smart sprinkler systems ensure that your landscape receives the precise amount of water it needs, when it needs it, eliminating wasteful overwatering.
Choosing to modernize your sprinkler system isn’t just about adopting new technology; it’s about making an environmentally conscious and economically sound decision. A smart system can adapt to changing weather patterns, seasonal shifts, and even local water restrictions, helping you maintain a healthy, vibrant landscape while minimizing your environmental impact.
Key Benefits of Smart Sprinkler Systems
Smart sprinkler systems offer various benefits over traditional systems:
- Water Conservation: Uses weather data to adjust watering schedules, reducing water waste.
- Cost Savings: Lower water bills due to efficient water usage.
- Convenience: Automated schedules eliminate manual adjustments.

By upgrading your system, you can contribute to water conservation efforts and enjoy a more beautiful and sustainable landscape.
Gathering Your Smart Sprinkler Components
Before diving into the 3-hour upgrade project, gathering all the necessary components is crucial. This preparation ensures a smooth and efficient installation process. You need to secure the tools and devices, as well as understanding their functions to set them up correctly. Here are the key components you’ll need, let’s dive in.
By gathering these components and tools beforehand, you can streamline the installation process and minimize any potential delays. Proper preparation is key to a successful and efficient upgrade to a smart, weather-aware sprinkler system.
Essential Components for Your Upgrade
Here’s a breakdown of the items you’ll need for the upgrade:
- Smart Sprinkler Controller: The core of the system, connecting to your Wi-Fi and controlling zones.
- Weather Sensors: Rain sensors or weather stations that provide real-time data.
- Smart Valves (Optional): Allow individual zone control via smartphone or other devices.
Having these components ready will ensure that you will proceed well with the rest of the installation.
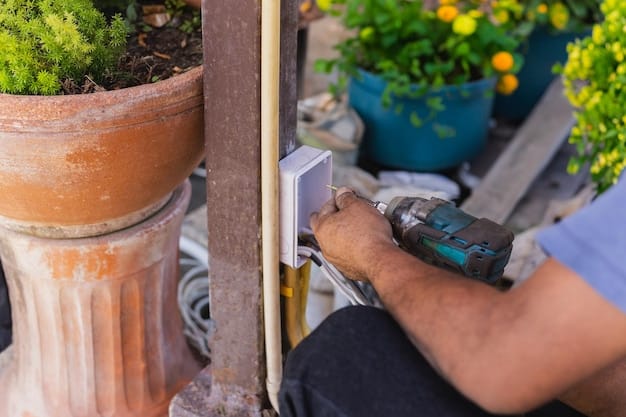
Step-by-Step: Installing Your Smart Sprinkler Controller
Installing a smart sprinkler controller might seem daunting, a great upgrade to the system. But by following a step-by-step process, you can seamlessly replace the old system without any issues. Here’s a complete guide to installing your smart sprinkler controller.
By following these steps carefully, you can successfully install your smart sprinkler controller, setting the stage for a weather-aware and efficient lawn care system. Be patient, double-check your connections, and enjoy the benefits of a smarter watering solution.
Installation Steps:
- Turn Off Power: Shut off the power to your existing sprinkler controller at the breaker.
- Remove Old Controller: Disconnect and label the wires connected to your existing controller.
- Mount New Controller: Install the new smart controller in the same location or a nearby spot.
- Connect Wires: Connect the labeled wires to the corresponding terminals on the new controller.
- Connect to WiFi: Follow the manufacturer’s instructions to connect the controller to your home Wi-Fi network.
This step should set you up effectively for the next stage of the installation.
Integrating Weather Sensors for Smart Watering
Weather sensors are integral to a smart sprinkler system, enabling it to adapt to local weather conditions and optimize watering schedules. These sensors provide real-time data, allowing the system to make informed decisions about when and how much water to apply. Installing and integrating weather sensors into your smart sprinkler system is the next vital step after setting up the controller.
By integrating weather sensors, you create a truly intelligent sprinkler system that not only saves water but also promotes a healthier, more resilient landscape. Real-time data ensures your lawn and garden receive the water they need, exactly when they need it, adapting to the ever-changing weather conditions.
Types of Weather Sensors
- Rain Sensors: Detect rainfall and prevent the system from watering during or after rain.
- Weather Stations: Measure temperature, humidity, wind speed, and rainfall for comprehensive data.
- Soil Moisture Sensors: Measure the moisture content of the soil, watering the lawn only when needed.
The more integration of sensors the more effective your smart sprinkler system will be.
Configuring Smart Valves for Zone Control
Smart valves provide an advanced level of control over your sprinkler system, allowing you to manage individual watering zones independently. Unlike traditional systems that water all zones equally, smart valves enable targeted and customized irrigation based on the specific needs of each area. This not only conserves water but also ensures that each part of your landscape receives the proper amount of hydration. Once the set up is installed, the configuration is next.
By investing in smart valves, you’re taking a significant step towards creating a highly efficient and personalized irrigation system. The ability to control each zone independently translates to healthier plants, reduced water waste, and a more sustainable landscape. Plus, with the convenience of smartphone control, you can easily adjust your system from anywhere, ensuring your yard always looks its best.
Benefits of Smart Valve Configuration
These are the advantages of incorporating Zones to your smart sprinkler
- Customized Watering: Adjust watering based on plant types, sun exposure, and soil conditions in each zone.
- Remote Control: Manage zones via a smartphone app, even when you’re away.
- Leak Detection: Some smart valves can detect leaks in the system, preventing water waste and damage.
Being able to dictate how, what and when the system goes. Will make your system more effective, as well as saving you water and money.
Fine-Tuning Your Smart Sprinkler System Settings
With the hardware installed, the next step is to fine-tune the settings of your smart sprinkler system to ensure optimal performance and water conservation. Adjusting various parameters, which often feel daunting. Fortunately, after a bit of tweaking and experimenting you can find the ideal adjustments settings that suits your needs. Here’s the guide on how to fine-tune your new system.
Fine-tuning your smart sprinkler system settings is an ongoing process. By continuing to monitor performance, adjust settings, and leverage available data, you can ensure your landscape receives the right amount of water at the right time. This not only leads to a healthier, more vibrant yard but also contributes to significant water savings and environmental stewardship.
Key Settings to Adjust
The parameters can be adjusted based on weather conditions:
- Watering Schedules: Set specific days and times for each zone to water.
- Watering Duration: Adjust the amount of time each zone is watered based on plant needs.
- Seasonal Adjustments: Modify watering schedules based on the season to account for changing weather patterns.
- Weather-Based Adjustments: Allow the system to automatically adjust schedules based on real-time weather data.
This will allow users to achieve a perfect watering schedule. Without wasting any water.
Troubleshooting Common Smart Sprinkler Problems
Even with the most advanced technology, issues can arise. Being prepared to troubleshoot common problems can keep your system running smoothly and prevent costly repairs. Let’s discuss the issues, from controller connectivity to valve malfunctions, let’s explore practical solutions that will get your smart sprinkler system back on track.
By proactively addressing potential problems and maintaining your smart sprinkler system, you can ensure its long-term performance and efficiency. Regular inspections, timely repairs, and a keen eye for detail will help you keep your landscape healthy and vibrant while conserving water and saving money.
Frequent Encounter
Here are some common challenges and how to address them:
- Controller Connectivity Issues: Ensure the controller is connected to the Wi-Fi network and the signal is strong. Restart your router or relocate the controller if necessary.
- Valve Malfunctions: Check for debris or damage in the valve. Clean or replace the valve as needed.
- Sensor Errors: Verify that the sensors are properly connected and calibrated. Replace batteries or the sensor if it’s defective.
| Key Point | Brief Description |
|---|---|
| 💧 Water Conservation | Smart systems use weather data to minimize water waste. |
| 💸 Cost Savings | Lower water bills from efficient water usage. |
| 📅 Automated Schedules | Eliminating the need for manual adjustments. |
| ⚙️ Zone Control | Manage individual zones for customized watering. |
Frequently Asked Questions
▼
The cost varies depending on the components you choose. A smart controller ranges from $100 to $300, while weather sensors cost around $50 to $150. Smart valves can add another $50 to $100 per zone.
▼
Yes, most smart sprinkler systems are designed for DIY installation. The process typically involves replacing your existing controller, connecting wires, and setting up the system via a smartphone app.
▼
Smart sprinkler systems can save up to 50% of your water usage by adjusting watering schedules based on real-time weather data and plant needs, preventing water waste.
▼
Most smart sprinkler controllers are compatible with standard sprinkler systems. However, it’s essential to check the compatibility of the controller with your specific system before purchasing.
▼
If you have a weak Wi-Fi signal, consider using a Wi-Fi extender to boost the signal strength. Alternatively, you can opt for a smart controller that supports cellular connectivity.
Conclusion
Upgrading your existing sprinkler system to a smart, weather-aware setup is a worthwhile investment for anyone looking to save water, reduce costs, and maintain a healthy landscape. With the right components and a bit of DIY effort, you can transform your traditional sprinkler system into an intelligent and efficient irrigation solution.


