DIY Smart Home Security: Installing a Comprehensive System Under $300 in 2026
Building an effective DIY smart home security system for under $300 in 2026 is entirely achievable, focusing on strategic component selection, seamless integration, and leveraging smart home platforms for enhanced protection and peace of mind.
The idea of a secure, connected home often brings to mind hefty price tags and complex installations. However, in 2026, creating a robust DIY smart home security system without breaking the bank is more accessible than ever. This guide will walk you through building a comprehensive setup for under $300, ensuring peace of mind without compromising on essential protection.
Understanding Your Security Needs and Budget Realities
Before diving into specific devices, it’s crucial to assess your home’s unique vulnerabilities and define your security priorities. Every home is different, and a “one-size-fits-all” approach rarely works effectively. Consider the size of your property, the number of entry points, and any specific concerns like valuable possessions or a history of neighborhood incidents. This initial assessment will guide your purchasing decisions and help you allocate your $300 budget wisely, ensuring you invest in the most impactful components first.
The $300 budget for a comprehensive system in 2026 requires smart choices and an understanding of value. The market is saturated with options, but many affordable devices now offer advanced features previously reserved for high-end systems. Our focus will be on maximizing coverage and functionality while adhering strictly to this financial limit. This means prioritizing core security elements and intelligent integration over unnecessary frills.
Identifying Key Vulnerabilities
Walk around your home, both inside and out, keeping an eye out for potential weak spots. Are there ground-floor windows easily accessible? Are your doors sturdy, or could they benefit from reinforced locks? Understanding these points helps determine where your sensors and cameras will be most effective.
- Entry Points: Doors, ground-level windows, basement windows.
- High-Value Areas: Rooms containing electronics, jewelry, or important documents.
- Exterior Access: Garages, sheds, or poorly lit areas around the house.
Setting Realistic Expectations for a $300 System
While $300 allows for a surprisingly capable system in 2026, it’s important to be realistic. You might not get professional monitoring services included, nor will you likely acquire top-tier, enterprise-grade cameras. However, you can achieve excellent self-monitoring capabilities, instant alerts, and deterrents that significantly enhance your home’s safety. The goal is a functional, reliable system that empowers you with control and information.
By carefully planning and selecting devices, you can create a layered defense that deters intruders, alerts you to suspicious activity, and provides valuable evidence should an incident occur. The DIY aspect also means you save on installation costs, further stretching your budget.
Essential Components for Your Budget Security System
Building a robust DIY smart home security system for under $300 in 2026 hinges on selecting the right core components. We’ll focus on devices that offer the best balance of affordability, reliability, and smart integration. The aim is to create a multi-layered defense using a combination of sensors and a central hub that communicates effectively.
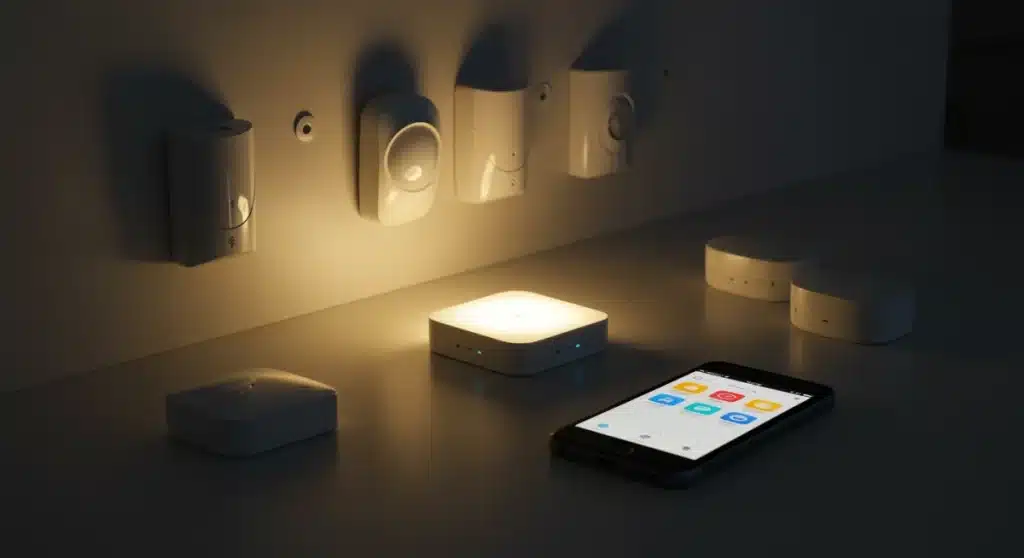
The foundation of any smart security system is a reliable central hub. This device acts as the brain, connecting all your sensors and allowing them to communicate with each other and with your smartphone. For a budget-friendly setup, many smart home assistants like Amazon Echo or Google Nest devices can double as basic hubs, or you can opt for dedicated, entry-level hubs from brands known for their affordability and compatibility.
Core Device Selection
Our $300 budget will primarily cover these essential items, selected for their cost-effectiveness and proven performance in the DIY smart home community.
- Smart Hub/Gateway: A central device to connect and control all components. Often, a budget-friendly option can be found for around $30-$50.
- Door/Window Sensors (4-6 units): These are critical for detecting unauthorized entry. Wireless, battery-powered sensors are widely available for $10-$15 each.
- Motion Sensor (1-2 units): Ideal for covering larger areas or hallways. A good motion sensor can be purchased for $15-$25.
- Indoor Security Camera (1 unit): A basic indoor camera with night vision and two-way audio provides visual verification. Look for options in the $30-$60 range.
- Smart Siren/Alarm (Optional, but recommended): A loud siren acts as a strong deterrent. Some smart hubs have built-in sirens, or you can find standalone units for $20-$40.
Leveraging Existing Smart Home Devices
If you already own smart speakers or displays (e.g., Echo Dot, Google Nest Hub), these can often integrate with new security devices, sometimes even acting as a basic hub. This significantly reduces the initial investment and helps keep your system within the $300 limit. Check for compatibility with your chosen security sensors before purchasing.
Many modern sensors are designed to work across various smart home ecosystems, making it easier to mix and match brands to find the best deals. This flexibility is a cornerstone of building an effective, budget-friendly DIY system. Always verify device compatibility with your chosen hub or smart home platform to avoid integration headaches later on.
Choosing the Right Smart Hub and Ecosystem
The smart hub is the linchpin of your entire security system, acting as the central command center that orchestrates all your devices. Selecting the right hub and its associated ecosystem is paramount, especially when working with a strict budget of $300 in 2026. Compatibility, ease of use, and future expandability are key considerations that will influence your overall security experience.
For budget-conscious DIYers, the market offers several compelling options. While high-end hubs like SmartThings or Hubitat provide vast integration capabilities, some more affordable alternatives can still deliver excellent performance for a basic security setup. Often, the best budget choice is a hub that can leverage an existing smart home ecosystem you might already be using, such as Amazon Alexa or Google Home.
Affordable Hub Options for 2026
Several brands offer entry-level hubs or smart speakers with built-in hub functionalities that are perfect for a sub-$300 security system.
- Amazon Echo (4th Gen or newer): Many Echo devices include a built-in Zigbee hub, making them compatible with a wide range of affordable sensors without needing an additional hub. This can be a huge cost-saver if you already own one.
- Google Nest Hub (2nd Gen or newer): While primarily a smart display, Nest Hubs offer robust integration with Google Assistant-compatible security devices, often acting as a central control point and notification center.
- Dedicated Budget Hubs (e.g., Aqara Hub M2): Brands like Aqara offer standalone hubs that are highly affordable (often under $50) and support their ecosystem of very inexpensive, yet reliable, Zigbee sensors. This is an excellent choice if you’re starting from scratch.
Ecosystem Compatibility and Integration
When choosing your hub, consider the broader smart home ecosystem it supports. Opting for a hub that works well with a wide array of third-party devices gives you more flexibility when selecting sensors and cameras, helping you stay within budget. Look for hubs that support common wireless protocols like Zigbee or Z-Wave, as these are used by many affordable security components.
Ensuring seamless integration means fewer headaches during setup and more reliable performance in the long run. A well-integrated system allows all components to work together, triggering actions like turning on lights when motion is detected or sending alerts to your phone when a door opens unexpectedly. This interconnectedness is what truly makes a smart security system effective and user-friendly.
Selecting Budget-Friendly Sensors and Cameras
Once your smart hub is chosen, the next critical step for your DIY smart home security system is selecting cost-effective yet reliable sensors and cameras. In 2026, the market offers an impressive array of budget-friendly options that don’t skimp on essential features. The key is to prioritize functionality and compatibility with your chosen hub, ensuring maximum coverage for your $300 investment.
Door and window sensors are the frontline defense against intruders, providing immediate alerts upon unauthorized entry. Motion sensors, on the other hand, offer broader coverage for interior spaces, detecting movement where it shouldn’t be. For cameras, focus on basic features like night vision, two-way audio, and reliable cloud storage options, even if free tiers are limited.
Door and Window Sensors: Your First Line of Defense
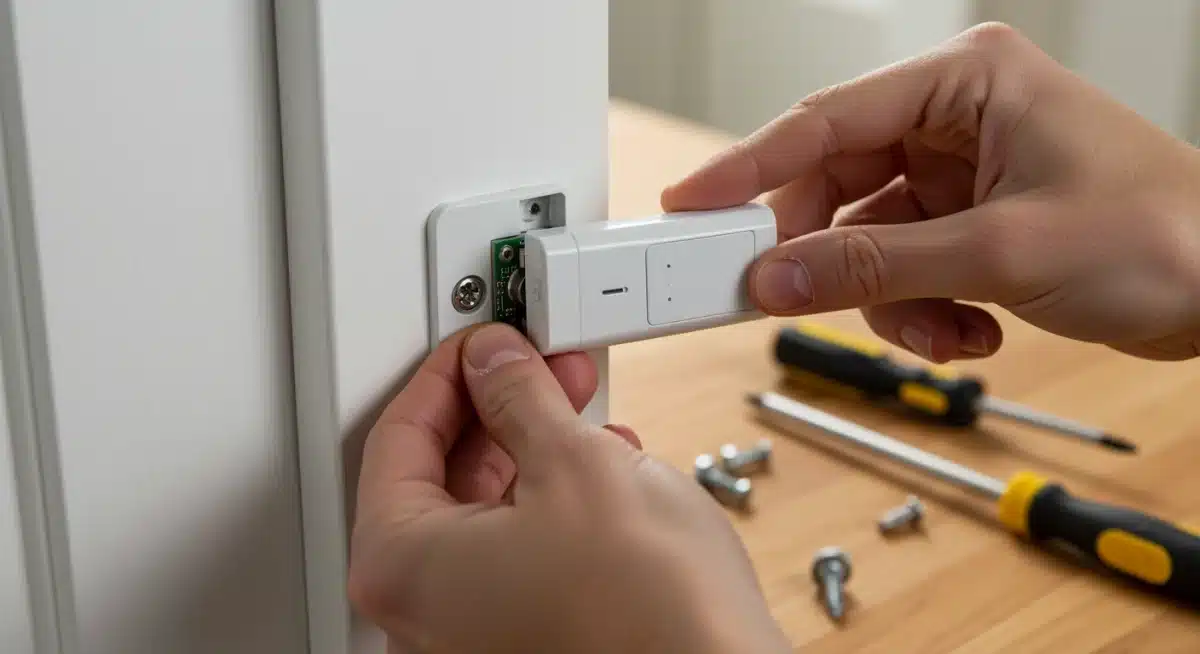
These small, discreet devices are indispensable. They typically consist of two parts: one attached to the door/window frame and the other to the moving part. When the connection is broken, an alert is triggered. Look for sensors that are easy to install (often adhesive-backed) and have long battery lives.
- Affordable Brands: Xiaomi Aqara, Wyze, Ecolink, and many Zigbee/Z-Wave compatible generic brands offer sensors for $10-$15 each.
- Installation: Typically peel-and-stick, making them ideal for DIY.
- Key Features: Instant alerts, tamper detection (on some models), and small footprint.
Motion Sensors: Covering Larger Areas
Motion sensors are excellent for detecting movement in hallways, living rooms, or any area where a break-in might occur. They complement door/window sensors by providing an additional layer of detection, especially if an intruder gains entry through an unexpected route.
When choosing motion sensors, consider their detection range and angle. Some advanced budget models even offer pet immunity, reducing false alarms from your furry friends. Placement is crucial; position them in corners or high traffic areas for optimal coverage, ensuring they can detect movement across the room without being triggered by everyday activities.
Indoor Security Cameras: Visual Verification on a Budget
A single indoor camera can provide invaluable visual verification of alerts and act as a strong deterrent. For under $60, you can find cameras with impressive features for a DIY setup.
- Recommended Options: Wyze Cam v3, Blink Mini, or basic Kasa Spot cameras often fall within this price range.
- Essential Features: 1080p resolution, night vision, two-way audio, and motion detection.
- Cloud Storage: Many budget cameras offer a free tier of cloud storage for short clips, with affordable subscription upgrades if needed.
By strategically placing these sensors and cameras, you can create a comprehensive monitoring system that provides both immediate alerts and visual confirmation of any suspicious activity. This layered approach ensures that your home is well-protected, even on a tight budget.
Step-by-Step Installation and Configuration
Installing your DIY smart home security system doesn’t require professional expertise, but a systematic approach will ensure a smooth setup. This section guides you through the process, from unboxing to full configuration, focusing on common practices for budget-friendly devices in 2026.
The first step is always to read the manufacturer’s instructions for each device, as specific pairing methods can vary. However, the general principles of smart home device installation remain consistent: power on, connect to the hub, and configure settings. Patience and attention to detail during this phase will prevent frustrating troubleshooting later on.
Setting Up Your Smart Hub
Your smart hub is the brain of the operation. Place it centrally in your home to ensure good signal strength to all your sensors. Connect it to power and your home’s Wi-Fi network (if applicable), then follow the app’s instructions to complete the initial setup. This usually involves creating an account and naming your hub.
- Power On: Connect the hub to a power source.
- Network Connection: Connect to your home Wi-Fi or Ethernet.
- App Setup: Download the companion app and follow the on-screen pairing process.
Installing and Pairing Sensors
Once the hub is ready, you can begin installing your door/window and motion sensors. Most budget sensors are wireless and use adhesive backing for easy placement. Pair each sensor with your hub through the hub’s dedicated app. This often involves putting the sensor in pairing mode (usually by pressing a small button) and letting the hub discover it.
Strategically place door/window sensors on all primary entry points and ground-level windows. For motion sensors, position them in corners of high-traffic rooms, ensuring they cover the main pathways an intruder might take. Test each sensor after installation to confirm it communicates correctly with the hub and triggers alerts.
Camera Placement and Configuration
Position your indoor security camera in a central location, or facing a main entry point, to maximize its surveillance capabilities. Ensure it has a clear line of sight and is connected to a stable power source. Most budget cameras connect directly to your Wi-Fi network and are configured through their own dedicated app.
Within the camera app, adjust settings such as motion detection sensitivity, recording schedules, and notification preferences. Test the live feed, two-way audio, and night vision capabilities to ensure everything is working as expected. Consider enabling a privacy mode or physically covering the lens when you are home and don’t need surveillance.
Smart Automation and Notifications for Enhanced Security
The true power of a DIY smart home security system lies in its ability to automate responses and provide intelligent notifications. Beyond simply detecting an event, a well-configured system can take proactive steps to deter intruders and keep you informed, even when you’re away from home. Leveraging the automation features of your smart hub is key to maximizing your $300 investment.
Smart routines, often called “scenes” or “automations,” allow your devices to work together seamlessly. For example, if a door sensor is triggered while your system is armed, it can automatically turn on lights, activate a siren, and send an alert to your phone. This layered response significantly enhances your home’s protection and provides immediate deterrence.
Setting Up Automated Routines
Most smart hubs and ecosystems (Alexa, Google Home) offer intuitive interfaces for creating automated routines. These typically follow an “if this, then that” logic. Think about scenarios that would enhance your security.
- Entry Alert: If a door/window sensor opens when the system is armed, then turn on all smart lights, activate the siren, and send a push notification to your phone.
- Motion Detection: If a motion sensor detects movement late at night, then record a short video clip from the indoor camera and send an alert.
- Arm/Disarm Schedule: Automatically arm the system when everyone leaves for work and disarm it when the first person returns.
Customizing Notifications and Alerts
Effective notifications are crucial for a self-monitored system. Configure your smart home app to send instant push notifications to your smartphone for critical events. Consider setting up different notification preferences for various scenarios – for instance, a subtle chime for a package delivery versus an urgent alarm for a detected break-in.
Some systems also offer email or even SMS notifications, providing redundancy. Ensure that your notification settings are clear and that you understand what each alert signifies. This proactive communication ensures you are always aware of your home’s status, allowing you to react quickly if necessary.
Maintaining and Expanding Your Budget Security System
Even after successfully installing your DIY smart home security system, ongoing maintenance and strategic expansion are crucial for long-term effectiveness. In 2026, smart home technology continues to evolve, and keeping your system updated and adapting it to changing needs ensures it remains a robust defense for your home, all while staying mindful of your initial $300 budget.
Regular checks of your devices, particularly battery-powered sensors, are essential. Software updates for your hub and cameras often bring new features, security patches, and improved performance. Staying informed about these updates and applying them promptly will keep your system operating at its peak efficiency and protect against emerging vulnerabilities.
Regular System Checks and Battery Management
Make it a habit to periodically test your sensors and cameras. Trigger a door sensor to confirm you receive an alert, or check the live feed from your camera. This ensures all components are communicating correctly.
- Battery Life: Most smart sensors use long-lasting batteries, but set a reminder to check their status in your app every few months. Replace them proactively to avoid dead zones.
- Connectivity: Ensure your Wi-Fi network is stable and provides good coverage to all devices. A weak signal can lead to missed alerts.
- Software Updates: Regularly check for firmware updates for your hub, sensors, and cameras. These often include security enhancements and bug fixes.
Future Expansion and Upgrades on a Budget
As your needs change or as more affordable, advanced devices become available, you might consider expanding your system. With your initial $300 investment, you’ve established a solid foundation. Future upgrades can be incremental and budget-friendly.
Consider adding smart locks for keyless entry and remote access, or outdoor cameras for perimeter monitoring. Many brands offer affordable versions of these devices that can easily integrate with your existing hub. The modular nature of DIY smart home security allows you to grow your system gradually, spreading out costs over time while continuously enhancing your home’s protection.
The Future of DIY Smart Home Security in 2026
The landscape of DIY smart home security is constantly evolving, and by 2026, we’re seeing even more sophisticated, yet affordable, technologies emerge. The trend towards greater interoperability, AI-driven analytics, and energy-efficient devices means that building a comprehensive system for under $300 is not just possible, but increasingly powerful. Understanding these trends can help you make future-proof decisions for your current setup.
One significant development is the widespread adoption of Matter, a universal communication protocol designed to make smart home devices from different manufacturers work together seamlessly. This means less worry about compatibility issues and a broader selection of affordable sensors and cameras that integrate effortlessly with your chosen hub, regardless of brand.
Advancements in Affordability and AI Integration
Manufacturers are continually innovating to bring down the cost of advanced features. What was once premium, like facial recognition or advanced motion detection that differentiates between humans and pets, is now becoming available in budget-friendly cameras. This AI integration reduces false alarms and provides more accurate threat detection, enhancing the overall effectiveness of your system without a significant price hike.
- Smarter Sensors: Expect more sensors with built-in environmental monitoring (temperature, humidity), offering added value beyond just security.
- Edge AI: More processing is happening directly on devices (edge computing), leading to faster alerts and reduced reliance on cloud services, which can save on subscription costs.
- Energy Efficiency: Devices are becoming even more power-efficient, extending battery life and reducing the environmental footprint of your security system.
The Rise of Community-Driven Security Networks
In 2026, we’re also seeing the emergence of community-driven security networks. These platforms allow neighbors to anonymously share security camera footage or alert each other to suspicious activity, creating a collective defense mechanism. While still in nascent stages for fully integrated DIY systems, this trend hints at a future where individual home security extends into a neighborhood-wide protective bubble, offering an additional layer of peace of mind without extra cost.
By staying informed about these technological advancements and continuously evaluating your system, your $300 DIY smart home security setup can remain at the cutting edge, providing robust protection for years to come. The future of home security is smart, connected, and increasingly accessible to everyone.
| Key Point | Brief Description |
|---|---|
| Budget Planning | Strategic allocation of $300 for core components and essential coverage. |
| Component Selection | Choosing affordable smart hubs, door/window sensors, motion sensors, and cameras. |
| DIY Installation | Step-by-step guide for setting up and pairing all security devices. |
| Smart Automation | Configuring routines and notifications for enhanced, proactive security. |
Frequently Asked Questions About Budget DIY Smart Security
Absolutely. By carefully selecting budget-friendly yet reliable components like smart hubs, door/window sensors, and basic cameras, you can create a comprehensive self-monitored system. The effectiveness comes from strategic placement and intelligent automation, providing strong deterrence and immediate alerts.
Prioritize a smart hub or a smart speaker with built-in hub capabilities, followed by door/window sensors for all entry points. Add at least one motion sensor for a central area and a basic indoor security camera for visual verification. These form the core of a robust budget system.
Not necessarily. Many budget DIY systems are designed for self-monitoring, where you receive alerts directly to your phone without monthly fees. Some cameras offer free cloud storage tiers, but paid subscriptions usually provide more storage and advanced features, which can be added later.
Most modern DIY smart security components are designed for easy installation, often involving adhesive mounts and simple app-based pairing. Basic technical aptitude is helpful, but extensive wiring or professional tools are typically not required, making it accessible for most homeowners.
Yes, absolutely. The modular nature of DIY smart home security means you can easily add more sensors, cameras, smart locks, or other compatible devices as your budget allows or as your security needs evolve. This flexibility is a major advantage of a DIY approach.
Conclusion
Building a comprehensive DIY smart home security system for under $300 in 2026 is not just a pipe dream but a tangible reality for homeowners seeking peace of mind without the hefty price tag. By understanding your specific security needs, making smart choices for essential components, and leveraging the power of automation, you can create a robust, self-monitored defense system. The advancements in smart home technology, coupled with increasing affordability and interoperability, mean that securing your home effectively is more accessible than ever before. Embrace the DIY spirit, and take control of your home’s safety with an intelligent, budget-friendly setup that truly delivers.


