DIY Smart Lighting: 5 Advanced Scenes, 2 Hours, 15% Energy Savings
DIY Smart Lighting: Your Guide to 5 Advanced Scenes and 15% Energy Savings
Welcome to the future of home illumination! If you’ve ever dreamt of a home that intuitively adapts to your mood, schedule, and even helps you save money, then you’re in the right place. This comprehensive guide will walk you through the exciting world of DIY smart lighting, demonstrating how you can install five advanced lighting scenes in under two hours and, in the process, achieve a remarkable 15% energy saving.
Smart lighting is no longer just a luxury; it’s an accessible, practical, and incredibly rewarding upgrade for any home. From enhancing ambiance to boosting security and drastically cutting down on electricity bills, the benefits are manifold. Forget complex installations or hefty professional fees; with a little guidance and the right tools, you can transform your living space into a smart, energy-efficient haven.
We’ll delve into everything from choosing the right smart lighting system to setting up intricate scenes that cater to every aspect of your daily life. Whether you’re a complete beginner or looking to expand your existing smart home setup, this article provides actionable steps and expert tips to make your DIY smart lighting project a resounding success.
The Unseen Power of Smart Lighting: Beyond On/Off
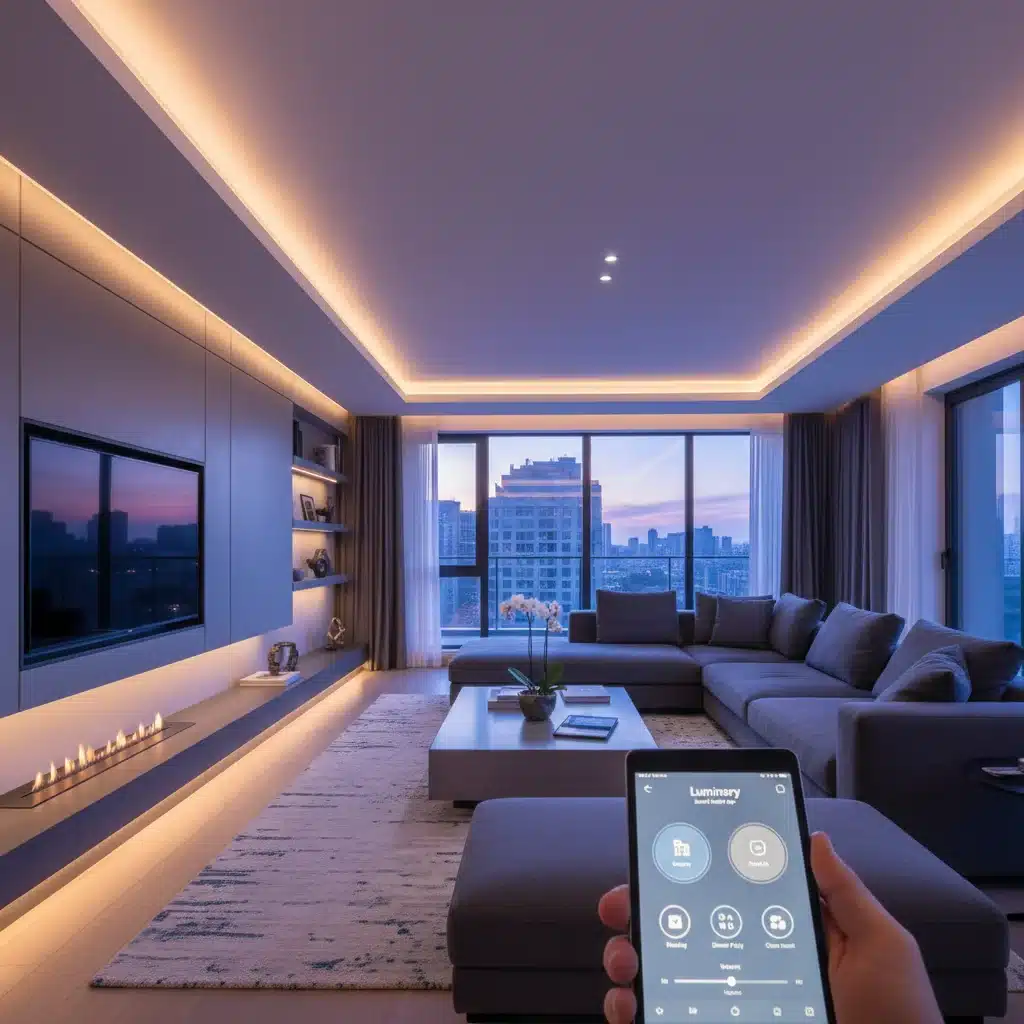
When most people think of smart lighting, they often picture simple on/off control via a smartphone. While this is certainly a core functionality, the true power of DIY smart lighting lies in its ability to create dynamic, responsive, and personalized lighting experiences. Imagine lights that gently wake you up in the morning, dim automatically for movie night, or even deter potential intruders when you’re away.
Why Embrace DIY Smart Lighting?
- Energy Efficiency: This is perhaps one of the most compelling reasons. Smart lighting systems allow for precise control, dimming, scheduling, and even occupancy sensing, all of which contribute to significant energy savings. Our goal of a 15% reduction is entirely achievable!
- Enhanced Ambiance: Transform the mood of any room with a tap. From vibrant party lights to serene reading nooks, smart lighting offers unparalleled flexibility in color and intensity.
- Convenience and Control: Control your lights from anywhere with your smartphone, voice assistant, or even through automated routines. No more fumbling for light switches in the dark.
- Security: Program lights to turn on and off randomly when you’re on vacation, giving the impression that your home is occupied. Integrate with security cameras for an extra layer of protection.
- Customization: Create bespoke lighting scenes tailored to your unique lifestyle and preferences. This is where the real fun begins!
- Integration: Seamlessly integrate with other smart home devices, such as thermostats, speakers, and security systems, for a truly interconnected home.
The beauty of DIY smart lighting is that you don’t need to be an electrician or a tech guru to get started. Many modern systems are designed for easy, plug-and-play installation, making them perfect for homeowners looking to upgrade their living spaces without professional help.
Choosing Your Smart Lighting System: A Quick Overview
Before diving into scene creation, you need to select a smart lighting system that fits your needs and budget. The market is flooded with options, but they generally fall into a few categories:
1. Hub-Based Systems (e.g., Philips Hue, Lutron Caséta)
- Pros: Often more robust, reliable, and offer a wider range of features, colors, and integrations. A dedicated hub creates its own network, reducing strain on your Wi-Fi. Excellent for larger homes or complex setups.
- Cons: Requires an initial investment in a hub.
2. Wi-Fi Based Systems (e.g., TP-Link Kasa, Cync by GE)
- Pros: No hub required, meaning a lower entry cost and simpler setup. You just screw in the bulb and connect it to your existing Wi-Fi network.
- Cons: Can sometimes strain your Wi-Fi network if you have many devices. May have fewer advanced features or integrations compared to hub-based systems.
3. Bluetooth-Only Systems
- Pros: Very simple setup, no hub or Wi-Fi needed for basic control.
- Cons: Limited range, typically only controllable when you’re in the same room. Not ideal for whole-home automation.
For this guide, we’ll focus on systems that offer scene creation and integration capabilities, which typically means hub-based or robust Wi-Fi based systems. Philips Hue is a popular choice due to its extensive ecosystem and user-friendly interface, making it an excellent starting point for DIY smart lighting enthusiasts.
Getting Started: The Foundation of Your Smart Lighting Setup
Before you can create those amazing scenes, you need to get your basic smart lighting infrastructure in place. This usually involves:
Step 1: Planning Your Layout
Decide which rooms or fixtures you want to smartify first. Start with high-traffic areas like the living room, kitchen, or bedroom, where lighting scenes will have the most impact. Consider:
- Which lights will be controlled together? (e.g., all ceiling lights in a room, or individual lamps)
- Do you need color-changing bulbs, or are tunable white bulbs sufficient?
- Are there any existing switches you want to keep or replace with smart switches/dimmers?
Step 2: Purchasing Your Gear
Based on your chosen system and plan, buy your smart bulbs, smart switches, and if necessary, a hub. Remember to check compatibility with your existing fixtures (e.g., bulb base type, dimmer compatibility).
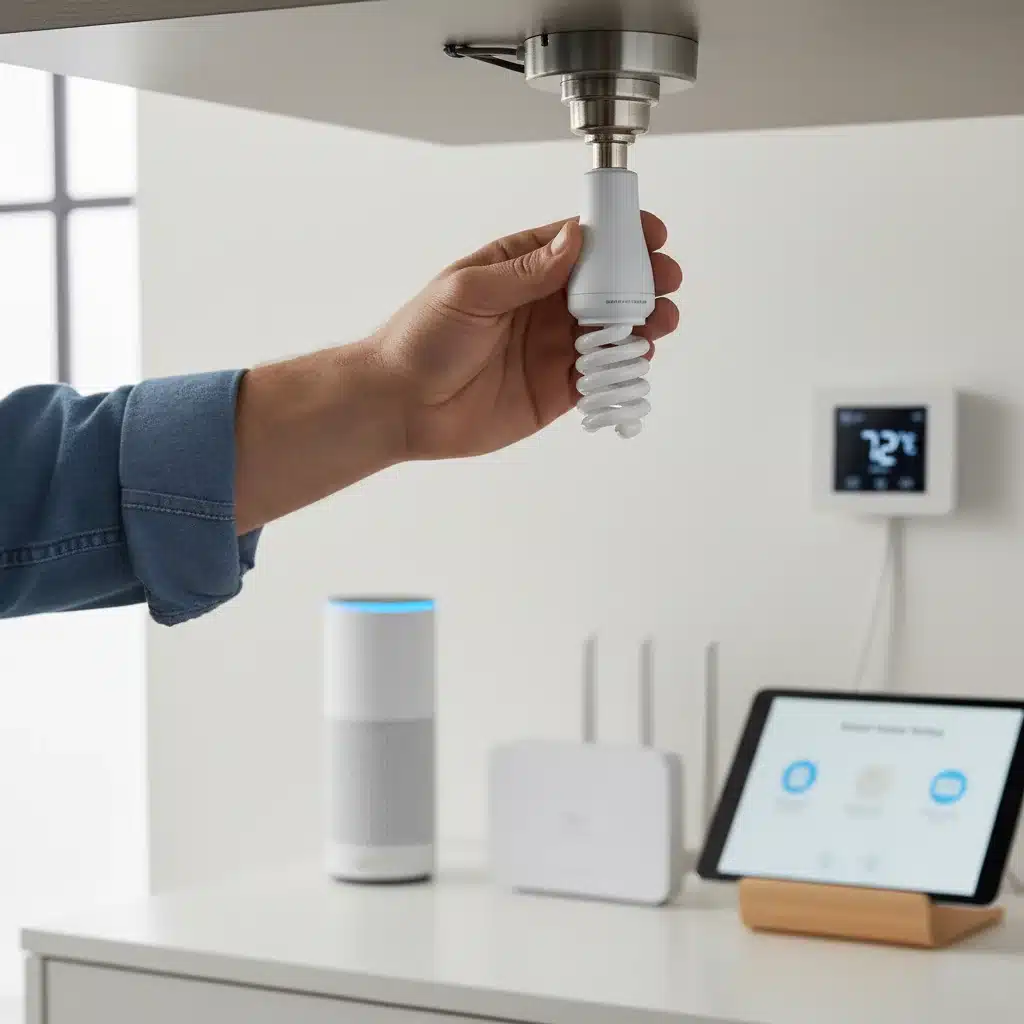
Step 3: Initial Installation & Setup (Approx. 30 minutes for a few bulbs)
This is the literal ‘DIY’ part! Most smart bulbs screw into standard light sockets just like regular bulbs. If you’re installing smart switches, you’ll need to follow the manufacturer’s instructions carefully, which usually involves basic electrical wiring (always turn off power at the breaker first!).
Once physically installed, you’ll connect them to your hub or Wi-Fi network via the manufacturer’s app. The app will guide you through the process of discovering and adding each device. Name your lights intuitively (e.g., ‘Living Room Ceiling 1’, ‘Kitchen Island Light’) for easier control later.
Crafting Your 5 Advanced Smart Lighting Scenes (Approx. 1 Hour)
Now for the fun part: creating scenes! A ‘scene’ is a predefined set of lighting conditions (brightness, color, on/off status) for one or more lights that can be activated with a single command or automation. These scenes are the heart of your DIY smart lighting system and will be key to both ambiance and energy savings.
We’ll set up five essential scenes that cover common daily scenarios. Remember, the exact steps might vary slightly depending on your smart lighting app (e.g., Philips Hue, Google Home, Apple HomeKit), but the principles remain the same.
Scene 1: ‘Morning Wake-Up’ (Energy Saving & Wellness)
Goal: Gently wake you up with increasing light, mimicking natural sunrise, and ensuring lights aren’t left on unnecessarily.
- Lights Involved: Bedroom ceiling light, bedside lamps.
- Settings:
- Time Trigger: Set to activate 30 minutes before your alarm (e.g., 6:30 AM).
- Light 1 (Bedside Lamp): Start at 1% brightness, warm white (2700K), gradually increasing to 50% over 20 minutes.
- Light 2 (Ceiling Light): Activate 10 minutes after bedside lamps, starting at 10% brightness, neutral white (4000K), gradually increasing to 70% over 10 minutes.
- Automation: Add a condition that if no motion is detected in the bedroom for 15 minutes after the scene ends, all bedroom lights turn off. This prevents lights from burning all day if you leave.
- Energy Saving Aspect: Gradual increase avoids harsh, full-brightness blasts. Automated turn-off ensures lights aren’t wasted.
Scene 2: ‘Productivity Boost’ (Energy Saving & Focus)
Goal: Create an optimal lighting environment for work or study, using cooler, brighter light, and ensuring only necessary lights are on.
- Lights Involved: Home office/kitchen table lights, desk lamp.
- Settings:
- Voice Command/Button Trigger: ‘Hey Google/Siri, activate Productivity Boost.’
- Office Ceiling Light: 80% brightness, cool white (5000K).
- Desk Lamp: 100% brightness, cool white (5500K) for direct task lighting.
- Other Room Lights: Ensure any non-essential lights in the immediate area are off or dimmed significantly.
- Automation: Pair with a motion sensor to dim lights to 20% after 10 minutes of no activity, and turn off completely after 30 minutes.
- Energy Saving Aspect: Uses brighter, cooler light which can reduce the perceived need for more lights, and motion sensing prevents lights from staying on in an empty room.
Scene 3: ‘Movie Night’ (Ambiance & Energy Saving)
Goal: Set a cozy, cinematic mood while minimizing glare and unnecessary light.
- Lights Involved: Living room lamps, accent lights (e.g., behind TV), overhead lights.
- Settings:
- Voice Command/Button Trigger: ‘Alexa/Siri, Movie Night.’
- Living Room Lamps: 15-20% brightness, warm white (2200K – 2700K).
- Accent Lights: 10% brightness, deep red or orange for a subtle glow.
- Overhead Lights: Turn OFF.
- Automation: If integrated with a smart TV, this scene could activate automatically when the TV turns on and a streaming app is launched.
- Energy Saving Aspect: Drastically reduces overall light output, using only essential lights at very low brightness levels.
Scene 4: ‘Away Mode’ (Security & Energy Saving)
Goal: Simulate occupancy when you’re not home to deter intruders, while conserving energy.
- Lights Involved: Random selection of lights throughout the house (e.g., living room, kitchen, bedroom, hallway).
- Settings:
- Schedule Trigger: Activate daily between sunset and 10 PM.
- Automation: Randomly turn on a different set of 2-3 lights at varying brightness levels (20%-50%) for 30-60 minutes each, then turn them off. Repeat this cycle with different lights.
- Example Sequence:
- 6:00 PM: Living Room Lamp (40% warm white) ON for 45 mins.
- 6:30 PM: Kitchen Ceiling (30% neutral white) ON for 30 mins.
- 7:00 PM: Living Room Lamp OFF; Hallway Light (25% warm white) ON for 60 mins.
- And so on…
- Energy Saving Aspect: Instead of leaving one light on all night, this uses minimal lights for short, staggered periods, significantly reducing energy consumption compared to traditional ‘vacation mode’ timers.
Scene 5: ‘Goodnight’ (Wellness & Energy Saving)
Goal: Prepare your home for sleep, ensuring all unnecessary lights are off and providing a brief, calming path to bed.
- Lights Involved: All lights in the house, especially bedroom and hallway lights.
- Settings:
- Voice Command/Button Trigger: ‘Goodnight’ or ‘Time for Bed.’
- All Lights (Except Bedroom/Hallway): Turn OFF.
- Bedroom Lights: Set to 10% brightness, very warm white (2000K-2200K).
- Hallway Light: Set to 5% brightness, very warm white (2000K).
- Automation: After 5 minutes, dim bedroom and hallway lights to OFF.
- Energy Saving Aspect: Guarantees all lights are off when you go to bed, preventing accidental overnight usage and providing a clear energy cut-off.
Pro Tip for Scene Creation: Most smart lighting apps allow you to save the current state of your lights as a new scene. So, manually set your lights exactly how you want them for each scene, then hit ‘Save Scene’ in your app. This makes the process incredibly fast!
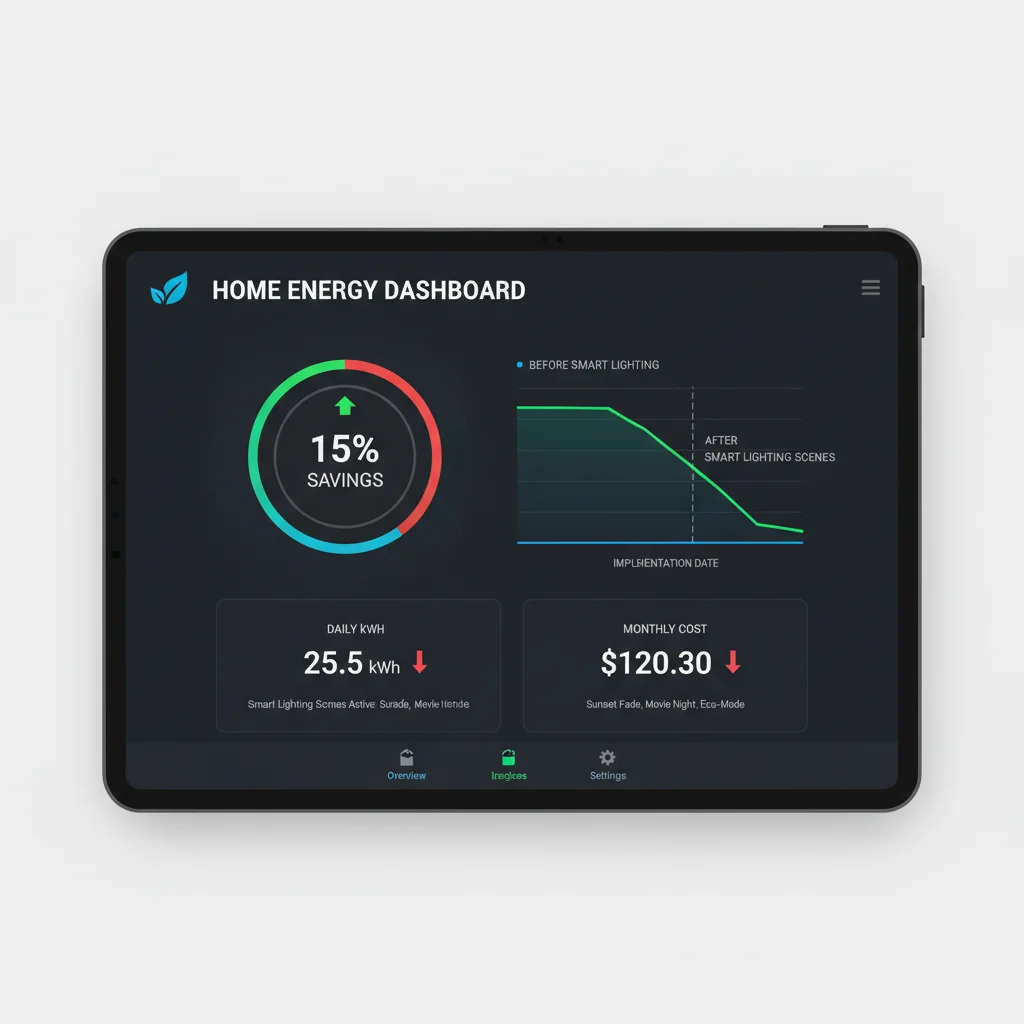
Achieving 15% Energy Savings with DIY Smart Lighting (Approx. 15 minutes for review)
The 15% energy saving isn’t just a claim; it’s a realistic outcome of intelligently applied DIY smart lighting. Here’s how these scenes and general smart lighting practices contribute:
- Eliminating Accidental Usage: The ‘Goodnight’ scene and motion-sensor automations (like in ‘Productivity Boost’ and ‘Morning Wake-Up’) ensure lights aren’t left on in empty rooms or overnight. This is a huge energy drain for many households.
- Optimized Brightness: How often do you really need your lights at 100%? Smart lighting allows you to dim lights to the exact level needed, which directly translates to less energy consumption. Our ‘Movie Night’ scene, for instance, uses a fraction of the power of full brightness.
- Targeted Lighting: Instead of illuminating an entire room, smart lighting lets you focus light only where and when it’s needed. The ‘Productivity Boost’ scene prioritizes task lighting over general ambient light.
- Scheduling and Automation: Lights turn on only when needed and off when not. The ‘Away Mode’ cleverly balances security with minimal energy use.
- LED Efficiency: Most smart bulbs are LEDs, which are inherently more energy-efficient than traditional incandescent or even CFL bulbs. Upgrading alone saves energy, but smart control amplifies these savings.
To truly track your savings, consider using smart plugs for non-smart lamps to monitor their energy consumption before and after implementing smart scenes, or check your smart lighting app if it offers energy usage statistics. Over time, these small adjustments add up to significant savings on your electricity bill.
Beyond the 5 Scenes: Expanding Your DIY Smart Lighting System
Once you’ve mastered these five core scenes, the possibilities for your DIY smart lighting system are virtually endless. Here are some ideas to take your setup to the next level:
Integrate with Voice Assistants
Connect your smart lighting system to Amazon Alexa, Google Assistant, or Apple HomeKit for seamless voice control. This adds another layer of convenience and makes activating your scenes effortless.
Add Motion Sensors
Motion sensors are game-changers for energy efficiency and convenience. Use them to:
- Turn on hallway lights when you enter.
- Activate kitchen lights when you walk in and turn them off when you leave.
- Ensure bathroom lights turn off after a set period of no activity.
Explore Geofencing
Geofencing uses your phone’s location to trigger actions. For example:
- Have lights turn on automatically when you arrive home.
- Turn off all lights when the last person leaves the house.
Experiment with Adaptive Lighting
Some systems offer adaptive lighting that automatically adjusts the color temperature of your lights throughout the day, mimicking natural daylight cycles. This can improve sleep, mood, and productivity.
Consider Smart Dimmers and Switches
If you have fixtures where you don’t want to replace individual bulbs (e.g., recessed lighting), smart dimmers or switches can convert them into smart lights, offering control over brightness and scheduling.
Outdoor Smart Lighting
Extend your smart lighting to the exterior of your home for enhanced curb appeal, security, and convenience. Schedule porch lights to come on at dusk or pathway lights to activate with motion.
Troubleshooting Common DIY Smart Lighting Issues
Even with the most user-friendly systems, you might encounter a hiccup or two. Here are some common issues and their quick fixes:
- Lights Unresponsive:
- Check if the physical light switch is ON. Smart bulbs need constant power.
- Ensure the bulb is screwed in tightly.
- Restart your smart lighting app.
- Check your Wi-Fi or hub connection.
- Difficulty Pairing:
- Make sure the bulb is in pairing mode (often involves turning it on/off a few times).
- Bring the bulb closer to your hub or Wi-Fi router during initial setup.
- Check for any firmware updates for your hub or app.
- Scenes Not Activating:
- Double-check the scene settings in your app (triggers, conditions, light states).
- Ensure any associated sensors or voice commands are correctly configured and working.
- Wi-Fi Congestion (for Wi-Fi bulbs):
- If you have many Wi-Fi devices, consider upgrading your router or spreading devices across 2.4GHz and 5GHz bands.
- For large numbers of devices, a hub-based system might be more reliable.
Most smart lighting manufacturers provide extensive online support, FAQs, and community forums, which can be invaluable resources for troubleshooting.
The Future is Bright: Long-Term Benefits of DIY Smart Lighting
Investing in DIY smart lighting is more than just a momentary upgrade; it’s an investment in your home’s future. The benefits extend far beyond the initial ‘wow’ factor:
- Increased Home Value: Smart home features are increasingly sought after by homebuyers.
- Sustainable Living: By actively managing your energy consumption, you contribute to a greener planet.
- Adaptability: As your needs change, your smart lighting system can adapt. New scenes, new automations, new integrations – it’s endlessly customizable.
- Peace of Mind: Knowing your home is secure and energy-efficient, even when you’re away, offers invaluable peace of mind.
The journey into DIY smart lighting is an exciting one, offering a blend of technological innovation, practical benefits, and creative expression. By following this guide, you’ve not only set up advanced lighting scenes but also taken a significant step towards a smarter, more energy-efficient, and more enjoyable home.
Conclusion: Illuminate Your Life, Save Your Energy
We’ve covered how to select your system, install your devices, and craft five powerful lighting scenes that enhance ambiance, boost security, and, most importantly, contribute to a fantastic 15% energy saving. All of this, achieved through simple DIY smart lighting steps, in under two hours of focused effort.
Your home is now more responsive, more efficient, and more aligned with your lifestyle than ever before. Enjoy the convenience of voice control, the beauty of personalized lighting, and the satisfaction of knowing you’re making a positive impact on both your wallet and the environment.
So, go ahead, experiment with new colors, create more scenes, and continue to explore the endless possibilities that DIY smart lighting brings to your home. The power to control your light, and your energy consumption, is now literally at your fingertips.


