DIY Smart Home Security: Install a Motion Sensor System in Under 3 Hours
DIY Smart Home Security Upgrades for 2026: Install a Motion Sensor System in Under 3 Hours
In an increasingly connected world, the security of our homes has become a paramount concern. While professional security installations offer peace of mind, they often come with a hefty price tag and monthly subscriptions. The good news? Advancements in smart home technology have made it easier and more affordable than ever to take home security into your own hands. This guide will walk you through the process of installing a DIY motion sensor system in your home, designed to be completed in under three hours, providing robust protection without breaking the bank.
By 2026, smart home security is no longer a luxury but an accessible necessity. Integrating motion sensors into your existing smart home ecosystem or building a new one from scratch can significantly enhance your home’s protective capabilities. Not only do motion sensors act as an immediate deterrent to intruders, but they also offer versatile functionalities, from triggering lights to sending instant alerts to your smartphone. Let’s dive into how you can achieve a safer home environment quickly and efficiently.
Why a DIY Motion Sensor System is Your Best Bet
Opting for a DIY motion sensor system offers a multitude of benefits that extend beyond mere cost savings. Here’s why this approach is gaining immense popularity:
- Cost-Effectiveness: Professional installations can cost thousands, not including ongoing monitoring fees. DIY solutions often require only the purchase of the sensors and a central hub, if not already owned.
- Customization: You have complete control over where sensors are placed, what actions they trigger, and how they integrate with other smart devices. This allows for a security system perfectly tailored to your home’s unique layout and your specific needs.
- Flexibility and Scalability: As your needs change or as new technologies emerge, you can easily add, remove, or upgrade components of your DIY system without being tied to a specific provider or contract.
- Empowerment: Understanding how your security system works provides a sense of control and confidence. You’re not just a user; you’re the architect of your home’s protection.
- No Monthly Fees: While some DIY systems offer optional professional monitoring, many homeowners choose self-monitoring through smartphone apps, eliminating recurring costs.
These advantages make a compelling case for anyone looking to bolster their home security without the traditional commitments. The focus on a DIY motion sensor installation means you’re investing in a solution that’s both smart and sustainable.
Understanding Motion Sensor Technology
Before we jump into the installation, let’s briefly understand the types of motion sensors commonly available for smart homes:
- Passive Infrared (PIR) Sensors: These are the most common type. PIR sensors detect movement by sensing changes in infrared radiation, which is emitted by warm bodies. They are excellent for detecting people and large animals.
- Microwave Sensors: These sensors emit microwave pulses and measure the reflection. Changes in the reflection pattern indicate movement. They cover a larger area than PIR sensors but can be prone to false alarms from outside movement if not calibrated correctly.
- Dual-Technology Sensors: Combining PIR and microwave technologies, these sensors offer enhanced accuracy and reduced false alarms. Both technologies must be triggered simultaneously for an alarm to sound, making them highly reliable.
- Ultrasonic Sensors: These sensors emit ultrasonic waves and detect movement by changes in the reflected sound waves. They are less common in residential security but can be found in some specialized applications.
For a quick and effective DIY motion sensor setup, PIR sensors are usually the go-to choice due to their reliability, affordability, and ease of installation. Many smart home brands offer compact, wireless PIR sensors that integrate seamlessly with their ecosystems.
Pre-Installation Checklist: Preparing for Your 3-Hour Upgrade
To ensure a smooth and swift installation, preparation is key. Gather the following before you begin your DIY motion sensor project:
- Choose Your Smart Home Ecosystem: If you already have one (e.g., SmartThings, Apple HomeKit, Google Home, Amazon Alexa), select motion sensors compatible with it. If not, consider starting with a popular, user-friendly hub and compatible sensors.
- Purchase Your Motion Sensors: Based on your chosen ecosystem and the size of your home, acquire the necessary number of sensors. Look for wireless models for easier installation.
- Basic Tools: You’ll likely need a small screwdriver (often included with the sensors), a pencil for marking, and possibly a drill if you opt for screw-mounted sensors over adhesive.
- Ladder/Step Stool: For reaching higher placement points.
- Smartphone/Tablet: To connect and configure your sensors via the smart home app.
- Batteries: Ensure your sensors come with batteries, or have spares on hand if needed.
- Home Layout Sketch: A simple drawing of your home’s floor plan can help in planning sensor placement.
Having everything ready will significantly cut down on your installation time, keeping you well within the three-hour target for your DIY motion sensor upgrade.
Step-by-Step Installation Guide: Your 3-Hour Timeline
Hour 1: Planning and Initial Setup
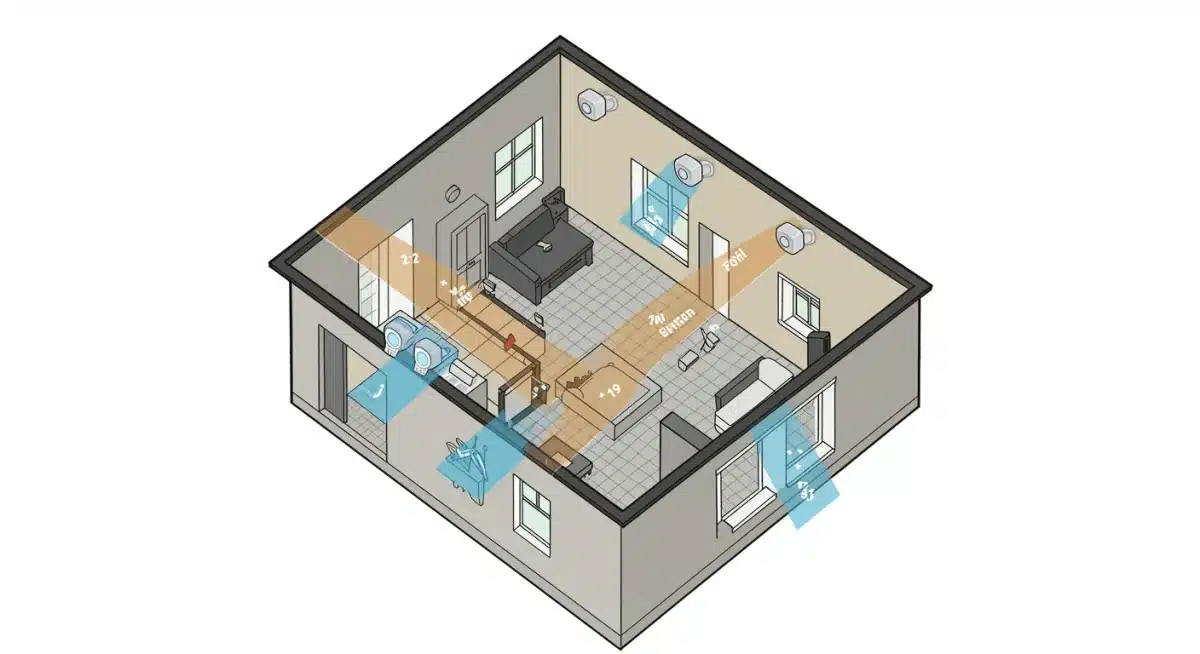
Step 1: Strategize Sensor Placement (30 minutes)
This is arguably the most crucial step for an effective DIY motion sensor system. Walk through your home and identify key areas where motion detection is vital. Consider:
- Entry Points: Hallways leading to front/back doors, main staircases.
- High-Value Areas: Rooms containing expensive electronics, jewelry, or important documents.
- Common Paths: Areas intruders would likely traverse to get from one part of the house to another.
- Blind Spots: Areas not covered by existing security cameras (if any).
Optimal placement for most PIR sensors is in corners, about 6-8 feet off the ground, angled to cover the desired area. Avoid pointing them directly at windows, heat sources (like vents or radiators), or areas with significant air currents, as these can cause false alarms. Use your home layout sketch to mark ideal locations.
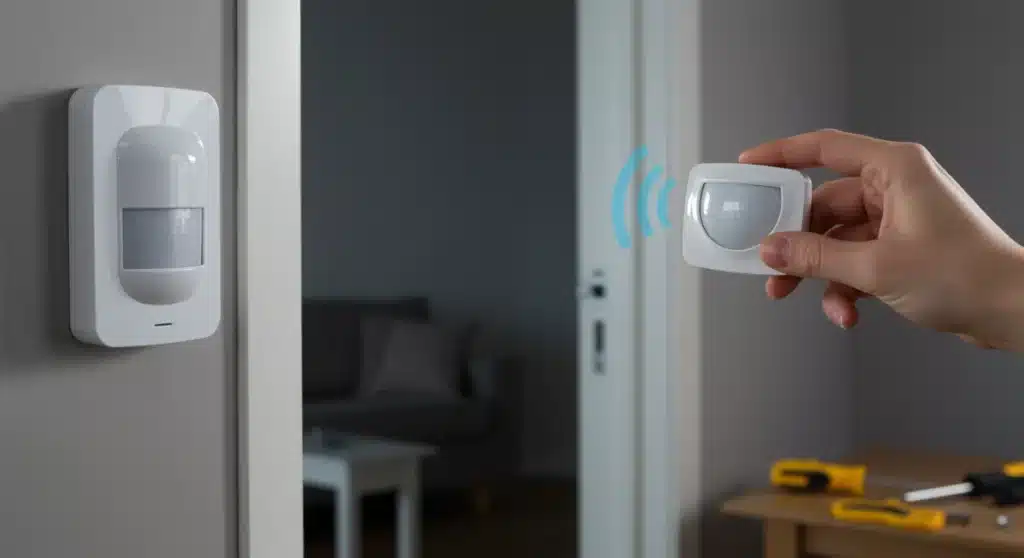
Step 2: Unbox and Power On Sensors (15 minutes)
Carefully unbox each motion sensor. Most wireless sensors come with pre-installed batteries or require you to pull a tab to activate them. Follow the manufacturer’s instructions. Keep the manuals handy.
Step 3: Connect to Your Smart Home Hub/App (15 minutes)
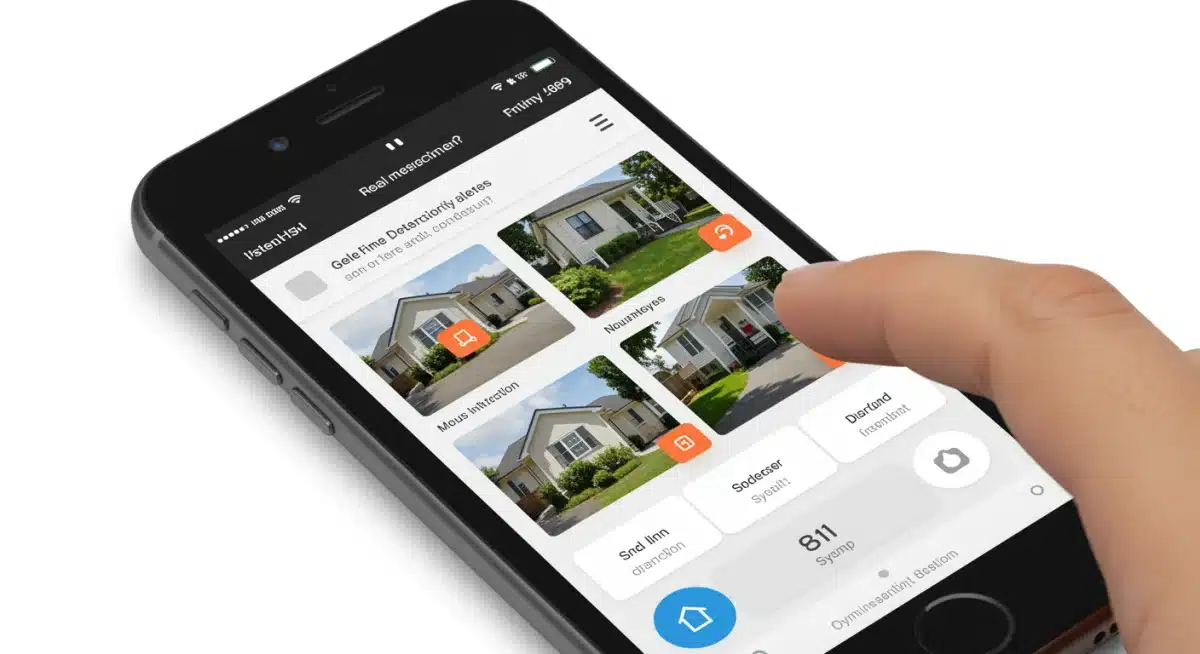
Open your smart home app (e.g., SmartThings, Home app, Alexa app). Follow the in-app instructions to “add a new device” or “pair sensor.” Typically, this involves putting the sensor into pairing mode (often by pressing a small button) and letting the app discover it. Rename each sensor in the app (e.g., “Living Room Motion,” “Hallway Motion”) for easy identification.
Hour 2: Mounting and Initial Testing
Step 4: Mount Your Motion Sensors (45 minutes)
Go to your planned locations. Most modern motion sensors come with adhesive backing for tool-free installation, or small screws for a more permanent fixture. Using your pencil, lightly mark the desired spot. Ensure the sensor is securely attached and has a clear line of sight to the area it’s meant to monitor. If using screws, pre-drill pilot holes if necessary.
- Adhesive Mounting: Clean the surface thoroughly before applying. Press firmly for about 30 seconds.
- Screw Mounting: Use the provided screws and a screwdriver. Ensure it’s level and firmly attached.
Step 5: Initial Range and Sensitivity Testing (15 minutes)
Once mounted, it’s time for preliminary testing. Many smart home apps allow you to see a “live” status of the sensor. Walk through the sensor’s intended coverage area. Observe if the sensor correctly detects your movement and if the app registers the motion. Adjust the sensor’s angle slightly if you notice blind spots or areas where detection is inconsistent. Some sensors also have adjustable sensitivity settings within the app, which you can fine-tune later.
Hour 3: Configuration, Integration, and Final Checks
Step 6: Configure Automation Rules (45 minutes)
This is where your DIY motion sensor system truly becomes smart. Within your smart home app, create automation rules or “routines” based on motion detection. Here are some ideas:
- Security Alert: If motion is detected when the system is “armed” (e.g., “Away” or “Night” mode), send a push notification to your phone, trigger an audible alarm from your smart speaker, or even flash smart lights.
- Welcome Home: When motion is detected near your entry point after you disarm the system, turn on specific lights.
- Energy Saving: If no motion is detected in a room for a set period, turn off the lights or adjust the thermostat.
- Pet Mode: Some advanced sensors can distinguish between humans and pets. If yours can’t, consider placing sensors higher to avoid pet triggers or adjusting sensitivity.
Spend time thinking about scenarios and how you want your home to react to motion. The possibilities are vast and can significantly enhance both security and convenience.
Step 7: Final System Test (15 minutes)
Perform a full system test. Set your smart home system to an “armed” state (e.g., “Away” mode) and trigger each motion sensor intentionally. Verify that all configured automations – notifications, alarms, lights – are working as expected. Check your phone for alerts. Walk through different areas to ensure comprehensive coverage. Make any necessary adjustments to sensor placement or automation rules.
Optimizing Your DIY Motion Sensor System
Once your basic DIY motion sensor system is up and running, consider these advanced tips for optimization:
Minimizing False Alarms
- Pet Immunity: If you have pets, look for “pet-immune” sensors or place standard sensors higher up, angling them so smaller animals don’t trigger them.
- Environmental Factors: Ensure sensors are not directly facing windows where sunlight changes or passing cars could trigger them. Avoid placing them near heat sources or drafty areas.
- Sensitivity Settings: Most smart sensors allow you to adjust sensitivity. If you’re getting frequent false alarms, try lowering the sensitivity.
Integrating with Other Smart Devices
The true power of a DIY motion sensor lies in its integration capabilities:
- Smart Lighting: Have lights turn on when motion is detected in a dark area or flash red/blue when an intruder is detected.
- Smart Cameras: Trigger a recording on your smart camera when motion is detected, providing visual verification of alerts.
- Smart Locks: While less common for direct motion sensor triggers, you can set up scenarios where, for example, if motion is detected near a door while armed, and the door is also unlocked, a more severe alert is issued.
- Smart Alarms/Sirens: Connect your motion sensors to a dedicated smart siren for a powerful auditory deterrent.
Regular Maintenance and Monitoring
- Battery Life: Most smart home apps will notify you when sensor batteries are low. Replace them promptly to ensure continuous protection.
- Firmware Updates: Keep your smart home hub and sensor firmware updated to benefit from the latest features and security patches.
- Periodic Testing: Occasionally (e.g., once a month), perform a quick test of your sensors to ensure they are still functioning correctly.
Common Challenges and Troubleshooting for Your DIY Motion Sensor Project
Even with careful planning, you might encounter minor hurdles. Here’s how to address common issues with your DIY motion sensor installation:
- Sensor Not Pairing:
- Check Batteries: Ensure they are correctly inserted and charged.
- Proximity: Bring the sensor closer to the smart home hub during pairing.
- Reset Sensor: Most sensors have a small reset button or a combination of button presses to factory reset them. Consult the manual.
- Hub Capacity: Ensure your smart home hub isn’t at its maximum device limit.
- False Alarms:
- Placement Review: Re-evaluate sensor placement. Is it facing a window, heat vent, or direct sunlight?
- Sensitivity Adjustment: Lower the sensitivity setting in your smart home app.
- Pet Interference: Consider pet-immune sensors or higher placement if pets are the cause.
- Drafts/Vibrations: Ensure the sensor is mounted securely and not subject to drafts or vibrations from appliances.
- Missed Detections/Blind Spots:
- Coverage Area: Walk through the area slowly to map out the sensor’s effective range.
- Obstructions: Ensure furniture or decor isn’t blocking the sensor’s view.
- Angle Adjustment: Slightly adjust the sensor’s angle to cover critical areas.
- Add More Sensors: For very large or irregularly shaped rooms, a single sensor might not be enough.
- Delayed Notifications:
- Network Congestion: Ensure your Wi-Fi network is robust and not overloaded.
- Hub Performance: Check if your smart home hub is up to date and performing optimally.
- App Settings: Verify notification settings on your smartphone for the smart home app.
Troubleshooting is a part of any DIY project. With a little patience and by systematically checking these points, you can quickly resolve most issues and get your DIY motion sensor system running flawlessly.
The Future of DIY Home Security: What to Expect Beyond 2026
The landscape of home security is constantly evolving, and by 2026, we can already see trends pointing towards even more sophisticated and integrated DIY motion sensor solutions. Here’s a glimpse into what the future might hold:
- AI-Powered Analytics: Motion sensors will become even “smarter,” leveraging artificial intelligence to differentiate between various types of motion – human, animal, falling objects, etc. – with greater accuracy, significantly reducing false alarms.
- Edge Computing: More processing will happen directly on the sensor itself (edge computing), leading to faster response times and less reliance on cloud processing, enhancing privacy and efficiency.
- Environmental Integration: Motion sensors will seamlessly integrate with environmental sensors (air quality, temperature, humidity) to create a holistic “health of the home” monitoring system, not just security.
- Advanced Biometrics: While not strictly motion detection, future sensors might incorporate more advanced biometric capabilities to recognize authorized individuals, further personalizing home access and security.
- Energy Harvesting: Expect to see more motion sensors powered by ambient light or kinetic energy, reducing the need for battery replacements and making them even more sustainable.
- Mesh Networks and Ultra-Wideband (UWB): These technologies will improve the reliability, range, and precision of motion detection, allowing for more granular control and fewer connectivity issues.
- Augmented Reality (AR) for Setup: Imagine using AR on your phone to visualize sensor coverage in real-time during installation, making placement even more foolproof.
These innovations promise to make DIY motion sensor systems even more powerful, user-friendly, and integral to the smart home experience. Staying informed about these trends will allow you to continue upgrading and optimizing your home security for years to come.
Conclusion: A Safer Home in Under 3 Hours with DIY Motion Sensor Technology
Upgrading your home’s security with a DIY motion sensor system doesn’t have to be a daunting or expensive task. As demonstrated, with careful planning and a methodical approach, you can significantly enhance your home’s protective capabilities in under three hours. This project empowers you with control, offers immense flexibility, and frees you from recurring professional monitoring fees.
By understanding the different types of sensors, strategic placement, and effective integration with your smart home ecosystem, you create a robust and intelligent defense against potential threats. The peace of mind that comes from knowing your home is secure, tailored to your exact specifications, and managed by you, is invaluable. Embrace the power of smart technology and take the proactive step towards a safer, smarter home today. Your DIY motion sensor installation is just the beginning of a truly connected and protected living space.


