Maximize Energy Savings: DIY Smart Thermostat Installation in 45 Minutes for 2026’s Coldest Months
As the chill of 2026 approaches, many homeowners are looking for effective ways to reduce their energy consumption and lower utility bills. One of the most impactful upgrades you can make to your home is installing a smart thermostat. This isn’t just about convenience; it’s about intelligent energy management that can save you a significant amount of money over time. The best part? You don’t need to be a professional electrician or HVAC technician to get it done. With the right guidance, a DIY Smart Thermostat installation can be completed in as little as 45 minutes, transforming your home’s heating and cooling efficiency almost instantly.
This comprehensive guide will walk you through every step of the process, from understanding why a smart thermostat is a wise investment to selecting the perfect model for your home, and finally, installing it with confidence. We’ll demystify the wiring, explain the features, and ensure you’re ready to embrace a smarter, more energy-efficient future. Prepare to gain control over your home’s climate like never before and enjoy the comfort and savings that come with it.
Why Upgrade to a Smart Thermostat? The Unbeatable Benefits
Before diving into the nuts and bolts of a DIY Smart Thermostat installation, it’s crucial to understand the profound benefits these devices offer. A traditional thermostat merely turns your heating or cooling system on and off based on a set temperature. A smart thermostat, however, is a sophisticated piece of technology designed to optimize your home’s climate control, leading to substantial energy savings and enhanced comfort.
Energy Efficiency and Cost Savings
This is arguably the primary reason most homeowners make the switch. Smart thermostats learn your preferences and schedule, adjusting temperatures automatically. Many models offer features like:
- Learning Algorithms: They observe your habits – when you’re home, when you’re away, what temperatures you prefer – and create an optimized schedule without you lifting a finger.
- Geofencing: This feature uses your smartphone’s location to detect when you leave or approach your home, automatically adjusting the temperature to save energy when you’re out and ensuring it’s comfortable when you return.
- Energy Usage Reports: Most smart thermostats provide detailed insights into your energy consumption, allowing you to identify patterns and make informed decisions to further reduce usage.
- Remote Access: Control your thermostat from anywhere in the world using a smartphone app. Forgot to turn down the heat before leaving for vacation? No problem!
These features collectively contribute to significant reductions in your heating and cooling costs, often paying for themselves within a year or two. The Department of Energy estimates that homeowners can save an average of 10-12% on heating and 15% on cooling by simply turning back their thermostat 7-10 degrees Fahrenheit for 8 hours a day from its normal setting.
Enhanced Comfort and Convenience
Beyond savings, smart thermostats elevate your home comfort. Imagine waking up to a perfectly warm house on a cold winter morning, or returning home to a comfortably cool living space after a long day – all without having to manually adjust anything. The remote control capabilities mean you can change the temperature from your couch, bed, or even another city. Integration with smart home ecosystems like Amazon Alexa, Google Assistant, and Apple HomeKit also allows for voice control, adding another layer of convenience.
Environmental Impact
By reducing your energy consumption, you’re not only saving money but also contributing to a healthier planet. Lower energy use means a smaller carbon footprint, supporting sustainability efforts and reducing reliance on non-renewable energy sources. A DIY Smart Thermostat installation is a step towards a greener home.
Choosing the Right Smart Thermostat: What to Look For
The market is flooded with various smart thermostat models, each boasting different features and compatibility. Selecting the right one for your home and HVAC system is crucial for a successful DIY Smart Thermostat project. Here’s what to consider:
HVAC System Compatibility
This is the most critical factor. Smart thermostats are compatible with a wide range of HVAC systems, but not all are universal. Most modern smart thermostats work with conventional (forced air) and heat pump systems. Key things to check:
- C-Wire (Common Wire): Many smart thermostats require a C-wire to provide continuous power. Without it, some models might not work, or they might rely on battery power which can be less reliable. Check your existing thermostat’s wiring for a C-wire. If you don’t have one, some smart thermostats come with an adapter, or you might need a professional to install one.
- Voltage: Ensure the smart thermostat’s voltage requirements match your system (usually 24V AC for residential systems).
- Stages of Heating/Cooling: If your system has multiple stages of heating or cooling (e.g., two-stage furnace), ensure the smart thermostat supports this.
Features and Functionality
Consider which smart features are most important to you:
- Learning Capability: Do you want a thermostat that learns your schedule automatically (like Nest) or one where you manually program it (like Ecobee, though it also has smart features)?
- Geofencing: Essential for maximizing savings if your schedule is unpredictable.
- Room Sensors: Some models (like Ecobee) come with remote sensors to monitor temperature in different rooms, providing a more balanced home temperature.
- Voice Assistant Integration: If you use Alexa, Google Assistant, or Siri, ensure seamless integration.
- HVAC Monitoring and Alerts: Some thermostats can alert you to potential system issues or when it’s time for maintenance.
- Design and Display: While secondary, the aesthetic appeal and ease of use of the display can be a factor.
Cost and Brand Reputation
Smart thermostats range in price from around $100 to $300+. Popular brands include Nest, Ecobee, Honeywell Home, and Emerson Sensi. Research reviews and choose a brand known for reliability and good customer support, especially if this is your first DIY Smart Thermostat project.
Pre-Installation Checklist: Gather Your Tools and Information
Preparation is key to a smooth DIY Smart Thermostat installation. Before you even touch a screwdriver, gather everything you’ll need and perform a few preliminary checks.
Tools You’ll Need:
- Screwdriver Set: Phillips and flathead.
- Pencil: For marking screw holes.
- Drill (optional): If new wall anchors are needed.
- Wire Strippers (optional): If wires need to be trimmed or re-stripped.
- Needle-Nose Pliers (optional): For bending wires.
- Level: To ensure your new thermostat is straight.
- Your Smartphone/Tablet: For the smart thermostat app and setup.
- A Small Flashlight or Headlamp: To see into the wall cavity if needed.
Information to Gather:
- Existing Thermostat Wiring Photo: Take a clear picture of how your current thermostat is wired before disconnecting anything. This is your safety net!
- HVAC System Type: Know if you have a conventional system, heat pump, boiler, etc.
- C-Wire Presence: Visually confirm if you have a C-wire. If not, check your smart thermostat’s instructions for alternatives or C-wire adapter installation.
- New Smart Thermostat Manual: Have it handy, either physical or digital.
- Wi-Fi Network Name and Password: You’ll need this for setup.
The 45-Minute DIY Smart Thermostat Installation Guide
Now, let’s get to the main event! Follow these steps carefully for a quick and successful DIY Smart Thermostat installation.
Step 1: Power Down Your HVAC System (5 minutes)
Crucial Safety Step: Go to your circuit breaker panel and turn off the power to your furnace or air handler. This is typically labeled ‘Furnace,’ ‘AC,’ or ‘HVAC.’ Do NOT skip this step. Test your old thermostat to ensure it’s off – it shouldn’t respond when you try to change the temperature.
Step 2: Remove Your Old Thermostat (5 minutes)
- Detach the Faceplate: Most thermostats have a faceplate that snaps off or is held by small screws. Gently remove it.
- Photograph the Wiring: As mentioned, take a clear, close-up photo of the wires connected to the terminals. This is your safety net! Note the color of each wire and the letter of the terminal it’s connected to (e.g., Red to R, White to W, Yellow to Y, Green to G, Blue/Black to C).
- Label the Wires: Your new smart thermostat likely comes with small labels. Attach the correct label to each wire as you disconnect it from the old thermostat. If wires are not labeled, use masking tape and a marker based on your photo.
- Disconnect Wires: Use a screwdriver to loosen the terminal screws and carefully pull out each wire.
- Remove the Backplate: Unscrew the old thermostat’s backplate from the wall.

Step 3: Install the New Smart Thermostat Backplate (15 minutes)
- Thread Wires: Pull the bundle of wires through the center hole of your new smart thermostat’s backplate.
- Position and Mark: Hold the new backplate against the wall, ensuring it’s level. Use a pencil to mark the new screw holes.
- Drill Pilot Holes (if needed): If the new screw holes don’t align with the old ones, or if you’re drilling into drywall without existing anchors, use a drill to create pilot holes for the new wall anchors provided with your thermostat. Insert the anchors.
- Mount the Backplate: Securely screw the new backplate to the wall.
Step 4: Wire Your New Smart Thermostat (10 minutes)
This is where your photo and wire labels come in handy. Refer to your smart thermostat’s specific wiring diagram, as terminal designations can vary slightly between brands.
- Connect Wires: Match each labeled wire to the corresponding terminal on the new backplate. Gently push the wire into the terminal or wrap it around the screw, then tighten the screw. Ensure no bare wire is touching other terminals.
- C-Wire Connection: If you have a C-wire, connect it to the ‘C’ terminal. If you don’t and your thermostat requires it, consult your manual for C-wire alternatives (e.g., power extender kit) or consider contacting a professional if you’re uncomfortable.
- Tuck Wires: Gently push any excess wire back into the wall opening to create a neat installation.
Step 5: Attach the Smart Thermostat Faceplate (5 minutes)
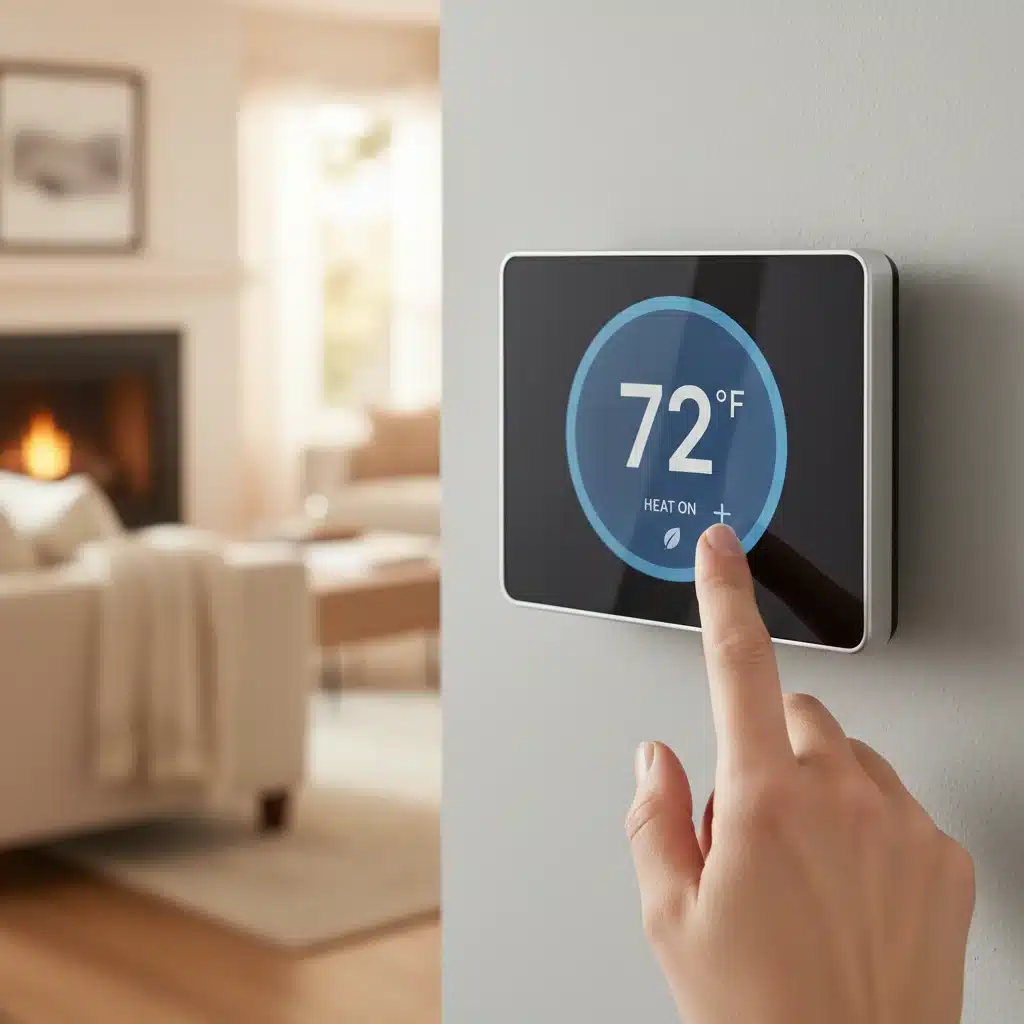
Carefully align the smart thermostat faceplate with the mounted backplate and push it firmly until it clicks into place. Do not force it.
Step 6: Power On and Initial Setup (5 minutes)
- Restore Power: Go back to your circuit breaker and turn the power back on to your HVAC system.
- Follow On-Screen Prompts: Your new smart thermostat will power on and guide you through the initial setup. This typically includes:
- Selecting your language.
- Connecting to your home Wi-Fi network (you’ll need your Wi-Fi name and password).
- Configuring your HVAC system type (e.g., conventional, heat pump, number of stages).
- Setting up your location (for weather data and geofencing).
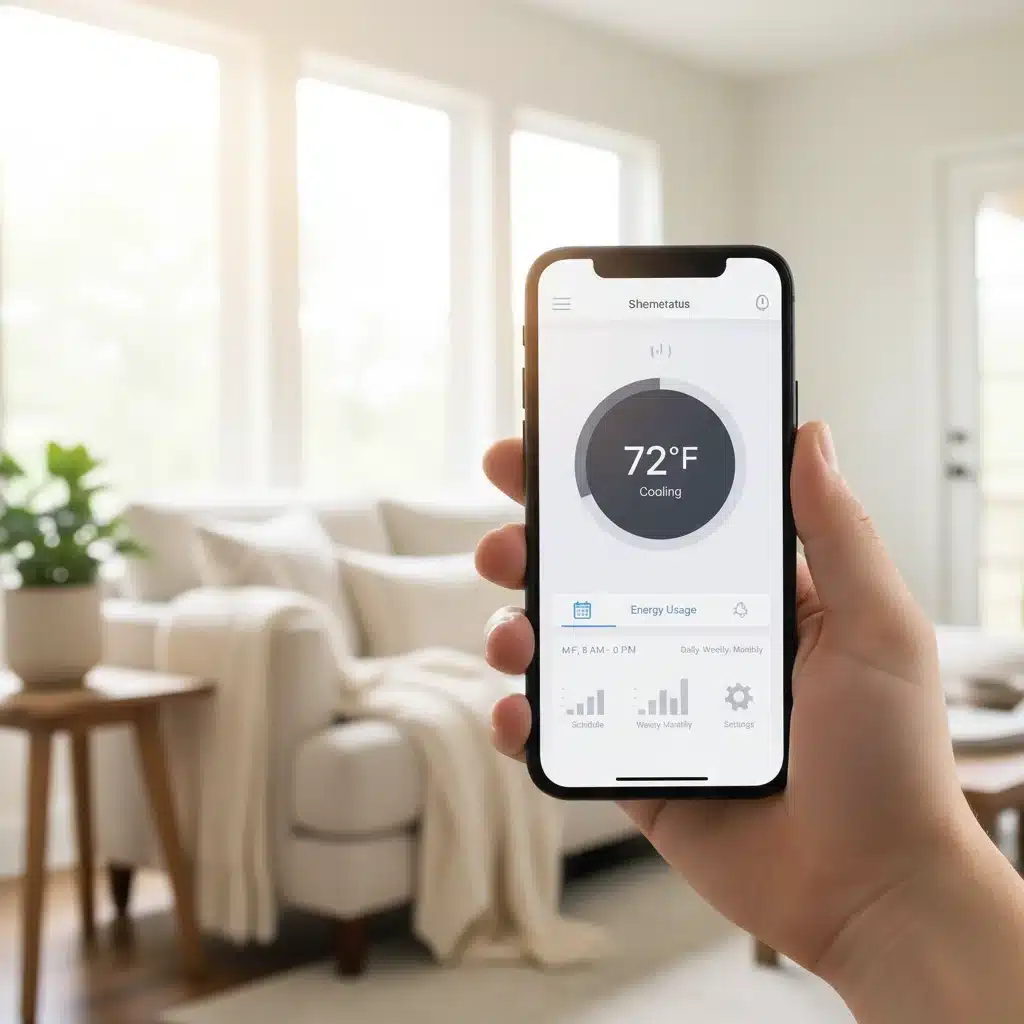
- Download the App: Download the smart thermostat’s companion app to your smartphone or tablet and create an account. This is where you’ll unlock most of its advanced features and remote control capabilities.
Post-Installation: Optimizing Your Smart Thermostat for Maximum Savings
Once your DIY Smart Thermostat is installed and configured, the real fun begins: optimizing it to save maximum energy and enhance your comfort. Don’t just set it and forget it – interact with its features to truly harness its power.
Calibrate and Test Your System
After initial setup, test both heating and cooling functions to ensure everything is working correctly. Set the temperature a few degrees above and below the current room temperature to verify that your furnace and AC kick on as expected. Some smart thermostats also offer a calibration function to ensure accurate temperature readings.
Leverage Learning and Scheduling Features
- Learning Mode: If your thermostat has a learning mode, let it run for a week or two. It will observe your habits and suggest an optimized schedule. Review and refine this schedule as needed.
- Manual Scheduling: If you prefer more control or have a very consistent schedule, manually program your thermostat. Set different temperatures for when you’re home, away, asleep, or on vacation.
- Geofencing: Activate geofencing if available. This feature is incredibly effective for saving energy when your schedule is unpredictable, as it automatically adjusts the temperature based on your proximity to home.
Utilize Advanced Settings and Integrations
- Room Sensors: If your model supports them, place room sensors in frequently used areas or rooms that tend to be hotter/colder than others. This helps average the temperature for better comfort and efficiency.
- Smart Home Integration: Connect your smart thermostat to your existing smart home ecosystem (Alexa, Google Assistant, HomeKit). This allows for voice control and the creation of routines or automations (e.g., ‘Good Morning’ routine turns on lights and sets thermostat to comfortable temperature).
- Energy Reports: Regularly check the energy usage reports provided by the app. These insights can help you identify peak usage times and areas where you can further optimize your settings.
- Fan Control: Explore fan settings. Running the fan periodically can help circulate air and even out temperatures without engaging the heating or cooling system.
Seasonal Adjustments and Maintenance
Remember to adjust your smart thermostat settings seasonally. While it’s smart, a little human input goes a long way. For example, during summer, you might want to increase the set point when you’re away to save on cooling, and in winter, decrease it to save on heating. Also, ensure your HVAC filters are clean, as a dirty filter can significantly reduce efficiency, even with a smart thermostat in place.
Troubleshooting Common DIY Smart Thermostat Issues
While a DIY Smart Thermostat installation is generally straightforward, you might encounter a few hiccups. Here are some common issues and their solutions:
No Power to Thermostat After Installation
- Check Breaker: First, ensure the power to your HVAC system is back on at the circuit breaker.
- C-Wire Connection: The most common culprit. Double-check that the C-wire is securely connected at both the thermostat and the furnace control board (if applicable). If you don’t have a C-wire and your thermostat requires it, you’ll need to install a power extender kit or consult an HVAC professional.
- Loose Wires: Ensure all wires are firmly seated in their terminals and not loose.
HVAC System Not Responding (No Heating/Cooling)
- Wiring Check: Re-verify all wire connections against your photo and the thermostat’s manual. A single misplaced wire can cause the system not to respond.
- System Type Configuration: During initial setup, ensure you correctly selected your HVAC system type (e.g., conventional, heat pump, number of stages). Incorrect configuration can prevent proper operation.
- Safety Switches: Some furnaces have safety switches on the access panel. Ensure all furnace covers are securely in place, as an open panel can prevent the system from running.
Wi-Fi Connectivity Issues
- Router Distance: Ensure your thermostat isn’t installed near a drafty window, vent, or direct sunlight, which can skew readings.
- Password: Double-check your Wi-Fi password. It’s case-sensitive.
- Network Compatibility: Most smart thermostats work on 2.4 GHz Wi-Fi networks. If you have a dual-band router, ensure your thermostat is connecting to the 2.4 GHz band.
- Router Reboot: Sometimes, simply rebooting your Wi-Fi router can resolve connectivity problems.
Inaccurate Temperature Readings
- Drafts: Ensure your thermostat isn’t installed near a drafty window, vent, or direct sunlight, which can skew readings.
- Calibration: Check if your thermostat has a calibration option in its settings to fine-tune the temperature sensor.
If you’ve exhausted these troubleshooting steps and are still facing issues, don’t hesitate to consult your smart thermostat’s customer support or consider calling a qualified HVAC technician. While a DIY Smart Thermostat installation is designed to be user-friendly, professional help is always an option when complex electrical or HVAC issues arise.
The Future is Smart: Embracing Home Automation
Installing a DIY Smart Thermostat is often the first step many homeowners take into the exciting world of home automation. Once you experience the convenience, savings, and control it offers, you might find yourself eager to integrate other smart devices into your home. Smart lighting, smart locks, security cameras, and smart plugs can all work in harmony with your thermostat, creating an interconnected and intelligent living space.
Imagine a scenario where your smart thermostat communicates with your smart blinds, adjusting them to block sunlight on hot days, further reducing the load on your AC. Or perhaps your smart lighting adjusts based on whether your thermostat detects you’re home or away. The possibilities are vast and continually expanding.
Moreover, as technology evolves, smart thermostats are becoming even more sophisticated, integrating with utility companies for demand-response programs, predicting weather patterns with greater accuracy, and offering more granular control over individual zones in your home. By taking on this DIY Smart Thermostat project, you’re not just upgrading a device; you’re investing in the future of your home and setting the stage for greater energy independence and technological integration.
Conclusion: A Smarter, More Efficient Home Awaits
The prospect of a DIY Smart Thermostat installation might seem daunting at first, but as this guide demonstrates, it’s a perfectly achievable project for most homeowners. In just 45 minutes, you can replace your old, inefficient thermostat with a modern, intelligent device that will deliver significant energy savings, enhance your home’s comfort, and provide unparalleled convenience. As 2026’s coldest months draw near, there’s no better time to take control of your home’s climate and energy consumption.
By carefully following the steps, understanding your HVAC system, and leveraging the smart features of your new thermostat, you’ll not only save money on your utility bills but also contribute to a more sustainable lifestyle. Embrace the power of smart technology and enjoy a perfectly comfortable home, all year round, with the satisfaction of having achieved it yourself. Your smarter, more efficient home starts now.


