DIY Smart Thermostat Installation: Save 10% on Costs by 2026
A DIY smart thermostat installation can significantly reduce home heating and cooling costs by at least 10% by 2026, offering enhanced control and energy efficiency through intelligent climate management.
Are you looking to take control of your home’s energy consumption and save money? A DIY smart thermostat installation is one of the most impactful upgrades you can make, promising to reduce your heating and cooling costs by an impressive 10% or more by 2026. This comprehensive guide will walk you through everything you need to know, from selecting the right device to mastering advanced energy-saving techniques.
Understanding the benefits of smart thermostats in 2026
Smart thermostats have evolved significantly, becoming indispensable tools for modern homeowners striving for energy efficiency and comfort. In 2026, these devices offer more than just remote control; they integrate advanced algorithms, machine learning, and seamless connectivity to optimize your home’s climate control system like never before.
The primary appeal of a smart thermostat lies in its ability to learn your habits and adjust temperatures accordingly. This predictive capability means less wasted energy when you’re away or asleep, leading directly to lower utility bills. Beyond mere savings, smart thermostats contribute to a more comfortable living environment by maintaining consistent temperatures and allowing for personalized scheduling.
Beyond basic temperature control
Modern smart thermostats offer a suite of features that go far beyond simply turning your HVAC system on or off. These innovations are key to maximizing your energy savings and enhancing your home’s intelligence.
- Geofencing: Automatically adjusts your home’s temperature based on your proximity, ensuring comfort upon arrival and savings when you depart.
- Energy reporting: Provides detailed insights into your energy usage, helping you identify patterns and areas for further optimization.
- Zone control: For homes with multiple thermostats or zoned systems, smart thermostats can manage different areas independently, preventing over-heating or over-cooling in unused spaces.
- Integration with smart home ecosystems: Seamlessly connects with other smart devices, like smart lighting or voice assistants, for a unified home automation experience.
Embracing a smart thermostat in 2026 means investing in a device that actively works to understand and adapt to your lifestyle. This proactive approach to climate management is what drives the substantial 10% or more reduction in heating and cooling costs, making it a wise investment for any homeowner.
Choosing the right smart thermostat for your home
Selecting the ideal smart thermostat is the first critical step in your DIY smart thermostat installation journey. The market is saturated with options, each boasting unique features and compatibility requirements. Understanding your home’s HVAC system, personal preferences, and budget will guide you toward the best choice.
Before making a purchase, verify your HVAC system’s compatibility. Most smart thermostats work with 24V common wire (C-wire) systems. If your current thermostat doesn’t have a C-wire, you might need an adapter or a model specifically designed for systems without one. Researching the specific wiring requirements is crucial to avoid complications later.
Key features to consider
When evaluating different models, focus on features that align with your energy-saving goals and lifestyle. Not all smart thermostats are created equal, and understanding the nuances can lead to greater satisfaction and savings.
- Compatibility: Ensure it works with your HVAC system (e.g., conventional, heat pump, multi-stage).
- Learning capabilities: Some thermostats learn your schedule and preferences automatically, while others require manual programming.
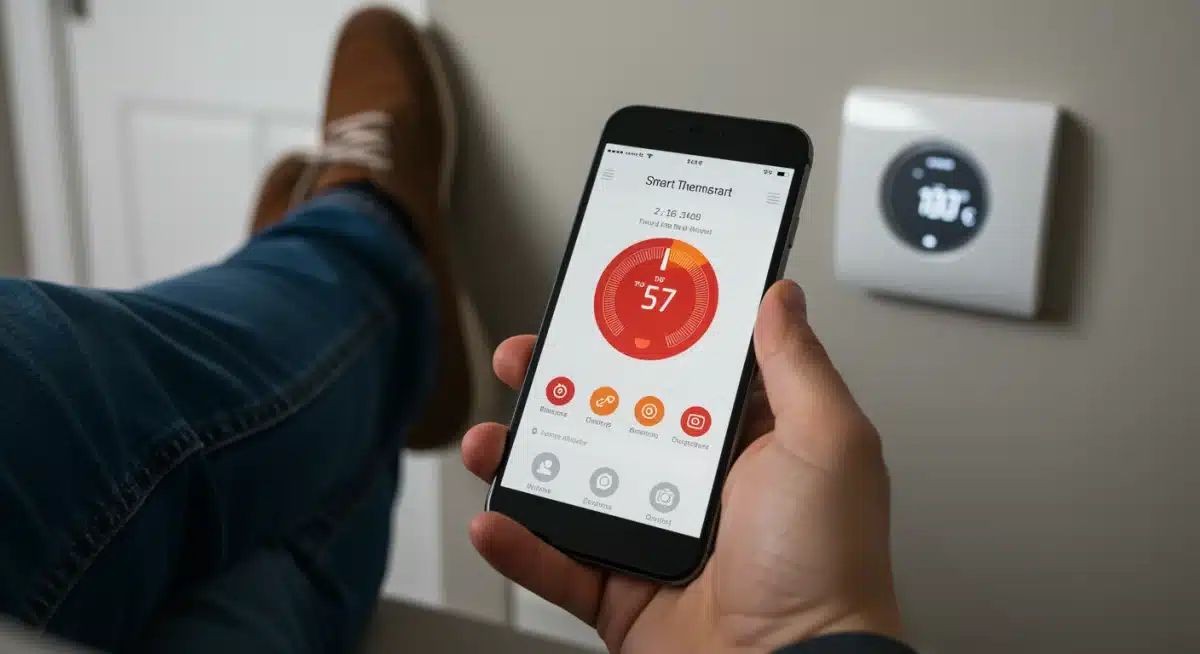
- App interface: A user-friendly mobile app is essential for convenient remote control and monitoring.
- Integration: Check for compatibility with your existing smart home ecosystem (e.g., Amazon Alexa, Google Home, Apple HomeKit).
- Sensors: Some models offer additional room sensors to monitor temperature in different areas of your home, addressing hot or cold spots.
Consider reading reviews from other users and consulting comparison guides to weigh the pros and cons of popular models like Nest, Ecobee, and Honeywell Home. Each brand offers distinct advantages, and the best choice ultimately depends on your specific needs and technical comfort level. Making an informed decision here will set the stage for a successful and rewarding DIY installation.
Preparing for your DIY smart thermostat installation
A successful DIY smart thermostat installation hinges on thorough preparation. Gathering the right tools, understanding safety precautions, and mapping out your existing wiring are essential steps before you even touch a screwdriver. This preparation minimizes surprises and ensures a smooth transition to your new smart climate control system.
First and foremost, safety should be your top priority. Always turn off the power to your HVAC system at the circuit breaker before beginning any work. This prevents electrical shocks and protects your equipment from potential damage. Double-check that the power is off by trying to adjust your old thermostat and confirming the system does not respond.
Tools and preliminary checks
Having the correct tools on hand will make the installation process much easier and more efficient. Most smart thermostat kits come with basic mounting hardware, but a few additional items will be helpful.
- Screwdriver set: Phillips and flathead screwdrivers for removing the old thermostat and mounting the new one.
- Needle-nose pliers: Useful for straightening or bending wires if necessary.
- Wire stripper: If your existing wires are worn or too short, you might need to strip a bit more insulation.
- Pencil and camera: For labeling wires and taking pictures of your old wiring setup.
- Wall patching compound and paint: To cover any holes or marks left by the old thermostat, if needed.
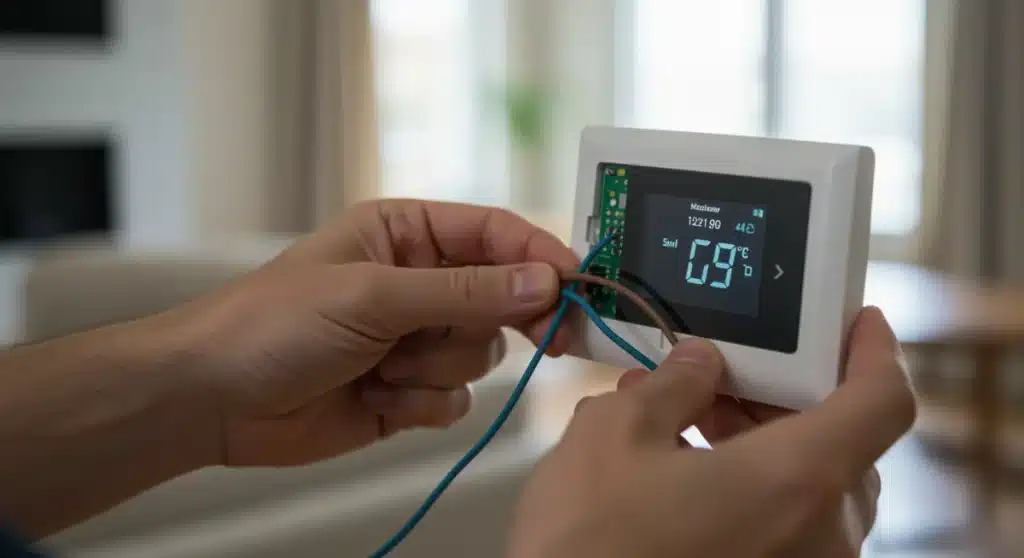
Before disconnecting anything, take a clear photo of your old thermostat’s wiring. This visual reference will be invaluable when connecting the new wires. Label each wire with the corresponding terminal letter from your old thermostat. Many smart thermostats come with adhesive labels for this purpose. This meticulous preparation ensures you’re ready for a confident and error-free installation.
Step-by-step DIY installation guide
With proper preparation, the actual DIY smart thermostat installation can be a straightforward process. Following these steps carefully will ensure your new device is correctly installed and ready to start saving you money on energy bills.
Remove your old thermostat. After turning off the power and documenting the wiring, gently unscrew the old thermostat from the wall plate. Disconnect the wires, making sure to keep them labeled as per your preparation. Some older thermostats may have mercury switches; handle these with care and dispose of them responsibly according to local regulations.
Mounting and wiring your new smart thermostat
Once the old thermostat is removed, you can begin installing the new one. Most smart thermostats come with a backplate that needs to be mounted to the wall.
- Mount the backplate: Use the provided screws and anchors to securely attach the new thermostat’s backplate to the wall. Ensure it’s level for a professional look.
- Connect the wires: Refer to your photo and labels from the previous step. Connect each wire to its corresponding terminal on the new smart thermostat’s backplate. Push the wires firmly into the terminals until they are secure.
- Attach the thermostat display: Once all wires are connected, carefully snap or push the smart thermostat’s display unit onto the mounted backplate.
- Restore power: Go back to your circuit breaker and turn the power back on to your HVAC system.
After restoring power, your new smart thermostat should power on and guide you through an initial setup process on its display or via its mobile app. This typically involves connecting to your Wi-Fi network, calibrating temperature sensors, and setting up basic schedules. Following these steps meticulously will lead to a successful installation and the beginning of your energy-saving journey.
Optimizing your smart thermostat for maximum savings
Installing your smart thermostat is only the beginning. To truly achieve the promised 10% or more reduction in heating and cooling costs by 2026, you need to actively optimize its settings and leverage its advanced features. This involves understanding your home’s energy consumption patterns and fine-tuning the thermostat to work efficiently with your lifestyle.
Begin by allowing your smart thermostat to learn your habits. Many models have an adaptive learning period where they observe when you’re home, when you sleep, and your preferred temperatures. The more data it gathers, the more effectively it can create an optimized schedule that balances comfort and energy savings.
Advanced energy-saving strategies
Beyond basic scheduling, several advanced features and practices can further enhance your savings. These strategies utilize the intelligence built into modern smart thermostats.
- Geofencing activation: If your thermostat supports geofencing, activate it. This feature uses your smartphone’s location to know when you’re leaving or approaching home, automatically adjusting temperatures to save energy when you’re out and ensuring comfort when you return.
- Energy reports analysis: Regularly review the energy usage reports provided by your thermostat’s app. These reports can highlight peak usage times and suggest adjustments to your schedule or settings.
- Away mode utilization: Manually activate ‘away mode’ if you’re leaving for an extended period, even if geofencing is enabled, for an extra layer of savings.
- Temperature setbacks: Implement significant temperature setbacks during sleeping hours or when the house is unoccupied. Even a few degrees can make a noticeable difference in energy consumption.
Consider integrating your smart thermostat with other smart home devices. For instance, linking it to smart window sensors can prevent your AC from running when a window is open. Continuously monitoring and adjusting your settings based on seasonal changes and personal comfort will ensure you’re maximizing your energy savings potential, well into 2026 and beyond.
Troubleshooting common DIY installation issues
Even with careful planning, occasional issues can arise during a DIY smart thermostat installation. Knowing how to troubleshoot common problems can save you time, frustration, and potentially the cost of a professional service call. Most issues can be resolved with a systematic approach to diagnosis.
The most frequent problem encountered is the thermostat not powering on after installation. This often indicates a wiring issue, most commonly a missing or incorrectly connected C-wire. The C-wire provides continuous power to the smart thermostat, which older systems might not have. Double-check all terminal connections against your initial photo and the thermostat’s wiring diagram.
Addressing connectivity and operational problems
Beyond initial power, other issues might involve network connectivity or the thermostat’s ability to control your HVAC system effectively.
- Wi-Fi connection failures: Ensure your home Wi-Fi network is active and the password is correct. Move your router closer or use a Wi-Fi extender if the signal is weak near the thermostat.
- HVAC system not responding: If the thermostat is powered on but not controlling heating or cooling, re-verify all wiring connections. Sometimes a loose wire is the culprit. Also, ensure your thermostat is correctly configured for your specific HVAC system type (e.g., conventional furnace, heat pump).
- Inaccurate temperature readings: This can occur if the thermostat is exposed to direct sunlight, drafts, or is too close to heat-generating appliances. Relocating the thermostat or using remote sensors can help.
- Short cycling: If your HVAC system turns on and off too frequently, it could be a thermostat setting issue. Review the thermostat’s advanced settings for cycle rates or consult its user manual for recommended configurations.
If you’ve exhausted all troubleshooting steps and the issue persists, don’t hesitate to contact the manufacturer’s customer support. They can often provide specific guidance for their product. In rare cases, a professional HVAC technician might be needed, especially if the problem points to a deeper issue with your heating and cooling system rather than the thermostat itself.
The future of smart climate control: 2026 and beyond
As we look towards 2026 and beyond, the evolution of smart climate control promises even greater efficiency, comfort, and integration within our homes. The impact of a DIY smart thermostat installation today will only grow as technology continues to advance, offering new ways to save energy and enhance our living spaces.
Expect to see more sophisticated AI and machine learning capabilities embedded in smart thermostats. These advancements will enable thermostats to predict energy needs with even greater accuracy, adapting not just to your schedule but also to real-time weather forecasts, grid demand, and even the occupancy patterns of individual rooms through advanced sensor networks. This level of predictive control will push energy savings beyond the current 10% benchmark.
Emerging trends and innovations
Several key trends are shaping the future of smart climate control, making homes more intelligent and responsive than ever before.
- Enhanced interoperability: Smart thermostats will seamlessly integrate with an even wider array of smart home devices and platforms, creating truly unified and automated environments.
- Grid-responsive capabilities: Future thermostats will communicate directly with utility providers to optimize energy consumption during off-peak hours or participate in demand-response programs, further reducing costs and supporting grid stability.
- Personalized thermal comfort: Advances in wearable technology and individual sensors will allow smart thermostats to cater to the specific thermal preferences of different individuals within the same household.
- Sustainable materials and design: Manufacturers will increasingly focus on producing smart thermostats using eco-friendly materials and designs, aligning with broader sustainability goals.
The journey of smart climate control is an ongoing one, continually seeking to blend technological innovation with environmental responsibility and user comfort. By performing a DIY smart thermostat installation today, you are not just saving money; you are investing in a future where your home intelligently manages its resources, contributing to a more sustainable and comfortable lifestyle for years to come.
| Key Point | Brief Description |
|---|---|
| Cost Savings | DIY installation can reduce heating/cooling costs by 10% or more by 2026. |
| Smart Features | Geofencing, energy reports, and learning capabilities optimize usage. |
| Installation Prep | Turn off power, label wires, and have tools ready for a smooth process. |
| Troubleshooting | Address common issues like power, Wi-Fi, or HVAC response before calling a pro. |
Frequently asked questions about smart thermostat installation
Homeowners can expect to save, on average, between 10% and 15% on their annual heating and cooling bills after installing a smart thermostat. These savings are achieved through intelligent scheduling, geofencing, and optimized energy usage patterns learned by the device over time, leading to significant reductions by 2026.
While many smart thermostats require a C-wire (common wire) for continuous power, some models are designed to operate without one, often using a power extender kit or internal battery. It’s crucial to check the specific requirements of your chosen smart thermostat model before purchase to ensure compatibility with your HVAC system.
For most homeowners with basic DIY skills, a smart thermostat installation can be completed in about 30 minutes to an hour. This timeframe includes removing the old thermostat, wiring the new one, and performing the initial setup. Proper preparation, like labeling wires, can significantly streamline the process.
Yes, numerous studies and user experiences confirm that smart thermostats can reduce energy consumption by 10% or more. This is primarily due to their ability to learn household routines, optimize temperature settings, and enable remote control, preventing unnecessary heating or cooling when nobody is home or during sleep.
If you face problems during installation, first re-check all wiring connections against the manufacturer’s guide and your initial photos. Most issues stem from incorrect wiring or a lack of C-wire. If troubleshooting doesn’t resolve the problem, contact the thermostat manufacturer’s support or consider calling a professional HVAC technician for assistance.
Conclusion
The journey toward a more energy-efficient and comfortable home is greatly facilitated by a DIY smart thermostat installation. By embracing this technology, homeowners are not just upgrading a device; they are adopting a smarter, more sustainable way of living. The potential to reduce heating and cooling costs by 10% or more by 2026 is a tangible benefit that combines with enhanced convenience and environmental responsibility, making it an invaluable addition to any modern smart home.


