DIY Smart Thermostat Integration: 20% HVAC Efficiency in 3 Months
Achieving a 20% HVAC efficiency improvement within three months is attainable through advanced DIY smart thermostat integration, leveraging precise control and automation to minimize energy waste and maximize comfort.
Are you ready to transform your home’s energy consumption and significantly reduce your utility bills? Mastering DIY smart thermostat integration can unlock remarkable HVAC efficiency, potentially delivering a 20% improvement within just three months. This guide will walk you through the advanced techniques and considerations to achieve substantial energy savings and enhanced comfort.
Understanding the Core of Smart Thermostat Technology
Before diving into integration, it’s crucial to grasp what makes smart thermostats ‘smart.’ These devices go far beyond basic temperature control, offering advanced features that learn your habits, respond to external conditions, and provide granular control over your home’s climate.
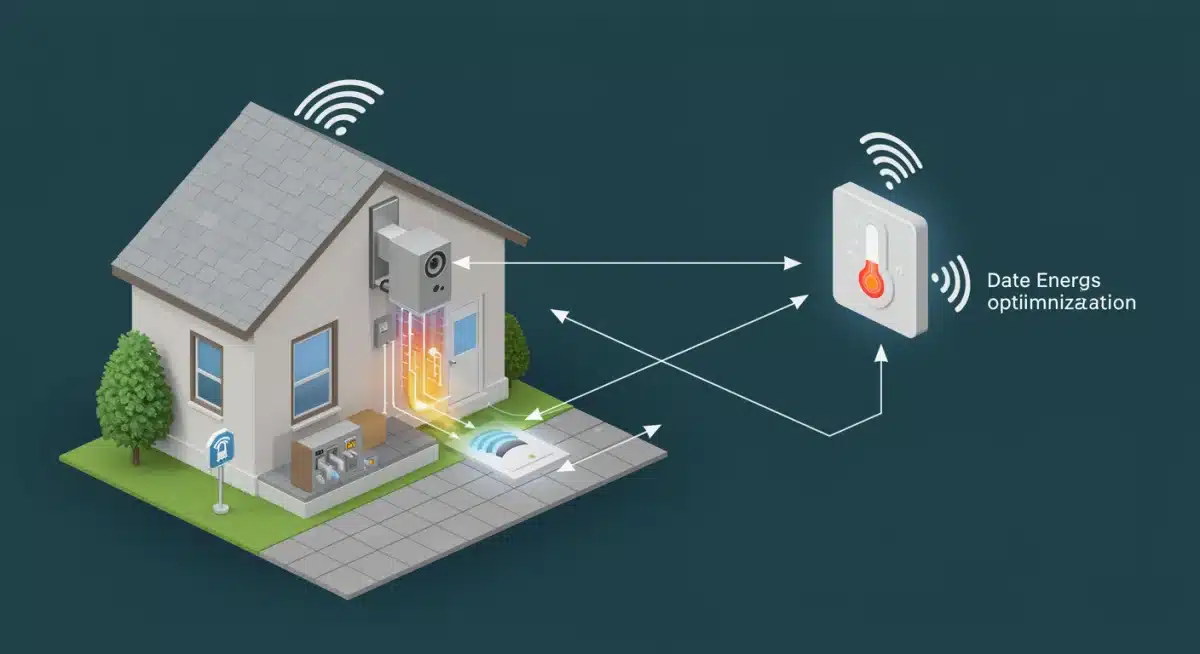
Smart thermostats leverage a combination of sensors, Wi-Fi connectivity, and sophisticated algorithms to optimize your HVAC system’s operation. This intelligent approach allows for proactive adjustments, ensuring comfort when needed and conserving energy when not.
Key Features for Enhanced Efficiency
Modern smart thermostats come equipped with an array of features designed to maximize energy savings. Understanding these capabilities is the first step toward effective DIY integration and achieving your 20% efficiency goal.
- Learning Capabilities: Many models learn your schedule and preferences, automatically adjusting temperatures.
- Geofencing: Uses your phone’s location to know when you’re home or away, saving energy by adjusting temperatures accordingly.
- Remote Access: Control your thermostat from anywhere via a smartphone app, providing convenience and immediate adjustments.
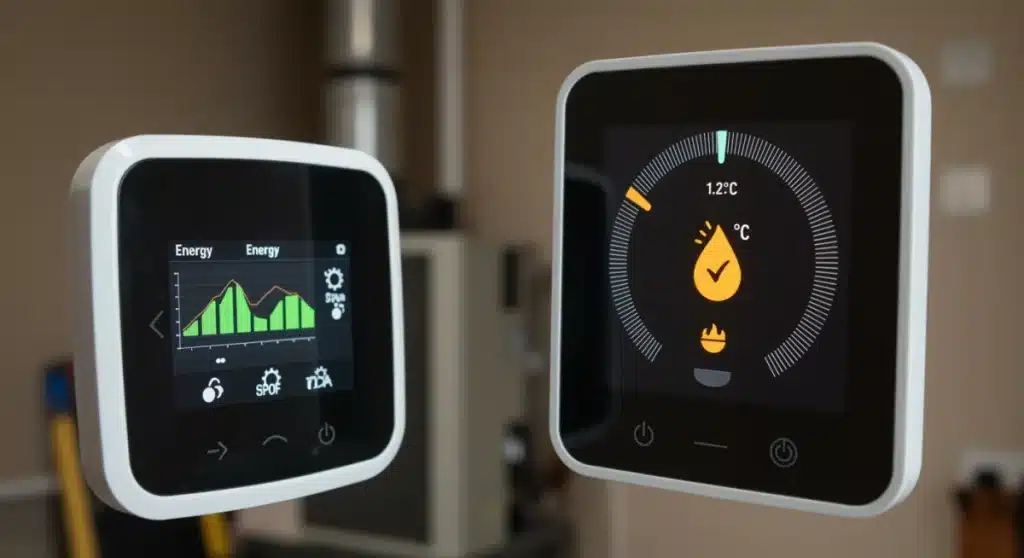
- Energy Reporting: Provides detailed insights into your energy usage, helping you identify areas for further optimization.
By understanding these core functionalities, you can better select a smart thermostat that aligns with your home’s specific needs and your efficiency aspirations. These features are not just conveniences; they are tools for active energy management.
Pre-Installation Checklist: Preparing for Advanced Integration
Successful DIY smart thermostat integration hinges on thorough preparation. This isn’t just about unboxing a new device; it involves assessing your existing HVAC system, understanding your home’s wiring, and ensuring compatibility. Skipping these steps can lead to frustration and potential damage.
A well-prepared installation ensures a smooth transition and immediately sets the stage for optimizing your HVAC system. It also mitigates common issues that DIYers encounter, saving time and effort in the long run.
HVAC System Compatibility and Wiring Basics
The most critical aspect of preparation is verifying compatibility. Not all smart thermostats work with all HVAC systems. You’ll need to check your system’s voltage and wiring configuration, particularly the presence of a ‘C-wire’ (common wire), which provides continuous power to the smart thermostat.
If your system lacks a C-wire, don’t despair. Many smart thermostats offer alternative solutions, such as power extenders or adapters, though these might add a bit more complexity to the installation process. Always consult the product’s specifications and your HVAC system manual.
- Identify your HVAC system type: Conventional (furnace and AC), heat pump, or dual fuel.
- Locate and photograph your existing thermostat wiring: This provides a crucial reference during installation.
- Check for a C-wire: Essential for most smart thermostats; if absent, plan for an alternative power source.
- Gather necessary tools: Screwdrivers, wire strippers, and a voltage tester are typically required.
Taking the time to complete this checklist meticulously will prevent headaches down the line and ensure your DIY smart thermostat integration is robust and reliable from day one.
Step-by-Step DIY Installation and Configuration
Once your preparations are complete, the actual installation process can begin. While specific steps vary slightly between models, the general sequence remains consistent. Focusing on meticulous execution will ensure safety and optimal performance.
This phase is where your research and preparation pay off. Following the manufacturer’s instructions precisely, combined with these general guidelines, will lead to a successful setup and lay the groundwork for achieving significant efficiency gains.
Mounting, Wiring, and Initial Setup
Begin by safely turning off power to your HVAC system at the circuit breaker. This is a critical safety step. Carefully remove your old thermostat, labeling each wire before disconnecting it. This prevents confusion during the new thermostat’s wiring.
Mount the new smart thermostat’s base plate, connect the labeled wires to their corresponding terminals, and then attach the thermostat display. Once physically installed, restore power and proceed with the in-app guided setup, connecting to your home Wi-Fi network and configuring initial settings.
- Safety first: Always turn off power to your HVAC system before handling wires.
- Label wires meticulously: Use the provided labels or masking tape to mark each wire.
- Follow in-app instructions: Smart thermostat apps guide you through the Wi-Fi connection and initial programming.
- Test all functions: Ensure heating, cooling, and fan modes operate correctly after installation.
A successful installation is the foundation for your journey towards 20% HVAC efficiency. Don’t rush this stage; precision here will save you troubleshooting time later.
Advanced Optimization Strategies for 20% HVAC Efficiency
Simply installing a smart thermostat is only half the battle. To truly achieve a 20% HVAC efficiency improvement within three months, you need to delve into advanced optimization strategies. This involves fine-tuning settings, leveraging automation features, and understanding your home’s unique energy profile.
The goal is to move beyond basic programming and embrace the full potential of your smart device. This proactive approach to energy management is what differentiates significant savings from marginal improvements.
Leveraging Schedules, Geofencing, and Integrations
Beyond basic daily schedules, consider creating dynamic schedules that account for variations in your weekly routine. Utilize geofencing to its fullest, ensuring your system automatically adjusts when you leave and return, preventing unnecessary heating or cooling of an empty home.
Integrate your smart thermostat with other smart home devices, such as smart sensors. Door/window sensors can tell your thermostat to pause operation if a window is open, while occupancy sensors can refine temperature adjustments based on actual room usage. This interconnectedness creates a more responsive and efficient system.
- Refine scheduling: Create detailed programs for weekdays, weekends, and holidays.
- Calibrate geofencing: Adjust the radius for optimal energy savings without sacrificing comfort.
- Integrate with smart sensors: Use occupancy or contact sensors for smarter climate control.
- Monitor energy reports: Regularly review usage data to identify patterns and areas for improvement.
These advanced techniques transform your smart thermostat from a simple controller into a sophisticated energy management hub, directly contributing to your 20% efficiency target.
Monitoring and Fine-Tuning for Sustained Savings
Achieving initial efficiency gains is commendable, but sustaining and even improving upon them requires ongoing monitoring and fine-tuning. Your home’s energy needs can change with seasons, lifestyle adjustments, and even minor system wear.
Regular oversight ensures that your smart thermostat continues to operate at peak efficiency, adapting to new conditions and maintaining your 20% HVAC efficiency improvement over time. This continuous feedback loop is vital for long-term success.
Interpreting Energy Reports and Making Adjustments
Most smart thermostats provide detailed energy usage reports, often accessible through their companion apps. These reports are invaluable. They show you exactly when your HVAC system is running, how much energy it’s consuming, and how your settings are impacting performance.
Look for anomalies or unexpected spikes in usage. Are there particular times of day when your system works harder than it should? This might indicate a need to adjust schedules, check for drafts, or even consider minor HVAC maintenance. Use these insights to make informed adjustments to your thermostat’s programming.
- Analyze daily and monthly energy trends: Identify peak usage times and potential inefficiencies.
- Adjust temperature setbacks: Experiment with slightly wider temperature ranges when away or asleep.
- Seasonal recalibration: Modify schedules and settings as seasons change to optimize for heating or cooling.
- Check for system performance issues: Unexplained high usage could signal a need for HVAC servicing.
By actively engaging with your smart thermostat’s data and making iterative adjustments, you ensure that your DIY smart thermostat integration continues to deliver maximum energy savings and comfort.
Troubleshooting Common Issues and Maintaining Your System
Even with meticulous planning and installation, you might encounter minor issues during your DIY smart thermostat integration journey. Knowing how to troubleshoot common problems can prevent frustration and keep your system running efficiently.
Proactive maintenance of both your smart thermostat and the broader HVAC system also plays a critical role in sustaining performance and achieving your long-term efficiency goals. A well-maintained system operates more effectively and consumes less energy.
Addressing Connectivity Problems and Sensor Malfunctions
Connectivity issues are among the most common smart home challenges. If your thermostat loses Wi-Fi connection, first check your router and internet service. Restarting both the router and the thermostat can often resolve temporary glitches. Ensure your Wi-Fi signal is strong where the thermostat is located.
Sensor malfunctions, such as inaccurate temperature readings, can sometimes be caused by placement (e.g., direct sunlight, near a draft). Recalibrating the thermostat or checking for debris obstructing external sensors can help. In persistent cases, contacting customer support or consulting online forums specific to your thermostat model can provide solutions.
- Wi-Fi troubleshooting: Restart router and thermostat, check signal strength, and update firmware.
- Temperature calibration: Manually adjust temperature offset if readings seem inaccurate.
- HVAC filter replacement: Regularly change filters to maintain airflow and system efficiency.
- Software updates: Keep your smart thermostat’s firmware up to date for optimal performance and security.
By being prepared to troubleshoot and committing to regular maintenance, you ensure the longevity and continued efficiency of your DIY smart thermostat integration, safeguarding your 20% HVAC efficiency gains.
| Key Aspect | Brief Description |
|---|---|
| Preparation | Assess HVAC compatibility, check wiring (C-wire), and gather tools before installation. |
| Installation | Safely wire the new thermostat, connect to Wi-Fi, and complete initial app setup. |
| Optimization | Leverage geofencing, advanced scheduling, and smart home integrations for efficiency. |
| Monitoring | Regularly review energy reports and fine-tune settings for sustained savings. |
Frequently Asked Questions About Smart Thermostat Efficiency
Many users report noticeable energy savings within the first month, with significant improvements, like a 20% HVAC efficiency gain, typically achievable within three months of advanced integration and optimization. Consistent monitoring and fine-tuning are key to maximizing these benefits.
While most modern smart thermostats require a C-wire for continuous power, some models offer alternatives such as power extenders, adapters, or internal batteries. Always check your chosen thermostat’s specific requirements and your HVAC system’s wiring before purchase to ensure compatibility.
Yes, many smart thermostats are designed to integrate seamlessly with other smart home ecosystems, like Google Home, Amazon Alexa, or Apple HomeKit. This allows for enhanced automation, such as adjusting temperature based on occupancy sensors or window contacts, further boosting efficiency.
If your energy bills aren’t decreasing, review your thermostat’s settings, schedules, and geofencing parameters. Ensure no windows or doors are left open frequently. Also, consider having your HVAC system professionally inspected, as underlying issues can hinder efficiency regardless of thermostat type.
It’s recommended to review your smart thermostat’s energy reports at least monthly. This allows you to track trends, identify potential inefficiencies, and make timely adjustments to your programming. Seasonal changes often necessitate recalibration for optimal performance and savings.
Conclusion
Embarking on DIY smart thermostat integration is a powerful step towards a more energy-efficient and comfortable home. By meticulously preparing, carefully installing, and diligently optimizing your system, you can realistically achieve a 20% HVAC efficiency improvement within a mere three months. This journey not only translates to significant cost savings but also contributes to a more sustainable lifestyle, proving that smart home technology, when thoughtfully implemented, delivers tangible and lasting benefits.


