DIY Smart Door Locks: Enhance Home Security in Under 90 Minutes for 2026 Peace of Mind
In an increasingly connected world, the concept of home security has evolved far beyond traditional deadbolts and alarm systems. Welcome to the era of DIY Smart Locks, where cutting-edge technology meets user-friendly installation to provide unparalleled peace of mind. For 2026 and beyond, safeguarding your home is not just about keeping intruders out; it’s about smart access, seamless integration, and ultimate convenience. This comprehensive guide will walk you through everything you need to know about upgrading your home with DIY smart door locks, proving that enhanced security doesn’t have to be a complex, costly, or time-consuming endeavor. In fact, you might be surprised to learn that you can transform your home’s entry points in under 90 minutes!
The Evolution of Home Security: Why Choose DIY Smart Locks?
For decades, home security relied on physical keys and mechanical locks. While reliable to a certain extent, these systems were prone to vulnerabilities like lost keys, lock-picking, and the hassle of rekeying. The advent of smart home technology has revolutionized this landscape, introducing smart door locks that offer a multitude of benefits:
- Enhanced Security: Beyond physical barriers, smart locks offer features like tamper alerts, remote monitoring, and multi-factor authentication (keypad codes, fingerprint, app control).
- Unmatched Convenience: Say goodbye to fumbling for keys. Unlock your door with a tap on your smartphone, a unique code, or even your fingerprint. Grant temporary access to guests or service providers remotely.
- Seamless Integration: Most smart locks integrate effortlessly with existing smart home ecosystems (Google Home, Amazon Alexa, Apple HomeKit), allowing for automated routines and centralized control.
- Cost-Effectiveness: While the initial investment might be higher than a traditional lock, the long-term benefits in security, convenience, and potentially lower insurance premiums can offset the cost. DIY installation further saves on professional fees.
- Peace of Mind: Knowing you can check your door’s status from anywhere, or receive notifications of unusual activity, provides an invaluable sense of security.
The beauty of DIY Smart Locks lies in their accessibility. Manufacturers have designed these devices with the average homeowner in mind, ensuring that installation is straightforward and requires minimal tools or specialized knowledge. This democratization of advanced security technology means that you no longer need to be a tech guru or hire an expensive professional to secure your home effectively.
Understanding Your Options: Types of DIY Smart Locks
Before diving into installation, it’s crucial to understand the different types of DIY smart locks available. Each type offers unique features and caters to different needs and preferences:
1. Keypad Smart Locks
These locks replace your traditional deadbolt with a keypad, allowing you to unlock your door by entering a numerical code. Many also retain a physical keyhole for backup access. Keypad locks are popular for their simplicity and the ability to create multiple unique codes for different users.
2. Bluetooth Smart Locks
Bluetooth locks connect directly to your smartphone via Bluetooth. You can unlock your door when you’re within range, typically a few feet. While convenient, their range is limited, making them less ideal for remote access unless paired with a Wi-Fi bridge.
3. Wi-Fi Smart Locks
Wi-Fi enabled locks connect directly to your home’s Wi-Fi network, allowing for remote control and monitoring from anywhere with an internet connection. These are often considered the most versatile but can consume more battery power than other types.
4. Z-Wave and Zigbee Smart Locks
These locks use dedicated wireless protocols (Z-Wave or Zigbee) to communicate with a central smart home hub. They offer excellent range, reliability, and energy efficiency, making them ideal for larger smart home ecosystems. However, they require a compatible hub.
5. Fingerprint Smart Locks (Biometric)
For ultimate keyless convenience and security, biometric smart locks use fingerprint recognition. These are often combined with keypads or traditional keyholes as backup options. They offer rapid access and eliminate the need to remember codes or carry keys.
6. Smart Lock Adapters/Converters
If you love your existing deadbolt but want smart features, some devices convert your current lock into a smart lock by replacing only the interior thumb-turn. These are often the easiest to install and are a great entry point into DIY Smart Locks.
When selecting your smart lock, consider factors like your existing smart home ecosystem, desired features (remote access, guest codes, voice control), battery life, and budget. Reading reviews and comparing models is essential to find the perfect fit for your home.
Preparation is Key: What You’ll Need for DIY Smart Lock Installation
One of the most appealing aspects of DIY Smart Locks is the minimal toolkit required. Before you begin, gather the following:
- Your chosen smart lock: Ensure all components are present in the box.
- Phillips head screwdriver: Most smart locks only require this.
- Measuring tape or ruler: To check door dimensions if needed.
- New batteries: Smart locks are battery-powered; fresh batteries are crucial.
- Your smartphone: For app download and setup.
- A stable internet connection: Essential for Wi-Fi and hub-connected locks.
- User manual: Always refer to the specific instructions for your model.
Before you even open the box, take a moment to inspect your existing door and deadbolt. Most DIY smart locks are designed to fit standard doors, but it’s good practice to ensure your door thickness and backset (distance from the door edge to the center of the bore hole) are compatible. This information is usually detailed in the smart lock’s product specifications. A quick measurement can save you a lot of hassle later.
The 90-Minute Challenge: Step-by-Step DIY Smart Lock Installation
Ready to transform your home security? Follow these general steps, keeping in mind that specific instructions may vary slightly depending on your smart lock model. This process is designed to be completed efficiently, often well within 90 minutes.
Step 1: Remove Your Existing Deadbolt (5-10 minutes)
Begin by removing the screws from the interior side of your existing deadbolt. Once these are out, the interior and exterior halves of the deadbolt, along with the latch mechanism, should easily separate from the door. Keep these screws and parts in a safe place, as you might need them if you ever revert to a traditional lock, or for comparison during installation.
Step 2: Install the New Latch Mechanism (10-15 minutes)
Most smart locks come with a new latch mechanism. Slide this into the bore hole on the edge of your door, ensuring the "UP" arrow (if present) is facing the correct direction. Secure it with the provided screws. Make sure the latch operates smoothly by testing it with a screwdriver or by hand.
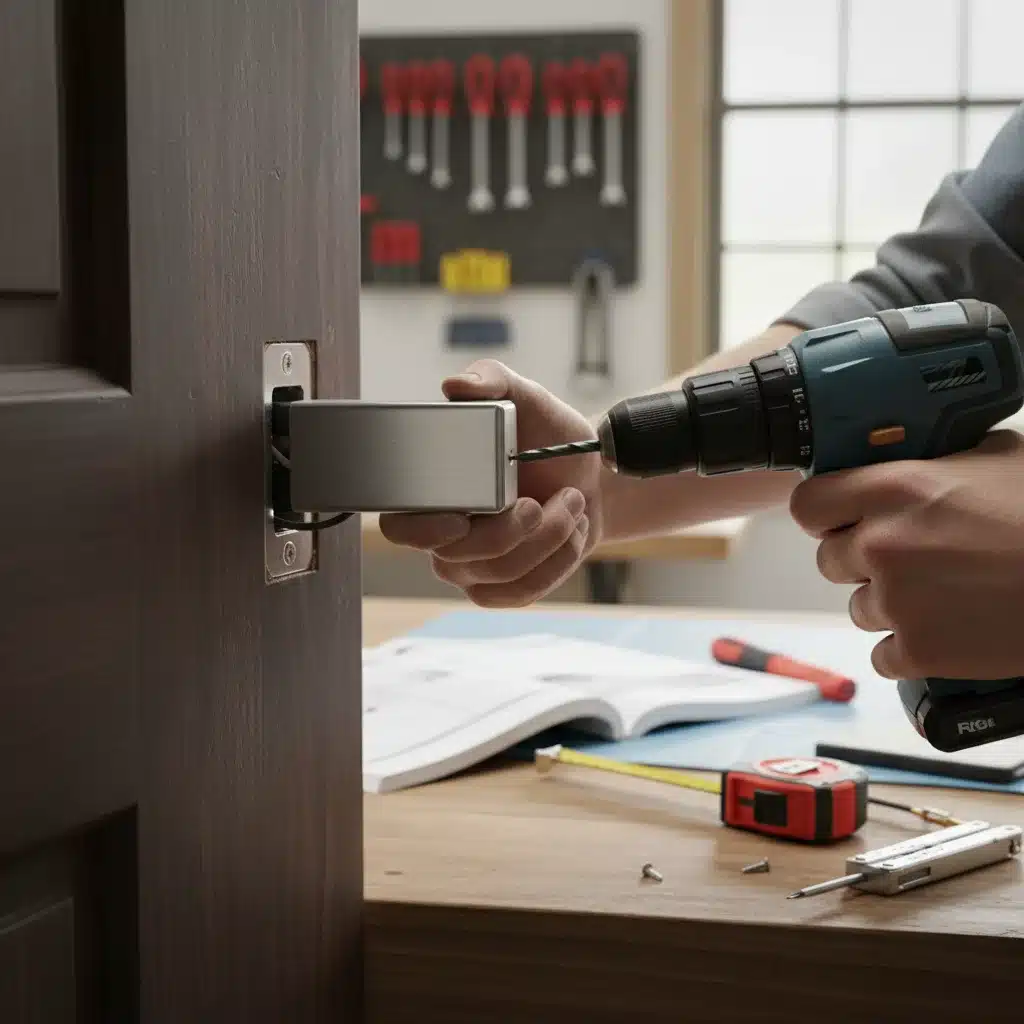
Step 3: Install the Exterior Keypad/Assembly (15-20 minutes)
Feed the data cable (if applicable) from the exterior smart lock assembly through the bore hole in your door. Position the exterior assembly so it aligns with the latch mechanism. It should sit flush against the door. Some models may require a mounting plate on the exterior side first.
Step 4: Install the Interior Mounting Plate (10-15 minutes)
On the interior side of the door, align the interior mounting plate over the bore hole and the exterior assembly’s data cable. Secure the mounting plate to the exterior assembly using the long screws provided. Ensure it’s snug but don’t overtighten, as this can cause binding. The data cable should pass through the opening in the mounting plate.
Step 5: Connect the Data Cable and Install the Interior Assembly (15-20 minutes)
Carefully connect the data cable from the exterior assembly to the corresponding port on the interior smart lock assembly. This connection is usually a simple plug-in. Once connected, align the interior assembly with the mounting plate and secure it with the remaining screws. Ensure the thumb-turn (if present) is oriented correctly.
Step 6: Insert Batteries and Test (5-10 minutes)
Insert the recommended batteries into the battery compartment of the interior assembly. Your smart lock should power on, often indicated by a series of beeps or lights. Manually test the deadbolt by turning the thumb-turn to ensure it extends and retracts smoothly without resistance. If it binds, slightly loosen the mounting screws and reposition the components until it operates freely.
Step 7: Download the App and Configure Settings (15-20 minutes)
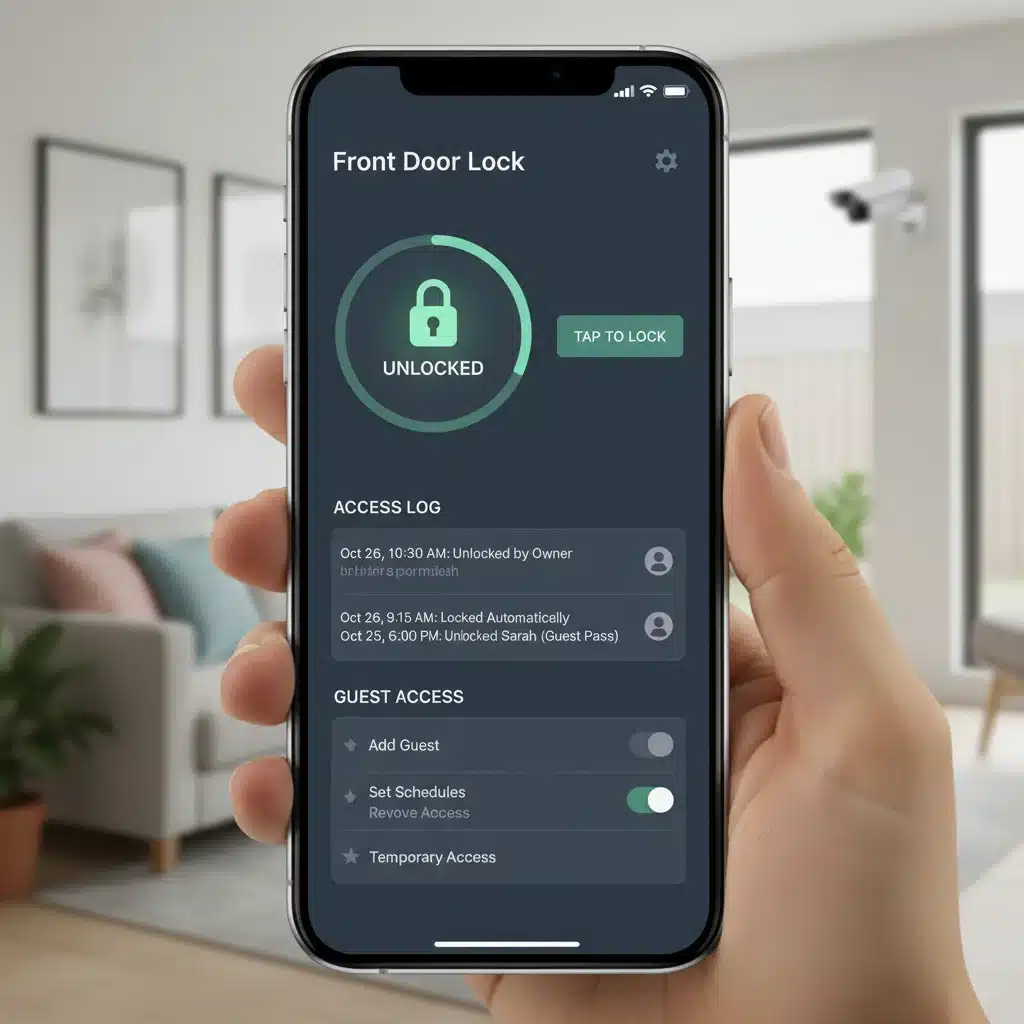
This is where the "smart" part of your lock comes to life. Download the manufacturer’s dedicated app to your smartphone. Follow the in-app instructions to pair your smart lock with your device and home network. This typically involves creating an account, discovering the lock, and connecting it to your Wi-Fi or smart home hub. During this step, you’ll set up your master access code, add user codes, configure auto-lock features, and integrate with voice assistants if desired.
Step 8: Final Checks and Adjustments (5-10 minutes)
Once configured, perform a series of tests: manually lock and unlock, use a keypad code, try the app’s lock/unlock feature, and test any voice commands you’ve set up. Ensure all features work as expected. Check that the door closes properly and the deadbolt fully extends into the strike plate without resistance. If not, minor adjustments to the strike plate on the door frame might be necessary.
Congratulations! You’ve successfully installed your DIY Smart Locks. The entire process, with a little focus and adherence to instructions, can indeed be completed in under 90 minutes, providing you with a significantly upgraded home security system.
Maximizing Your DIY Smart Locks: Advanced Features and Tips
Installation is just the beginning. To truly leverage the power of your DIY Smart Locks for 2026 and beyond, explore these advanced features and tips:
Virtual Keys and Guest Access
Most smart locks allow you to create temporary or permanent virtual keys and unique access codes for family members, friends, pet sitters, or delivery services. You can often set schedules for these codes, ensuring they only work during specific times or dates. This eliminates the need to hide spare keys or worry about lost access.
Auto-Lock and Auto-Unlock
Enhance convenience and security with auto-lock features that automatically lock your door after a set period of time (e.g., 30 seconds, 5 minutes). Some advanced models offer auto-unlock based on geofencing, unlocking your door as you approach your home and locking it as you leave. This means never having to worry if you remembered to lock the door again.
Activity Logs and Alerts
Keep track of who enters and exits your home with detailed activity logs accessible through your smart lock app. Many locks also send real-time notifications to your smartphone when the door is locked, unlocked, or if there’s any unusual activity like tampering attempts. This proactive monitoring is a cornerstone of modern home security.
Voice Control Integration
Integrate your smart lock with voice assistants like Amazon Alexa, Google Assistant, or Apple Siri. "Alexa, lock the front door," or "Hey Google, is the back door locked?" offers hands-free control and adds another layer of convenience to your smart home.
Smart Home Automation
Connect your smart lock to other smart home devices to create powerful automation routines. For example:
- When the front door unlocks, turn on the entryway lights.
- When the back door locks, arm your security system.
- If the smart lock detects an unauthorized entry, trigger an alarm and notify you.
These integrations elevate your home from merely smart to truly intelligent, responding to your needs and enhancing security automatically.
Regular Maintenance and Updates
Just like any electronic device, smart locks benefit from regular maintenance. Keep the keypad clean, and periodically check battery levels. More importantly, ensure your smart lock’s firmware is always up to date. Manufacturers frequently release updates to improve security, add new features, and fix bugs. These updates are usually managed through the smart lock’s app.
Troubleshooting Common DIY Smart Lock Issues
Even with straightforward installation, you might encounter minor hiccups. Here are some common issues and their solutions:
- Lock Binding/Not Operating Smoothly: This is often due to misalignment. Loosen the mounting screws slightly, adjust the interior and exterior assemblies, and re-tighten. Ensure the deadbolt is centered in the bore hole and the strike plate. Sometimes, adjusting the strike plate on the door frame can help.
- Battery Drain: Frequent Wi-Fi activity or poor signal strength can drain batteries faster. Consider a Wi-Fi extender or a smart lock that uses Z-Wave/Zigbee with a hub for better efficiency. Ensure you’re using high-quality alkaline batteries.
- Connectivity Problems: If your lock isn’t connecting to Wi-Fi or your hub, check your router/hub’s proximity, signal strength, and internet connection. Try restarting your router and the smart lock. Ensure the smart lock app is updated.
- Keypad Not Responding: Check battery levels first. If batteries are fine, try cleaning the keypad. A factory reset (refer to your manual) might be necessary if the issue persists.
- App Issues: If the app isn’t working correctly, try force-closing and reopening it. Ensure your phone’s operating system and the app itself are updated.
Most manufacturers offer excellent customer support and extensive online resources to help with troubleshooting. Don’t hesitate to consult your user manual or contact support if you’re stuck.
The Future of Home Security: Beyond 2026 with DIY Smart Locks
As we look towards 2026 and beyond, the landscape of home security will continue to evolve rapidly. DIY Smart Locks are at the forefront of this revolution, becoming increasingly sophisticated and integrated. We can anticipate:
- Enhanced AI and Machine Learning: Smart locks will become even smarter, learning your routines and proactively identifying unusual patterns, offering predictive security.
- Seamless Biometric Integration: Beyond fingerprints, facial recognition and even gait analysis might become standard features, offering truly effortless and secure access.
- Matter and Thread Protocol Adoption: These new smart home standards promise even greater interoperability, making it easier to connect devices from different manufacturers and create robust, future-proof smart home ecosystems.
- Energy Harvesting Technologies: Innovations in low-power communication and energy harvesting could lead to smart locks that require less frequent battery changes, or even self-powering models.
- Advanced Threat Detection: Integration with more sophisticated sensors (e.g., vibration, sound) could allow smart locks to detect attempted forced entry with greater accuracy and speed.
By embracing DIY Smart Locks today, you’re not just upgrading your home security; you’re investing in a future-ready home that prioritizes safety, convenience, and intelligent living. The ease of installation means that this powerful technology is within reach for virtually any homeowner, proving that enhancing your home’s defenses doesn’t require a professional locksmith or a hefty price tag. Take the plunge, and experience the peace of mind that comes with a truly smart, secure home.
Conclusion: Your Home, Smarter and Safer
The journey to a smarter, more secure home begins at your doorstep. With DIY Smart Locks, you have the power to transform your entry points into intelligent gateways, offering unparalleled control, convenience, and protection. From selecting the right type of lock to a straightforward installation process that can be completed in under 90 minutes, the path to enhanced home security has never been more accessible. Embrace the future of home automation and enjoy the peace of mind that comes with knowing your home is secured by the latest technology, tailored to your needs, and managed right from your fingertips. Upgrade your home’s defenses today and step confidently into 2026 with a smarter, safer living space.