In an era where energy costs are constantly on the rise and environmental consciousness is paramount, optimizing our home’s energy consumption has become more than just a trend—it’s a necessity. Among the myriad of ways to reduce your carbon footprint and save money, DIY smart lighting stands out as one of the most accessible and impactful upgrades. Imagine controlling your home’s illumination with a tap of a button, a voice command, or even based on your daily schedule, all while significantly cutting down your electricity bill. This isn’t science fiction; it’s the reality of modern smart homes, and you can achieve it yourself.
The promise of smart lighting goes beyond mere convenience. It offers a tangible path to substantial energy savings. Our goal with this comprehensive guide is to empower you with the knowledge and steps to implement DIY smart lighting upgrades that can help you achieve a remarkable 25% energy saving by July 2026. This isn’t an ambitious, out-of-reach target; it’s a realistic outcome when you strategically transition to smart lighting solutions. By focusing on practical, actionable steps, we’ll demystify the process, making it easy for even novice DIY enthusiasts to embrace the future of home lighting.
From understanding the basics of smart lighting technology to selecting the right components and setting up automated routines, this article will walk you through everything you need to know. We’ll explore the benefits, address common concerns, and provide a clear roadmap to a more energy-efficient and intelligent home. So, if you’re ready to take control of your energy consumption and enjoy the myriad advantages of a smarter living space, let’s dive into the world of DIY smart lighting.
The Power of DIY Smart Lighting: More Than Just Convenience
When most people think of smart lighting, they often envision the convenience of turning lights on or off from their smartphone. While this is certainly a significant benefit, the true power of DIY smart lighting extends far beyond simple remote control. It’s about creating an intelligent ecosystem that adapts to your life, enhances your comfort, and, most importantly, optimizes your energy usage in ways traditional lighting simply cannot. This is where the 25% energy saving target becomes not just achievable but a natural outcome of thoughtful implementation.
Understanding the Energy-Saving Potential
Traditional lighting systems are inherently inefficient. Lights are often left on unnecessarily, consuming power even when a room is unoccupied or when natural light is abundant. Smart lighting tackles this inefficiency head-on through several mechanisms:
- LED Technology: The foundation of almost all smart lighting is LED (Light Emitting Diode) technology. LEDs consume significantly less energy than incandescent bulbs (up to 90% less) and have a much longer lifespan. Upgrading to LEDs alone is a major step towards energy efficiency, but combining them with smart controls amplifies the savings.
- Occupancy Sensors: Smart lighting systems can integrate with motion or occupancy sensors. Lights automatically turn on when someone enters a room and, crucially, turn off after a set period of inactivity. This eliminates wasted energy from lights being left on in empty rooms.
- Daylight Harvesting: Many smart lighting systems can detect ambient light levels. If there’s enough natural light streaming in, the smart lights can automatically dim or turn off, ensuring you’re only using artificial light when and where it’s truly needed.
- Scheduling and Routines: With smart lighting, you can set precise schedules for when lights turn on, turn off, or dim. This is perfect for simulating occupancy when you’re away, ensuring lights are off when you’re typically asleep, or gradually dimming them as bedtime approaches.
- Remote Control and Geo-fencing: Ever left the house wondering if you turned off all the lights? With remote control via your smartphone, you can check and adjust your lights from anywhere. Geo-fencing can even automatically turn lights off when you leave a certain perimeter around your home and turn them on as you approach.
By leveraging these features, you’re not just upgrading your lights; you’re upgrading your home’s intelligence. This holistic approach to illumination management is what makes DIY smart lighting systems a cornerstone of a truly energy-efficient smart home. The initial investment, which we’ll discuss, is quickly recouped through consistent energy bill reductions, making it a financially sound decision in the long run.
Step 1: Assess Your Current Lighting and Set Clear Goals
Before you dive into buying smart bulbs and hubs, the first crucial step in any successful DIY smart lighting project is a thorough assessment of your current lighting setup and a clear definition of your goals. This foundational work will ensure you make informed decisions and avoid unnecessary expenses or compatibility headaches.
Conducting a Lighting Audit
Walk through every room in your home and make a note of:
- Types of Bulbs: Are you currently using incandescent, CFL, or existing LED bulbs? This will inform what type of smart bulbs you’ll need.
- Fixture Types: Note down the types of fixtures (e.g., standard screw-in, recessed cans, track lighting, dimmable fixtures). This impacts compatibility with smart bulbs or smart switches.
- Usage Patterns: Which lights are used most frequently? Which are often left on by accident? Identifying high-usage or problematic areas will help prioritize your smart upgrades for maximum impact on energy savings.
- Areas with Natural Light: Identify rooms that receive significant natural light. These are prime candidates for daylight harvesting features.
- Existing Smart Home Devices: Do you already have a smart speaker (Google Home, Amazon Echo) or a smart home hub? This can influence your choice of smart lighting ecosystem.
Defining Your Smart Lighting Goals
Beyond the overarching 25% energy saving goal, think about what you want to achieve with DIY smart lighting control:
- Primary Objective: Is it purely energy savings, convenience, ambiance, security, or a combination?
- Control Methods: Do you prefer voice control, app control, smart switches, or sensors?
- Integration: Do you want your lights to integrate with other smart home devices (e.g., thermostat, security cameras)?
- Budget: Establish a realistic budget for your initial phase and potential future expansions.
By understanding your current situation and clearly defining your aspirations, you’ll be well-prepared to select the right smart lighting components that align with your needs and help you effectively achieve your energy-saving target. This strategic planning is the bedrock of successful DIY smart lighting installation.
Step 2: Choose Your Smart Lighting Ecosystem and Components
With a clear understanding of your needs, the next step is to select the right smart lighting ecosystem and the specific components that will bring your vision to life. This is where the world of DIY smart lighting products opens up, offering a variety of options to suit different preferences and technical comfort levels.
Hub-Based vs. Hub-less Systems
- Hub-Based Systems (e.g., Philips Hue, Lutron Caseta): These systems use a central bridge or hub that connects to your home router. The hub then communicates with your smart lights using a dedicated protocol (like Zigbee or Clear Connect).
- Pros: More reliable connection, can handle a larger number of devices, often offers more advanced features and integrations, less strain on your Wi-Fi network.
- Cons: Requires an additional piece of hardware (the hub), potentially higher initial cost.
- Hub-less Systems (e.g., many Wi-Fi bulbs like TP-Link Kasa, Sengled Wi-Fi): These bulbs connect directly to your home’s Wi-Fi network.
- Pros: Simpler setup, lower initial cost (no hub required), great for starting with a few smart lights.
- Cons: Can strain your Wi-Fi network with many devices, potentially slower response times, fewer advanced features compared to hub-based systems.
For achieving significant energy savings and robust home automation, a hub-based system often provides more stability and scalability, especially if you plan to expand your DIY smart lighting network throughout your entire home.
Key Smart Lighting Components
- Smart Bulbs: These are the most common entry point. They come in various shapes, sizes, and color temperatures (white, tunable white, full color). Ensure they match your existing fixture sockets (e.g., E26, E12, GU10). Look for energy-efficient LED bulbs.
- Smart Switches/Dimmers: If you want to make existing non-smart bulbs smart, or prefer traditional wall switch control, smart switches or dimmers are excellent. They replace your standard wall switches and can control a whole circuit of lights. This is particularly useful for fixtures with multiple bulbs or built-in LEDs that aren’t easily replaced.
- Smart Plugs: For lamps or other devices that plug into an outlet, a smart plug can turn them on/off or dim them (if the plug supports dimming and the lamp is dimmable).
- Motion/Occupancy Sensors: Crucial for automating lights in high-traffic areas like hallways, bathrooms, and closets, ensuring lights are only on when needed. This is a key component for maximizing energy savings with DIY smart lighting automation.
- Daylight Sensors: Some systems offer dedicated daylight sensors that can be placed near windows to monitor ambient light and adjust artificial lighting accordingly.
Consider compatibility. Most smart lighting brands are compatible with major smart home platforms like Amazon Alexa, Google Assistant, and Apple HomeKit. Check for these integrations if you plan to use voice control or integrate with other smart devices. Making the right choices here lays the groundwork for an efficient and enjoyable DIY smart lighting experience.
Step 3: Installation and Setup of Your DIY Smart Lighting
Once you’ve selected your smart lighting ecosystem and components, it’s time for installation and setup. This is often the most hands-on part of your DIY smart lighting project, but with a little patience and attention to detail, it’s perfectly manageable for most homeowners.
1. Hub Installation (if applicable)
If you opted for a hub-based system, your first step will be to set up the hub:
- Power Up: Plug the hub into a power outlet.
- Connect to Router: Connect the hub to your home router using an Ethernet cable.
- Download App: Download the manufacturer’s dedicated app to your smartphone or tablet.
- Follow In-App Instructions: The app will guide you through connecting the hub to your account and getting it online. This usually involves creating an account and ensuring the hub is recognized by the app.
2. Installing Smart Bulbs, Switches, and Plugs
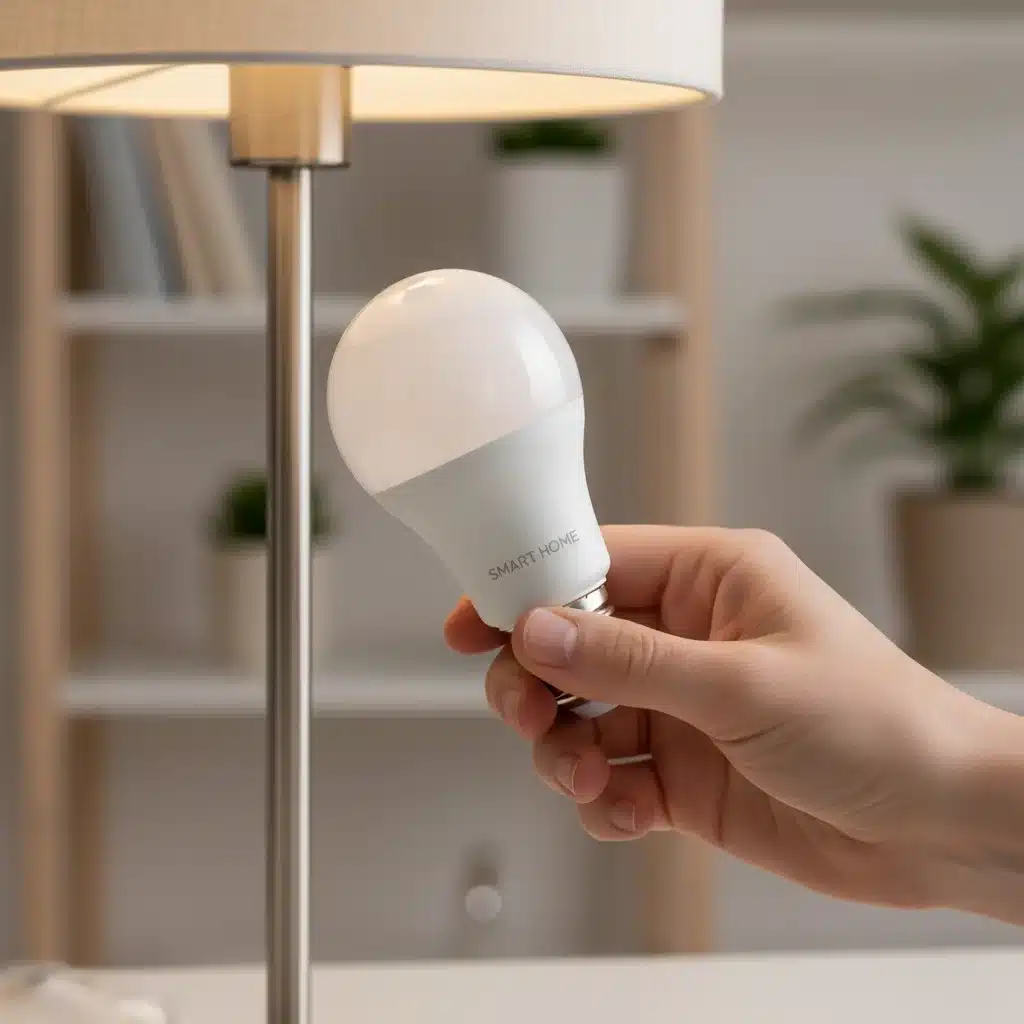
- Smart Bulbs: This is generally the easiest. Simply screw the smart bulb into any compatible lamp or fixture. Ensure the physical light switch for that fixture is left in the ‘on’ position to maintain power to the smart bulb.
- Smart Switches/Dimmers: This requires a bit more electrical savvy.
- Safety First: ALWAYS turn off the power to the light switch at your circuit breaker before beginning.
- Remove Old Switch: Carefully remove the faceplate and unscrew your existing light switch from the wall box.
- Identify Wires: You’ll typically find a line wire (hot), a load wire (to the light), a neutral wire (often white, crucial for most smart switches), and a ground wire (bare copper or green). If you don’t have a neutral wire, look for smart switches specifically designed for non-neutral setups, though these are less common and may require a capacitor.
- Install New Switch: Follow the smart switch’s wiring diagram carefully. Connect the wires appropriately, secure the switch in the wall box, and replace the faceplate.
- Restore Power: Turn the power back on at the circuit breaker.
- Smart Plugs: Plug the smart plug into a wall outlet, then plug your lamp or appliance into the smart plug. Simple as that!
3. Pairing Devices with Your System
Once components are physically installed, you need to pair them with your hub or directly with your Wi-Fi network via the app:
- Open App: Launch the smart lighting app (e.g., Philips Hue app, Kasa app).
- Add Device: Look for an ‘Add Device’ or ‘Pair Device’ option within the app.
- Follow Prompts: The app will guide you through the pairing process, which often involves turning the light on/off a few times, or holding a button on a switch. For Wi-Fi bulbs, you’ll connect them directly to your home Wi-Fi network through the app.
Take your time with each installation. If you’re unsure about electrical wiring, consider consulting a qualified electrician, especially for smart switches. Proper installation is key to the reliability and safety of your DIY smart lighting system.
Step 4: Configure Automation and Routines for Maximum Savings
The real magic of DIY smart lighting, and the primary driver for achieving your 25% energy saving goal, lies in its automation capabilities. Simply replacing bulbs with smart ones won’t yield significant savings if you’re still manually controlling them. This step focuses on setting up intelligent routines and schedules that optimize energy use without sacrificing convenience or comfort.
Leveraging Schedules and Timers
One of the simplest yet most effective automation tools is scheduling:
- Morning Wake-Up: Set lights to gradually brighten in your bedroom as your alarm goes off, helping you wake up naturally and reducing the need for harsh overhead lights.
- Evening Ambiance: Schedule lights in your living areas to dim as evening progresses, creating a relaxing atmosphere and signaling to your body that it’s time to wind down.
- Outdoor Lighting: Automate outdoor lights to turn on at dusk and off at dawn, or only during specific evening hours, ensuring security without wasting energy during the day.
- Away Mode: Program lights to turn on and off at irregular intervals when you’re away from home, simulating occupancy for security purposes, then ensure they are off when no one is home.
Integrating with Sensors for Dynamic Control
This is where DIY smart lighting automation truly shines in terms of energy efficiency:
- Motion/Occupancy Sensors: Install these in high-traffic, transient areas like hallways, stairwells, pantries, and bathrooms. Configure them so lights turn on when motion is detected and automatically turn off after a set period (e.g., 5-10 minutes) of no activity. This is a game-changer for eliminating lights left on unnecessarily.
- Daylight Sensors: In rooms with good natural light, integrate daylight sensors. Set rules so that if the ambient light level is above a certain threshold, the artificial lights dim or turn off completely. As natural light fades, the smart lights can gradually brighten.
- Door/Window Sensors: While less common for direct lighting control, you could set up a rule where if a door to an unused room is open for an extended period, the lights in that room are prompted to turn off.
Experiment with different settings and observe your energy consumption. Many smart lighting apps provide usage statistics, allowing you to fine-tune your automations for optimal savings. The goal is to make your lights work for you, anticipating your needs and minimizing waste, thereby significantly contributing to your 25% energy saving target through DIY smart lighting efficiency.
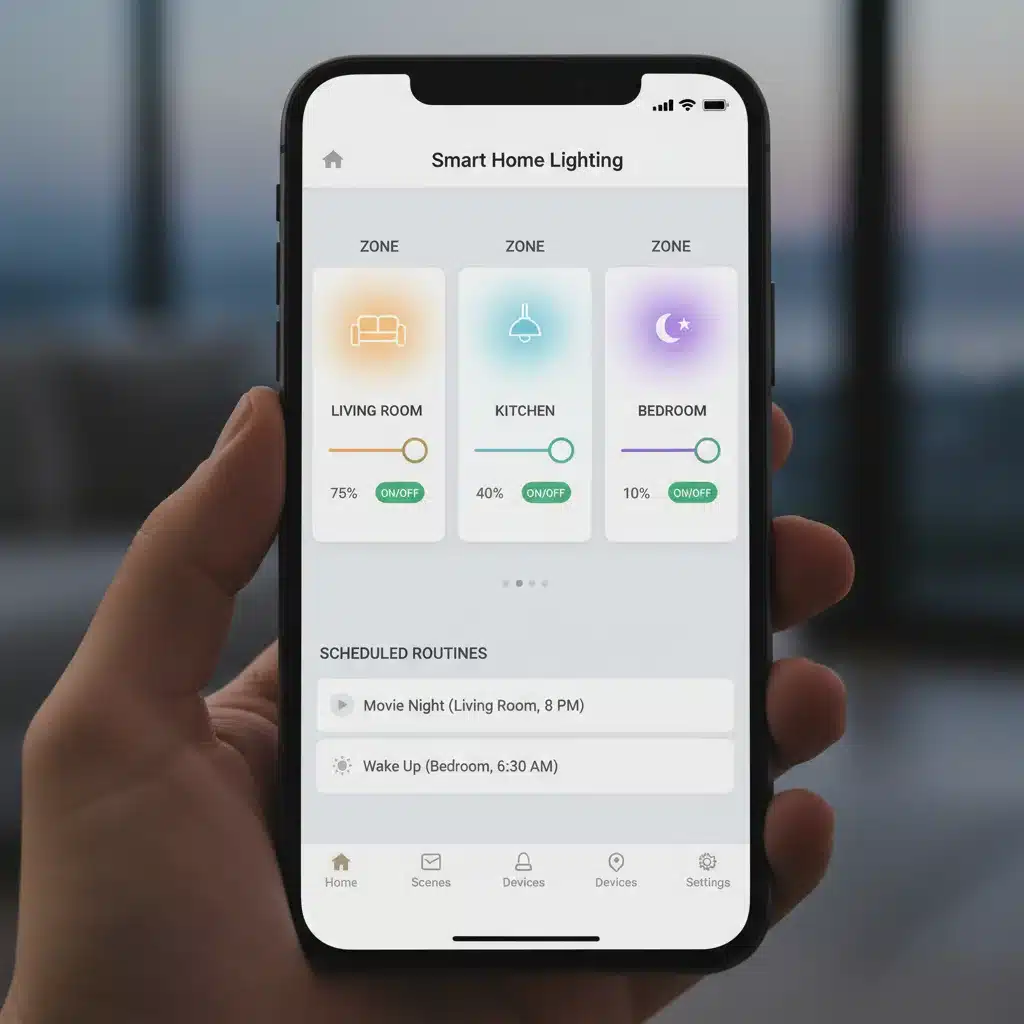
Step 5: Monitor, Optimize, and Expand Your Smart Lighting System
Implementing DIY smart lighting isn’t a one-and-done task; it’s an ongoing process of monitoring, optimization, and potential expansion. To truly achieve and maintain your 25% energy saving goal by July 2026, you need to regularly review your system’s performance and adapt it to your evolving needs and lifestyle.
Monitor Energy Usage
Many smart lighting systems and smart home platforms offer energy monitoring features. While individual smart bulbs typically don’t provide watt-level reporting, some smart switches and smart plugs do. More importantly, you’ll see the impact on your overall electricity bill. Keep track of your monthly energy consumption before and after your DIY smart lighting upgrades. This concrete data will confirm your savings and motivate further optimization.
- Review App Statistics: Check if your smart lighting app provides any usage data or insights into how often lights are on/off.
- Compare Electricity Bills: The most direct measure of success. Compare your bills month-over-month and year-over-year (accounting for seasonal variations) to see the tangible financial benefits of your DIY smart lighting solutions.
Optimize Routines and Settings
Your initial automation settings are a starting point. Over time, you’ll discover opportunities for improvement:
- Adjust Sensor Sensitivity: Are motion sensors too sensitive, triggering lights unnecessarily? Or not sensitive enough, leaving you in the dark? Adjust their sensitivity and timeout periods.
- Refine Schedules: Does a light turn off too early or too late? Tweak schedules to perfectly match your daily habits. For instance, if you consistently leave for work at 8:15 AM instead of 8:00 AM, adjust your ‘away’ routine accordingly.
- Experiment with Dimming Levels: Often, full brightness isn’t necessary. Experiment with lower dimming levels for various activities. You might find that 70% brightness is perfectly adequate for many tasks, saving more energy.
- Seasonal Adjustments: As seasons change, so does natural light. Adjust daylight harvesting settings and outdoor lighting schedules to account for longer or shorter days.
Expand Your Smart Lighting System
Once you’ve mastered the basics and seen the benefits, you might consider expanding your DIY smart lighting network:
- New Rooms: Gradually equip more rooms with smart bulbs or switches. Start with high-usage areas first (living room, kitchen, bedrooms), then move to less frequently used spaces.
- Outdoor Lighting: Extend smart control to your patio, garden, or porch lights for enhanced security and ambiance.
- Smart Home Integration: Connect your smart lighting to other smart home devices. For example, have your lights flash red if a smoke detector goes off, or turn on a specific scene when your smart lock is disarmed.
- Voice Assistants: If you haven’t already, integrate your smart lighting with a voice assistant (Alexa, Google Assistant) for hands-free control.
Remember, the journey to a fully optimized, energy-efficient smart home is continuous. By actively monitoring, optimizing, and strategically expanding your DIY smart lighting setup, you’re not just saving energy; you’re creating a more responsive, comfortable, and future-proof living environment. Your 25% energy saving target is well within reach with consistent effort and smart choices.
Troubleshooting Common DIY Smart Lighting Issues
Even with careful planning, you might encounter minor hurdles during your DIY smart lighting installation and operation. Knowing how to troubleshoot common issues can save you time and frustration, ensuring your path to 25% energy savings remains smooth.
Connectivity Problems
- Lights Unresponsive:
- Check Power: Ensure the physical light switch is ‘on’ and the bulb or device is receiving power.
- Wi-Fi/Hub Connection: Verify your Wi-Fi router is working, and if using a hub, ensure it’s powered on and connected to the router.
- Signal Strength: Smart bulbs, especially Wi-Fi-based ones, can struggle with poor signal. Consider a Wi-Fi extender or moving your hub closer to problem areas. Mesh networks are excellent for smart home devices.
- Router Overload: Too many Wi-Fi devices can bog down your router. If you have many smart devices, a hub-based system (Zigbee/Z-Wave) offloads traffic from your Wi-Fi.
- Re-pair Device: Sometimes, simply deleting a device from the app and re-pairing it can resolve connectivity glitches.
- Slow Response Time:
- Network Congestion: Similar to unresponsiveness, too many devices or heavy network usage can cause delays.
- Distance from Hub/Router: Devices far from the central controller will have slower response times.
- Interference: Other wireless devices (cordless phones, microwaves) can interfere with Wi-Fi or Zigbee signals.
Automation Failures
- Schedules Not Executing:
- Time Zone Settings: Double-check that your smart lighting app and hub (if applicable) have the correct time zone set.
- App Sync: Ensure the app has synced the schedule changes to your devices.
- Power Outages: Some devices might lose their schedule if power is interrupted, requiring a resync.
- Sensors Not Triggering:
- Battery Life: Check the batteries in wireless sensors.
- Placement: Ensure the sensor isn’t obstructed and is placed in an optimal location to detect motion or light.
- Sensitivity Settings: Adjust the sensor’s sensitivity within the app.
- Rule Configuration: Re-verify that the automation rule linking the sensor to the light is correctly configured in the app.
Compatibility and Integration Issues
- Voice Assistant Not Responding:
- Linking Accounts: Ensure your smart lighting account is correctly linked to your Alexa, Google Assistant, or HomeKit account.
- Device Discovery: Ask your voice assistant to ‘discover devices’ after making changes in your lighting app.
- Naming Conflicts: Use simple, unique names for your lights and rooms to avoid confusion for the voice assistant.
- Flickering Lights:
- Non-Dimmable Bulbs: If you’re using a smart dimmer switch with non-dimmable smart bulbs, flickering can occur. Ensure all components are compatible.
- Incompatible Dimmers: If you’re using a smart bulb in an existing dimmable fixture with a traditional dimmer switch, remove the traditional dimmer and replace it with a standard switch or a smart dimmer that is compatible with smart bulbs.
Most smart lighting issues can be resolved by checking basic connections, power, and app settings. Don’t hesitate to consult the manufacturer’s support documentation or online forums for specific device troubleshooting. With these tips, you’ll keep your DIY smart lighting system running smoothly and continue on your path to significant energy savings.
The Future is Bright: Long-Term Benefits of DIY Smart Lighting
Embarking on DIY smart lighting upgrades is more than just a project; it’s an investment in the future of your home and your finances. While the immediate gratification of convenience and initial energy savings is appealing, the long-term benefits truly solidify smart lighting as a wise choice for any homeowner aiming for efficiency and modernity. Our 25% energy saving target by July 2026 is just the beginning of a sustained period of reduced utility costs and enhanced living.
Sustained Energy Savings and Financial Returns
Once your smart lighting system is optimized, the energy savings become consistent. The initial investment in smart bulbs, switches, and hubs is often recouped within a few years through lower electricity bills. Beyond that, every month brings pure savings. Consider the cumulative effect over five, ten, or even fifteen years, especially as energy prices continue their upward trend. This makes DIY smart lighting efficiency a powerful financial tool.
Furthermore, the extended lifespan of LED smart bulbs means fewer replacements, saving you money on new bulbs and the time spent changing them. Many smart LED bulbs are rated for 20,000 to 50,000 hours, which translates to decades of use in a typical home setting.
Enhanced Home Value and Appeal
As smart home technology becomes more mainstream, homes equipped with integrated DIY smart lighting systems are increasingly attractive to potential buyers. Smart lighting adds a layer of sophistication, modernity, and energy efficiency that can differentiate your property in the real estate market. It signals that the home is up-to-date and thoughtfully designed for contemporary living.
Improved Security and Peace of Mind
The security benefits of smart lighting extend beyond simply turning lights on and off when you’re away. Automated lighting can deter potential intruders by making your home appear occupied, even when it’s not. Integration with security cameras or smart doorbells can trigger specific lighting responses (e.g., porch light turns on when motion is detected), adding an extra layer of protection. This peace of mind is invaluable for any homeowner.
Greater Comfort and Well-being
Smart lighting allows for unprecedented control over your home’s ambiance. Tunable white lights can mimic natural daylight cycles, supporting your circadian rhythm and improving sleep quality. Color-changing bulbs can transform the mood of a room for entertaining, relaxation, or focused work. This personalized control over your environment contributes significantly to overall comfort and well-being, making your home a more enjoyable place to live. The ability to create ‘scenes’ for different activities (e.g., ‘reading mode,’ ‘movie night,’ ‘cooking bright’) ensures your lighting always matches your needs, a key advantage of DIY smart lighting control.
Future-Proofing Your Home
The smart home ecosystem is constantly evolving. By adopting DIY smart lighting technology today, you’re laying the groundwork for seamless integration with future smart devices and platforms. Most reputable smart lighting systems are designed to be updated and expanded, ensuring your investment remains relevant for years to come. This future-proofing aspect means your home will continue to adapt to new innovations, keeping it at the forefront of modern living.
Conclusion: Your Path to a Brighter, More Efficient Home with DIY Smart Lighting
The journey to achieving 25% energy savings by July 2026 through DIY smart lighting upgrades is not just a possibility; it’s a practical and rewarding endeavor. We’ve walked through the essential steps, from assessing your current setup and choosing the right ecosystem to installing components, configuring intelligent automations, and continuously optimizing your system. Each step is designed to empower you, the homeowner, to take control of your energy consumption and transform your living space into a more efficient, convenient, and comfortable environment.
Remember, the power of DIY smart lighting lies in its ability to adapt to your lifestyle, ensuring lights are only on when and where they are needed, at the optimal brightness. This intelligent management of illumination is the core mechanism through which you will realize significant reductions in your electricity bills, contributing directly to your financial well-being and a healthier planet.
Beyond the tangible energy savings, you’ll experience a host of benefits: enhanced home security through automated presence simulation, unparalleled convenience with voice and app control, and the ability to craft perfect ambiances for any occasion. Your home will feel more responsive, more modern, and more attuned to your daily rhythms. The long-term advantages of increased home value, reduced maintenance, and a future-proofed living space further underscore the wisdom of this investment.
So, take the first step today. Start by auditing your current lighting, then gradually introduce smart bulbs and switches into high-usage areas. Experiment with schedules and sensors, and don’t be afraid to fine-tune your settings. With each successful automation and every lower energy bill, you’ll affirm the positive impact of your DIY smart lighting project. The future of your home’s lighting is bright, smart, and, most importantly, energy-efficient. Embrace it, and enjoy the savings and convenience that follow.