Installing Smart Leak Detectors: Protect Your Home from Water Damage with 4 Simple Steps in 2026
Water damage is a homeowner’s nightmare. From burst pipes to leaky appliances, the consequences can be devastating, leading to costly repairs, mold growth, and significant disruption to your life. In fact, water damage is one of the most common and expensive home insurance claims. But what if there was a way to prevent these disasters before they escalate? Enter smart leak detectors – a revolutionary technology designed to give you peace of mind and safeguard your most valuable asset: your home.
In this comprehensive guide, we’ll walk you through the essential steps to installing and maximizing the benefits of smart leak detectors in your home. We’ll cover everything from understanding why they’re crucial to choosing the right system and, most importantly, the simple, actionable steps to get them up and running. By 2026, smart home technology is no longer a luxury but a necessity, and leak detection is at the forefront of home protection.
Why Every Home Needs Smart Leak Detectors in 2026
The statistics surrounding water damage are sobering. According to the Insurance Information Institute, water damage and freezing are among the leading causes of property damage, accounting for a significant percentage of all homeowner insurance claims. A small, undetected leak can quickly turn into a major flood, causing thousands of dollars in damage to flooring, walls, furniture, and personal belongings. Beyond the financial strain, there’s the emotional toll of dealing with repairs, displacement, and the potential health risks associated with mold and mildew.
Traditional methods of leak detection often rely on visual inspection or the unfortunate discovery of a major issue. By then, the damage is already done. Smart leak detectors, however, offer a proactive solution. These devices utilize advanced sensors to detect the presence of water – even in minute quantities – and immediately alert you via your smartphone, email, or a connected smart home hub. Some advanced systems can even automatically shut off your main water supply, preventing further damage.
Consider the benefits:
- Early Detection: Catch leaks when they are small, preventing extensive damage.
- Cost Savings: Avoid expensive repairs, insurance deductibles, and higher premiums.
- Peace of Mind: Know that your home is protected, even when you’re away.
- Mold Prevention: Minimize the conditions that lead to unhealthy mold growth.
- Insurance Benefits: Some insurance providers offer discounts for homes equipped with smart leak detection systems.
- Increased Home Value: A smart, protected home is more attractive to potential buyers.
As we move further into 2026, smart home integration is becoming more seamless and affordable. Investing in smart leak detectors is not just about technology; it’s about intelligent home management and safeguarding your future.
Understanding the Types of Smart Leak Detectors
Before diving into installation, it’s crucial to understand the different types of smart leak detectors available. While they all serve the same core purpose – detecting water – they vary in their technology, features, and how they integrate into your smart home ecosystem.
1. Spot Detectors
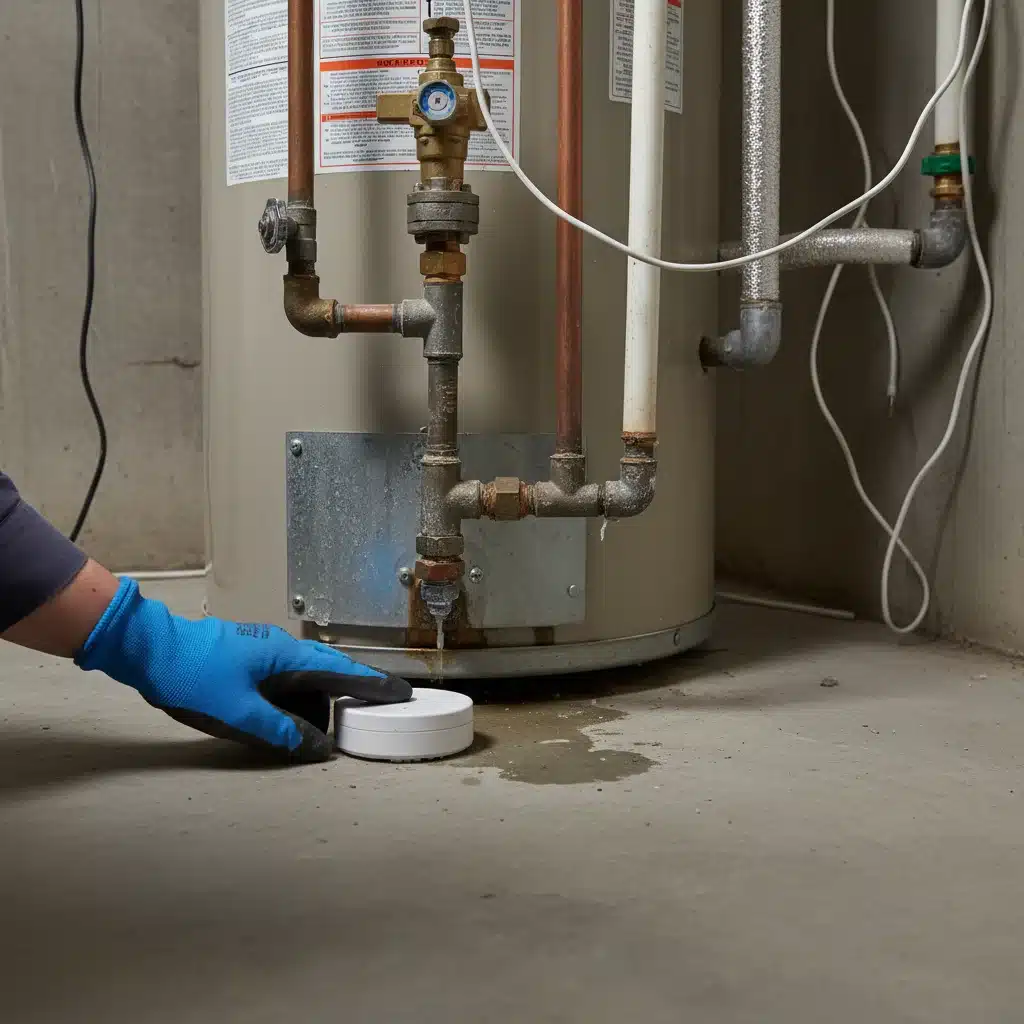
These are the most common and often the most affordable type of smart leak detectors. Spot detectors are small, battery-powered devices that you place directly in areas prone to leaks, such as under sinks, near water heaters, behind toilets, or in basements. They typically have probes or metal contacts on the bottom that trigger an alarm when they come into contact with water. When water is detected, they send an alert to your smartphone or smart home hub. Some models also emit an audible alarm.
- Pros: Easy to install, relatively inexpensive, good for specific high-risk areas.
- Cons: Only detect water in their immediate vicinity, require multiple units for comprehensive coverage.
2. Rope/Cable Detectors
Rope or cable detectors offer broader coverage than spot detectors. These systems consist of a main sensor unit connected to a long, absorbent cable that can be snaked around pipes, along baseboards, or under appliances. The entire length of the cable is sensitive to water, providing detection over a larger area. This is particularly useful for areas like basements, utility rooms, or server rooms where water might spread before reaching a single spot detector.
- Pros: Wider coverage area, ideal for long stretches or multiple potential leak points.
- Cons: Can be more expensive than spot detectors, installation might be slightly more involved for routing the cable.
3. Whole-Home Water Shut-Off Systems
These are the most advanced and protective smart leak detectors. A whole-home system typically consists of a main unit installed directly onto your home’s main water line, often near your water meter. This unit continuously monitors water flow and pressure. If it detects unusual patterns (like continuous flow when no one is home, or a sudden pressure drop indicating a burst pipe), it can automatically shut off the water supply to your entire home. Many of these systems also integrate with spot or rope detectors to provide localized detection and global shut-off capabilities.
- Pros: Ultimate protection – automatically prevents catastrophic damage, comprehensive monitoring, often includes flow rate data.
- Cons: Higher upfront cost, requires professional plumbing installation for the main unit, potentially more complex setup.
4. Integrated Smart Home Systems
Many smart leak detectors are designed to integrate seamlessly with existing smart home ecosystems like Amazon Alexa, Google Home, Apple HomeKit, or specific smart home security systems (e.g., Ring, SimpliSafe). This integration allows for centralized control, combined alerts, and the ability to create automation rules (e.g., if a leak is detected, flash smart lights or trigger a siren).
When choosing your system, consider your budget, the size of your home, your specific risk areas, and your comfort level with technology. A combination of different types might offer the best comprehensive protection.
Step 1: Planning and Placement of Your Smart Leak Detectors
The success of your smart leak detectors hinges on strategic placement. Don’t just scatter them randomly. Take a few minutes to walk through your home and identify the most vulnerable areas. Think about where water sources are, where pipes run, and where leaks would cause the most damage.
Identify High-Risk Areas:
- Bathrooms: Under sinks, behind toilets, near showers/tubs (especially on upper floors).
- Kitchen: Under the sink, behind the dishwasher, near the refrigerator’s water line, under the garbage disposal.
- Laundry Room: Behind and under the washing machine, near utility sinks.
- Water Heater: At the base of the water heater – this is a critical spot!
- Basement/Crawl Space: Near the sump pump, along foundation walls, around any exposed pipes, under utility tubs.
- Utility Room: Near furnaces, humidifiers, water softeners, or any other water-reliant appliances.
- Attic: Near HVAC units with condensate pans, especially in regions with extreme temperature fluctuations.
- Garages: If you have a utility sink, water heater, or washing machine in your garage.
Consider Coverage and Quantity:
For spot detectors, you’ll likely need multiple units to cover all your high-risk areas effectively. For larger spaces like basements, consider using rope detectors to cover more ground. If you’re investing in a whole-home shut-off system, its main unit will be at your main water line, but you’ll still want spot detectors to pinpoint the exact location of a leak.
Network and Connectivity:
Ensure that your chosen locations have good Wi-Fi coverage if your detectors are Wi-Fi enabled. Some systems use proprietary hubs or Zigbee/Z-Wave protocols, which might have better range. Check the manufacturer’s recommendations for optimal placement relative to your router or hub to ensure reliable communication and timely alerts.
Accessibility for Maintenance:
While you want them out of the way, ensure your smart leak detectors are accessible enough for periodic battery checks or cleaning. Most modern devices have long battery lives (several years), but it’s good practice to check them annually.
A well-thought-out plan for placement is the foundation of an effective leak detection system. Don’t rush this step; it will save you time and potential headaches down the line.
Step 2: Preparing for Installation – What You’ll Need
Once you’ve planned your placement, gathering the necessary tools and ensuring proper preparation will make the installation process smooth and efficient. Most smart leak detectors are designed for DIY installation, but a little preparation goes a long way.
Essential Items:
- Your Smart Leak Detectors: Unbox them and ensure all components are present (detectors, batteries, any included mounting hardware).
- Smartphone or Tablet: You’ll need this to download the accompanying app and set up the devices.
- Wi-Fi Network Information: Your network name (SSID) and password will be crucial for connecting Wi-Fi enabled devices.
- Small Screwdriver (Optional): Some detectors might require a small Phillips head screwdriver to open battery compartments.
- Cleaning Supplies: A damp cloth and a dry cloth to clean the surfaces where detectors will be placed.
- Gloves (Optional): If you’re working in a dusty basement or crawl space.
- Flashlight: For inspecting dark areas like under sinks or in utility closets.
- Owner’s Manual/Instruction Guide: Always refer to the specific instructions for your chosen model, as details can vary.
Pre-Installation Checklist:
- Read the Manual: Seriously, read it. It contains vital information specific to your device.
- Charge/Install Batteries: Most detectors come with batteries, but ensure they are correctly installed or fully charged if rechargeable.
- Download the App: Search for the manufacturer’s app in your device’s app store and download it. Create an account if required.
- Test Your Wi-Fi: In each planned location, quickly check your phone’s Wi-Fi signal strength. If it’s weak, consider a Wi-Fi extender.
- Clean Surfaces: Ensure the areas where you’re placing the detectors are clean and dry. This helps with proper sensor contact and adherence if using adhesive mounts.
- Gather Plumbing Tools (for whole-home systems): If you’re installing a whole-home shut-off valve, you’ll likely need a plumber. If you’re confident in DIY plumbing, ensure you have pipe cutters, wrenches, thread sealant, and a bucket for any residual water. This step is usually for advanced users or professionals.
Taking these preparatory steps will streamline the installation process, allowing you to quickly move on to setting up and testing your new smart leak detectors.
Step 3: Installation & Configuration of Your Smart Leak Detectors
Now that you’ve planned and prepared, it’s time to install and configure your smart leak detectors. The process is generally straightforward, especially for spot detectors, but pay close attention to each step.
For Spot and Rope Detectors:
- Physical Placement:
- Place spot detectors directly on the floor in your identified high-risk areas. Ensure the water-sensing probes or contacts are facing downwards and are in direct contact with the surface.
- For rope detectors, carefully unroll the cable and snake it around the base of appliances, along walls, or under pipes. Secure it in place with any included clips or adhesive strips, ensuring the entire length of the cable is positioned to detect water.
- Power On: Insert the batteries if you haven’t already, or activate the device according to the manufacturer’s instructions. You’ll usually see an LED indicator light up.
- Connect to App/Hub:
- Open the smart leak detector’s app on your smartphone.
- Follow the in-app instructions to ‘add a new device’ or ‘pair a sensor.’
- This usually involves putting the detector into ‘pairing mode’ (often by pressing a button on the device) and then selecting it from a list in the app.
- If it’s a Wi-Fi device, you’ll be prompted to enter your Wi-Fi network credentials.
- If it connects to a separate hub, ensure the hub is powered on and connected to your network.
- Name Your Detectors: Once connected, the app will typically ask you to name each detector (e.g., ‘Kitchen Sink,’ ‘Water Heater,’ ‘Basement Sump’). This is crucial for quickly identifying the source of a leak when an alert comes in.
- Set Up Notifications: Configure how you want to receive alerts. This usually includes push notifications to your smartphone, email alerts, and sometimes even text messages. Ensure your notification settings are enabled and tested.
For Whole-Home Water Shut-Off Systems:
Installation of these systems is more complex and often requires professional plumbing. However, the general steps involve:
- Professional Installation: A licensed plumber will cut into your main water line and install the shut-off valve and associated sensors. This ensures proper fitting, prevents leaks from the installation itself, and complies with local plumbing codes.
- Power Connection: The main unit will need a power source, usually a standard electrical outlet.
- Connect to App/Hub: Similar to spot detectors, you’ll use the manufacturer’s app to connect the main unit to your Wi-Fi network and smart home ecosystem.
- Calibration and Learning: Many whole-home systems have a ‘learning’ period where they monitor your typical water usage to establish a baseline. This helps them differentiate between normal water use and a potential leak.
- Integrate Spot Detectors: If your whole-home system allows, integrate any spot or rope detectors you have. This provides localized detection that can trigger the main shut-off valve.
- Set Up Automation: Configure rules within the app, such as automatically shutting off water if any connected sensor detects a leak.
Always double-check that all connections are secure and that the devices are showing as ‘online’ or ‘connected’ in your app. This step is where your proactive protection truly comes to life.
Step 4: Testing, Maintenance, and Maximizing Your Smart Leak Detectors
Installation isn’t the final step; regular testing and maintenance are crucial to ensure your smart leak detectors remain effective guardians of your home. You’ve invested in peace of mind; now make sure it lasts.
Testing Your Detectors:
This is arguably the most important step after initial setup. You need to confirm that your detectors will actually alert you when a leak occurs.
- Simulate a Leak: Take a small amount of water (a few drops or a damp paper towel) and apply it to the sensors of each detector.
- Verify Alerts: Check your smartphone for push notifications, your email for alerts, and listen for any audible alarms from the device itself.
- Test Whole-Home Shut-Off (if applicable): For whole-home systems, manually trigger a shut-off via the app (if possible) or simulate a significant flow rate to see if the automatic shut-off engages. Ensure you know how to manually reopen the valve afterward.
- Repeat Periodically: Test all your detectors every few months, or at least annually, to ensure they are still functioning correctly and communicating with your system.
Regular Maintenance:
- Battery Replacement: Most smart leak detectors have long battery lives (2-5 years), but keep an eye on battery status indicators in your app. Replace batteries promptly when prompted or as part of your annual maintenance routine.
- Sensor Cleaning: Periodically wipe down the water-sensing probes/contacts with a clean, dry cloth to remove dust or grime that could interfere with detection.
- Firmware Updates: Check your device’s app for any available firmware updates. These often include performance improvements, bug fixes, and new features.
- Wi-Fi/Network Check: If you experience connectivity issues, check your Wi-Fi router and the detector’s proximity to it.
- Physical Inspection: Ensure detectors are still in their intended locations and haven’t been accidentally moved or obstructed.
Maximizing Your System:
- Integrate with Smart Home: If your detectors are compatible, integrate them with your broader smart home system (e.g., Alexa, Google Home). This allows for voice commands, combined alerts, and advanced automation. For example, you could set up a routine that flashes all your smart lights red if a leak is detected.
- Inform Key Contacts: If your system allows for multiple alert recipients, add family members, trusted neighbors, or even a home watch service to receive notifications, especially if you travel frequently.
- Review Data (for advanced systems): Whole-home systems often provide data on water usage. Reviewing this can help identify potential hidden leaks (e.g., a toilet running constantly) or areas where you can conserve water.
- Consider Insurance Discounts: Contact your home insurance provider. Many offer discounts for homes equipped with active water damage prevention systems like smart leak detectors.
By diligently following these steps, you’re not just installing a device; you’re establishing a robust defense against one of the most common threats to homeownership. Your smart leak detectors will become silent, vigilant sentinels, providing continuous protection and invaluable peace of mind.

Choosing the Right Smart Leak Detectors for Your Home in 2026
With a growing market of smart home devices, selecting the best smart leak detectors can feel overwhelming. To make an informed decision, consider these key factors:
1. Connectivity & Ecosystem Compatibility:
- Wi-Fi: Many detectors connect directly to your home Wi-Fi. This is convenient but can drain batteries faster and might be less reliable in areas with weak Wi-Fi signals.
- Zigbee/Z-Wave: These protocols require a dedicated hub but often offer better range, longer battery life, and a more robust mesh network for multiple devices.
- Proprietary Hub: Some brands use their own hub. This can simplify setup but might limit integration with other smart home devices.
- Smart Home Integration: Ensure compatibility with your existing smart home platform (Alexa, Google Home, Apple HomeKit) if you want centralized control and automation.
2. Power Source:
- Battery-Powered: Most spot and rope detectors are battery-powered, offering flexibility in placement. Look for long battery life (2+ years) and easy-to-replace batteries.
- AC-Powered: Whole-home shut-off systems and some advanced detectors are AC-powered, providing continuous operation but requiring access to an outlet.
3. Alert Mechanisms:
- Smartphone Notifications: Essential for remote monitoring.
- Audible Alarms: Crucial for immediate local alerts, especially if your phone isn’t nearby.
- Email/Text Alerts: Good for secondary notifications or for others to be alerted.
- Water Shut-Off: The ultimate protection offered by whole-home systems.
4. Sensor Design & Features:
- Spot Detectors: Look for models with sensitive probes that can detect even small amounts of water.
- Rope Detectors: Consider the length of the cable and its flexibility for routing.
- Temperature/Humidity Sensors: Some detectors include these, which can alert you to conditions that might lead to frozen pipes or mold.
- Water Flow Monitoring: A feature of whole-home systems that can detect unusual water usage patterns.
5. Brand Reputation & Reviews:
Stick with reputable brands known for reliability and good customer support. Read user reviews to gauge real-world performance, ease of use, and common issues.
6. Cost:
Prices vary significantly. Spot detectors can be as low as $20-$50 each, while whole-home systems can range from $300 to over $1,000 (plus installation). Balance your budget with the level of protection you need.
By carefully evaluating these factors, you can select the smart leak detectors that best fit your home’s unique needs and provide the most effective protection against water damage in 2026 and beyond.
The Future of Home Protection: Smart Leak Detectors in 2026 and Beyond
As we navigate further into the 21st century, smart home technology continues to evolve at an astonishing pace. By 2026, smart leak detectors are not just an emerging trend but a foundational component of a truly intelligent and resilient home. The integration of artificial intelligence (AI) and machine learning (ML) is pushing these devices beyond simple water detection.
Imagine systems that don’t just alert you to a leak but can predict potential issues based on subtle changes in water pressure or flow patterns. Future iterations of smart leak detectors might:
- Proactive Maintenance Alerts: Detect small, consistent drips that indicate a faucet or pipe is about to fail, prompting you to address it before it becomes a major leak.
- Hyper-Localized Detection: Smaller, more numerous sensors embedded within walls or under flooring, offering pinpoint accuracy of a leak’s origin.
- Self-Healing Systems: While still a futuristic concept, imagine a system that could isolate a leaking pipe section by rerouting water flow or even initiating minor repairs autonomously.
- Enhanced AI Learning: Systems that learn your family’s unique water usage patterns with even greater precision, significantly reducing false alarms and identifying anomalies more effectively.
- Integration with Predictive Analytics: Combining weather data with internal home conditions to anticipate risks like frozen pipes before they occur, allowing for preventative actions.
- Augmented Reality (AR) for Troubleshooting: Using AR through your smartphone to guide you through troubleshooting or even simple repairs of detected leaks.
The goal is to move from reactive damage control to proactive prevention and predictive maintenance. This not only saves homeowners immense stress and financial burden but also contributes to more sustainable living by reducing water waste.
For homeowners in 2026, embracing smart leak detectors means more than just installing a gadget; it means adopting a smarter, safer, and more efficient way to manage and protect their most valuable asset. The initial investment in these technologies pales in comparison to the potential costs and emotional distress of dealing with severe water damage. As technology becomes more sophisticated and accessible, the question won’t be ‘should I get smart leak detectors?’ but ‘which advanced leak detection system is best for my fully integrated smart home?’
Conclusion: Your Home, Protected by Smart Leak Detectors
The threat of water damage is ever-present, but with the advent of smart leak detectors, homeowners now have a powerful and accessible tool to mitigate this risk. By following these four simple steps – planning, preparing, installing, and maintaining – you can establish a robust defense system that works tirelessly to protect your property.
From the subtle drip under a sink to a catastrophic burst pipe, smart leak detectors provide early warnings, allowing you to take action before minor issues escalate into major disasters. They offer peace of mind, financial savings, and contribute to a healthier, safer living environment. In 2026, making your home a ‘smart home’ isn’t just about convenience; it’s about intelligent protection.
Don’t wait for the inevitable leak to discover the value of these devices. Invest in smart leak detectors today and enjoy the confidence that comes with knowing your home is continuously monitored and safeguarded against the silent threat of water damage. Take control, stay informed, and protect your home – the smart way.