
Welcome to the future of living, where your home anticipates your needs, responds to your commands, and simplifies your daily routine. If you’ve been dreaming of a truly intelligent living space, the journey begins with setting up your first smart home hub setup. By 2026, the average smart home is expected to have upwards of 7 connected devices, and a robust hub is the brain that makes it all work in harmony. This comprehensive DIY guide will walk you through every step, ensuring a seamless and efficient integration of your smart devices.
The allure of a smart home is undeniable. Imagine lights that dim automatically as you settle down for a movie, a thermostat that learns your preferences and adjusts itself, or doors that lock themselves when you leave. These conveniences aren’t just luxuries; they’re becoming essential components of modern living, offering enhanced comfort, security, and energy efficiency. But for all these individual smart devices to communicate effectively and work together, they need a central coordinator – a smart home hub. Without it, your smart devices might operate in silos, unable to unlock their full potential. Our focus today is on making your smart home hub setup a breeze, even if you’re a beginner.
Understanding the Core of Your Smart Home: What is a Smart Home Hub?
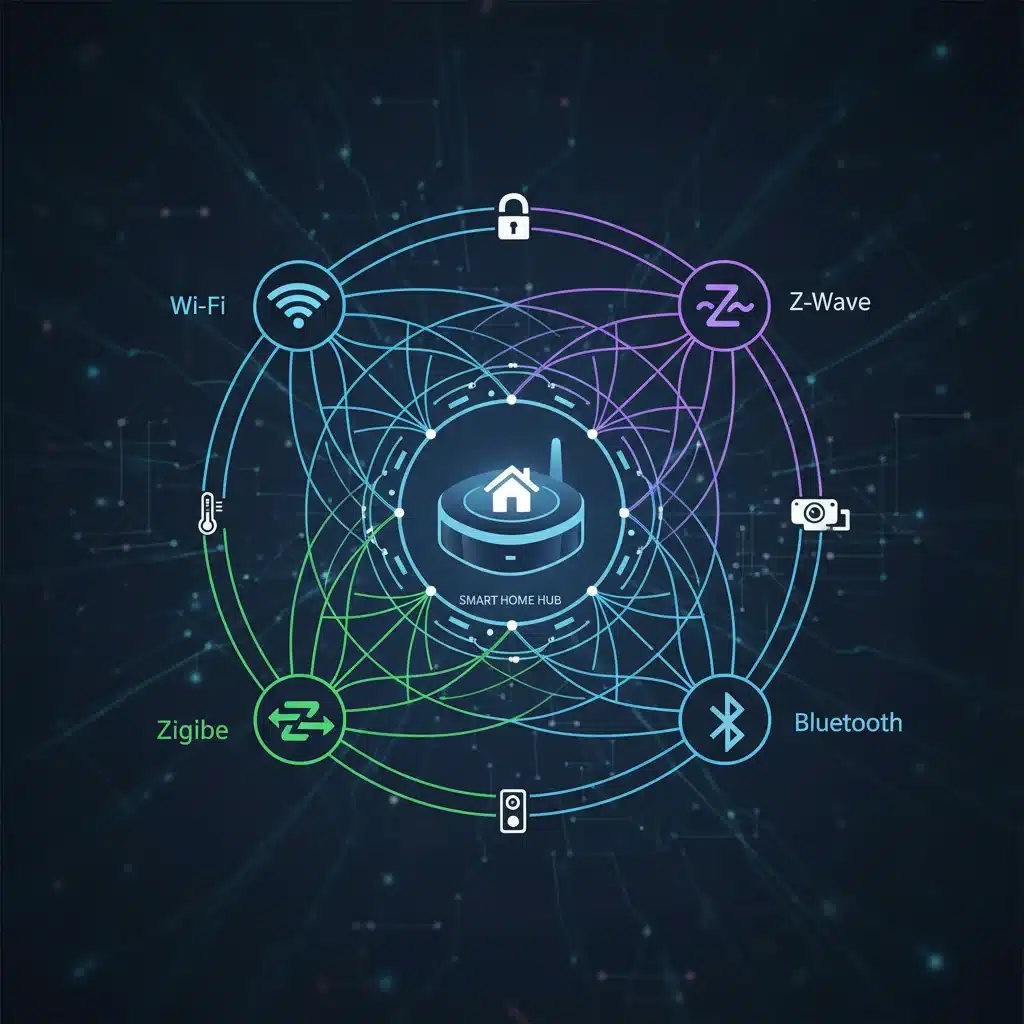
Before diving into the actual setup, let’s clarify what a smart home hub is and why it’s so crucial. A smart home hub, sometimes called a smart home controller or gateway, is a central device that connects and controls various smart devices within your home. Think of it as the conductor of an orchestra, ensuring every instrument (your smart devices) plays in perfect synchronicity. It acts as a translator, allowing devices that use different communication protocols (like Zigbee, Z-Wave, Wi-Fi, and Bluetooth) to ‘talk’ to each other and respond to your commands, whether through voice, an app, or automated routines. A proper smart home hub setup is the foundation of a truly interconnected home.
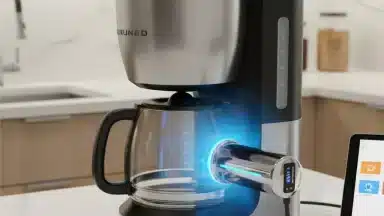
Without a hub, you might find yourself juggling multiple apps for different devices – one for your lights, another for your thermostat, and yet another for your security camera. This defeats the purpose of ‘smart’ living, adding complexity rather than simplifying it. A hub consolidates control into a single interface, enabling you to create complex automations and scenes that involve multiple devices working together. For example, a ‘Good Morning’ scene could simultaneously turn on your bedroom lights, raise the blinds, and start your coffee maker. This level of integration is precisely why mastering your smart home hub setup is paramount.
Choosing Your First Smart Home Hub: Key Considerations for Your DIY Journey
The market is flooded with various smart home hubs, each with its strengths and weaknesses. Selecting the right one for your initial smart home hub setup is critical for future scalability and compatibility. Here are the key factors to consider:
- Compatibility with Existing/Desired Devices: This is arguably the most important factor. If you already own smart devices or have specific brands in mind, ensure the hub you choose supports their communication protocols (e.g., Philips Hue uses Zigbee, Ring uses Z-Wave). Common protocols include Wi-Fi, Bluetooth, Zigbee, and Z-Wave. Some hubs are ‘multi-protocol,’ offering broader compatibility.
- Ecosystem and Voice Assistants: Do you prefer Amazon Alexa, Google Assistant, or Apple HomeKit? Most hubs integrate with one or more of these voice assistants, allowing for voice control. Consider which ecosystem you’re already invested in or plan to use.
- Ease of Use and Setup: For a DIY enthusiast, a hub with an intuitive app and straightforward setup process is ideal. Look for hubs that offer clear instructions and a user-friendly interface for creating automations.
- Features and Functionality: Beyond basic device control, what else do you need? Some hubs offer advanced features like local processing (meaning automations run even without an internet connection), energy monitoring, or robust security integrations.
- Scalability and Future-Proofing: Think about your future smart home ambitions. Will the hub support a growing number of devices? Is it regularly updated with new features and device support?
- Price: Hubs range from budget-friendly options to premium devices with advanced capabilities. Define your budget, but remember that investing a little more upfront can save you headaches down the line.
Popular choices for a first smart home hub setup include Samsung SmartThings, Hubitat Elevation, Apple HomePod Mini (for HomeKit users), Amazon Echo devices (acting as basic hubs for certain protocols), and Google Nest Hubs. Researching user reviews and compatibility lists for each is highly recommended.
Pre-Setup Checklist: Preparing for a Smooth Smart Home Hub Installation
Before you even unbox your new hub, a little preparation goes a long way in ensuring a smooth smart home hub setup. Follow this checklist:
- Stable Wi-Fi Network: Your smart home relies heavily on a robust and reliable Wi-Fi connection. Ensure your router is up to the task, and consider a mesh Wi-Fi system if you have a large home or dead zones.
- Power Outlets: Identify a central location for your hub, preferably near your router, with easy access to a power outlet.
- Download Necessary Apps: Most hubs require a companion app on your smartphone or tablet. Download and install it before you start.
- Gather Device Information: Have the login credentials for your Wi-Fi network and any existing smart device accounts ready.
- Unbox and Inspect: Carefully unbox your hub and ensure all components (power adapter, Ethernet cable if applicable) are present and undamaged.
- Read the Manual (or Quick Start Guide): Even if you’re a DIY pro, a quick read of the manufacturer’s guide can save you time and prevent common errors during your smart home hub setup.
Step-by-Step DIY Smart Home Hub Setup: From Unboxing to First Automation
Step 1: Physical Installation and Power Up
Your smart home hub setup begins with the physical connection. Place your hub in a central location in your home. This helps ensure good signal strength for all your connected devices, especially those using Zigbee or Z-Wave, which operate on mesh networks. Connect the hub to power using the provided adapter. If your hub requires an Ethernet connection, plug one end into the hub and the other into an available port on your Wi-Fi router. Wait for the hub’s indicator lights to show it’s powered on and ready, as per the manufacturer’s instructions.
Step 2: Initial App Setup and Account Creation
Open the companion app you downloaded earlier. The app will guide you through creating an account or logging in if you already have one. This account will be your central point of control for your entire smart home. Follow the on-screen prompts to register your new hub. This often involves scanning a QR code on the device or entering a serial number. The app will then typically guide you through connecting the hub to your home Wi-Fi network (if it’s a Wi-Fi-only hub) or confirming its Ethernet connection. This is a critical part of your smart home hub setup, establishing the communication backbone.
Step 3: Connecting Your First Smart Devices
Once your hub is online and registered, it’s time to start adding devices. The process is generally similar across most hubs:
- Put Hub in Pairing Mode: In the hub’s app, look for an ‘Add Device,’ ‘Pair Device,’ or similar option. This puts your hub into discovery mode, actively searching for new devices.
- Put Device in Pairing Mode: Refer to your smart device’s manual to put it into pairing mode. This often involves holding a button, toggling power, or performing a specific sequence.
- Wait for Discovery: The hub and device will communicate. Once discovered, the device will appear in your hub’s app.
- Name and Assign: Give your device a descriptive name (e.g., ‘Living Room Lamp,’ ‘Front Door Sensor’) and assign it to a room for better organization.
Start with a few simple devices, like a smart light bulb or a smart plug, to get comfortable with the process. Gradually add more devices, always ensuring they are within range of your hub or other mesh network devices. Remember, a successful smart home hub setup hinges on methodical device addition.
Step 4: Configuring Voice Assistant Integration (Optional but Recommended)
If you plan to use voice commands, this is where you link your hub to your chosen voice assistant (Alexa, Google Assistant, HomeKit). In your hub’s app, look for ‘Integrations,’ ‘Voice Assistants,’ or ‘Connected Services.’ Follow the instructions to link your hub account to your voice assistant account. Once linked, you can usually ask the voice assistant to ‘discover devices,’ and it will pull in all the devices connected to your hub. Now you can say, ‘Alexa, turn on the living room light!’ This enhances the convenience of your smart home hub setup significantly.
Unlocking Intelligence: Creating Automations and Routines
This is where the magic of your smart home hub setup truly comes alive. Automations, routines, or scenes (names vary by hub) allow your devices to work together intelligently without constant manual input. Here are some common types of automations you can create:
- Time-Based Automations: ‘At sunset, turn on outdoor lights.’ ‘At 7 AM, turn on the kitchen lights and start the coffee maker.’
- Sensor-Based Automations: ‘When motion is detected in the hallway, turn on the hallway light for 5 minutes.’ ‘When the front door opens, disarm the security system.’
- Device-Triggered Automations: ‘When the smart TV turns on, dim the living room lights.’ ‘When the smart lock is unlocked, turn on the entryway light.’
- Location-Based Automations (Geofencing): ‘When I leave home, lock all doors and arm the security system.’ ‘When I arrive home, turn on the porch light and unlock the front door.’
- Scenes/Modes: Create custom scenes like ‘Movie Night’ (dim lights, close blinds, turn on TV) or ‘Goodnight’ (turn off all lights, lock doors, set thermostat).
Spend time exploring the automation features within your hub’s app. Start with simple routines and gradually build up to more complex ones. The goal is to make your home react to your lifestyle, not the other way around. This iterative process of creating and refining automations is a key part of optimizing your smart home hub setup.
Troubleshooting Common Smart Home Hub Setup Issues
Even with careful planning, you might encounter a few bumps during your smart home hub setup. Here are common issues and their solutions:
- Device Not Pairing:
- Check Compatibility: Ensure the device is compatible with your hub’s protocols.
- Proximity: Move the device closer to the hub (or another mesh device).
- Reset Device: Perform a factory reset on the smart device and try pairing again.
- Hub in Pairing Mode: Confirm your hub is actively searching for devices.
- Interference: Other wireless devices can sometimes cause interference.
- Wi-Fi Connectivity Issues:
- Router Reboot: Restart your Wi-Fi router and modem.
- Signal Strength: Ensure the hub is within good Wi-Fi range.
- Network Congestion: If many devices are on your network, consider a Wi-Fi analyzer app to identify less congested channels.
- Automations Not Running:
- Check Conditions: Double-check the triggers and conditions you’ve set for the automation.
- Device Status: Ensure all devices involved in the automation are online and working.
- Hub Status: Verify the hub is connected to the internet and functioning correctly.
- App Updates: Ensure both your hub’s firmware and the app are up to date.
- Voice Commands Not Working:
- Link Accounts: Confirm your hub is correctly linked to your voice assistant account.
- Discover Devices: Ask your voice assistant to ‘discover devices’ again.
- Device Naming: Use clear, simple names for your devices that the voice assistant can easily understand.
Most manufacturers offer extensive online documentation, FAQs, and community forums. Don’t hesitate to consult these resources if you’re stuck. A little patience often resolves most issues during the smart home hub setup process.
Expanding Your Smart Home: Beyond the Initial Setup
Once you’ve successfully completed your initial smart home hub setup and integrated your first 7+ devices, the possibilities for expansion are virtually limitless. Here’s how you can continue to grow your intelligent living space:
Integrating More Devices:
As you become more comfortable, you can add a wider array of devices:
- Smart Lighting: Beyond basic bulbs, explore smart light strips, outdoor lighting, and color-changing options to set the perfect ambiance.
- Climate Control: Upgrade to smart thermostats that learn your habits, smart vents for zone control, and even smart ceiling fans.
- Security and Surveillance: Integrate smart door locks, window sensors, motion detectors, and indoor/outdoor security cameras for comprehensive home protection.
- Entertainment: Connect smart TVs, soundbars, and streaming devices for a truly immersive media experience.
- Appliances: Smart refrigerators, ovens, washing machines, and robot vacuums can add convenience to your daily chores.
- Energy Management: Smart plugs with energy monitoring capabilities, smart circuit breakers, and even solar panel integration can help you track and reduce energy consumption.
- Gardening: Smart sprinklers and soil sensors can automate your garden’s watering needs.
Each new device enhances the capabilities of your smart home hub setup, allowing for more intricate and personalized automations.
Advanced Automations and Customization:
With more devices, you can create more sophisticated routines:
- Conditional Logic: Implement ‘if this, then that, but only if…’ scenarios. For example, ‘If motion is detected in the kitchen AND it’s between 10 PM and 6 AM, turn on the kitchen light to 20% brightness.’
- Virtual Switches and Scenes: Create virtual switches that trigger multiple actions with a single command. Design custom scenes for different moods or activities.
- Integrations with Other Services: Many hubs allow integration with IFTTT (If This Then That) or other web services, opening up a world of possibilities for connecting your smart home to external data or events (e.g., ‘If it’s raining tomorrow, close the garage door’).
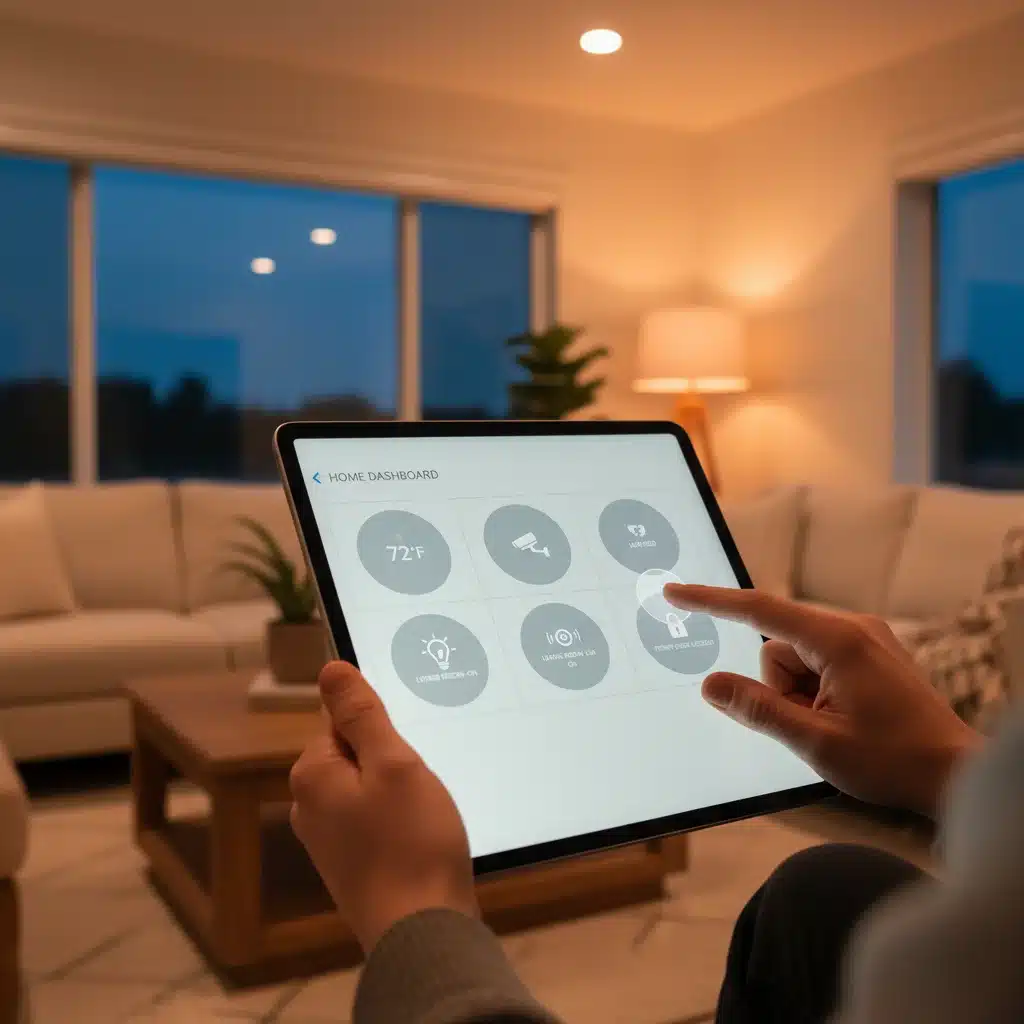
- Dashboards and Panels: Some hubs offer the ability to create custom dashboards on tablets or smart displays, providing a centralized control panel for your entire home.
The beauty of a robust smart home hub setup is its adaptability. Your home can evolve with your needs and preferences.
The Future of Your Smart Home: Beyond 2026
As technology continues to advance, the capabilities of smart homes will only grow. By 2026 and beyond, we can expect even greater seamlessness and intelligence from our connected environments. Future trends include:
- Enhanced AI and Machine Learning: Hubs will become even better at learning your habits and anticipating your needs, offering truly predictive automation rather than just reactive.
- Greater Interoperability: New standards like Matter are emerging to simplify device compatibility, making your smart home hub setup even easier and more universally compatible.
- Edge Computing: More processing will occur directly on devices or locally on the hub, reducing reliance on cloud services and improving speed and privacy.
- Sustainable Smart Homes: Increased focus on energy optimization, waste reduction, and integration with renewable energy sources.
- Personalized Environments: Homes will adapt not just to schedules but to individual occupants, adjusting lighting, temperature, and even music based on who is in the room.
Your initial smart home hub setup is not just about convenience today; it’s an investment in a future-ready home that will continue to adapt and improve your quality of life for years to come. By following this guide, you’ve laid a strong foundation for an intelligent, responsive, and truly personalized living space.
Conclusion: Your Intelligent Home Awaits
Congratulations! You’ve navigated the exciting world of smart home technology and successfully completed your first smart home hub setup. From understanding the core components to integrating multiple devices and creating intelligent automations, you’re now equipped to manage a truly smart living space. Remember, your smart home is a dynamic entity – continue to explore new devices, experiment with automations, and customize it to perfectly suit your lifestyle. By 2026, your home will not just be smart; it will be a seamless extension of your life, making every day more convenient, secure, and enjoyable. Embrace the journey of continuous improvement and enjoy the boundless possibilities your intelligent home offers.